ACAI VECTO Deployment
VECTO Version: 2.1.1
Duration: 1 hour
Overview
This guide explains how to deploy the VECTO solution in two stages:
-
Deploy the VECTO setup resources.
-
Use those setup resources to deploy the VECTO solution, which establishes OpenID Connect (OIDC) integration between Azure DevOps and your AWS Organization.
Prerequisites
AWS Side:
- Select one AWS account of your AWS Organization as the Core IaC CI/CD account.
- Nominate this account as delegated administrator for CloudFormation.
Azure DevOps Side:
- Administrator access to the Azure DevOps (ADO) project for managing the AWS Core Accounts.
Your local machine:
- Git client installed
- Azure DevOps CLI installed
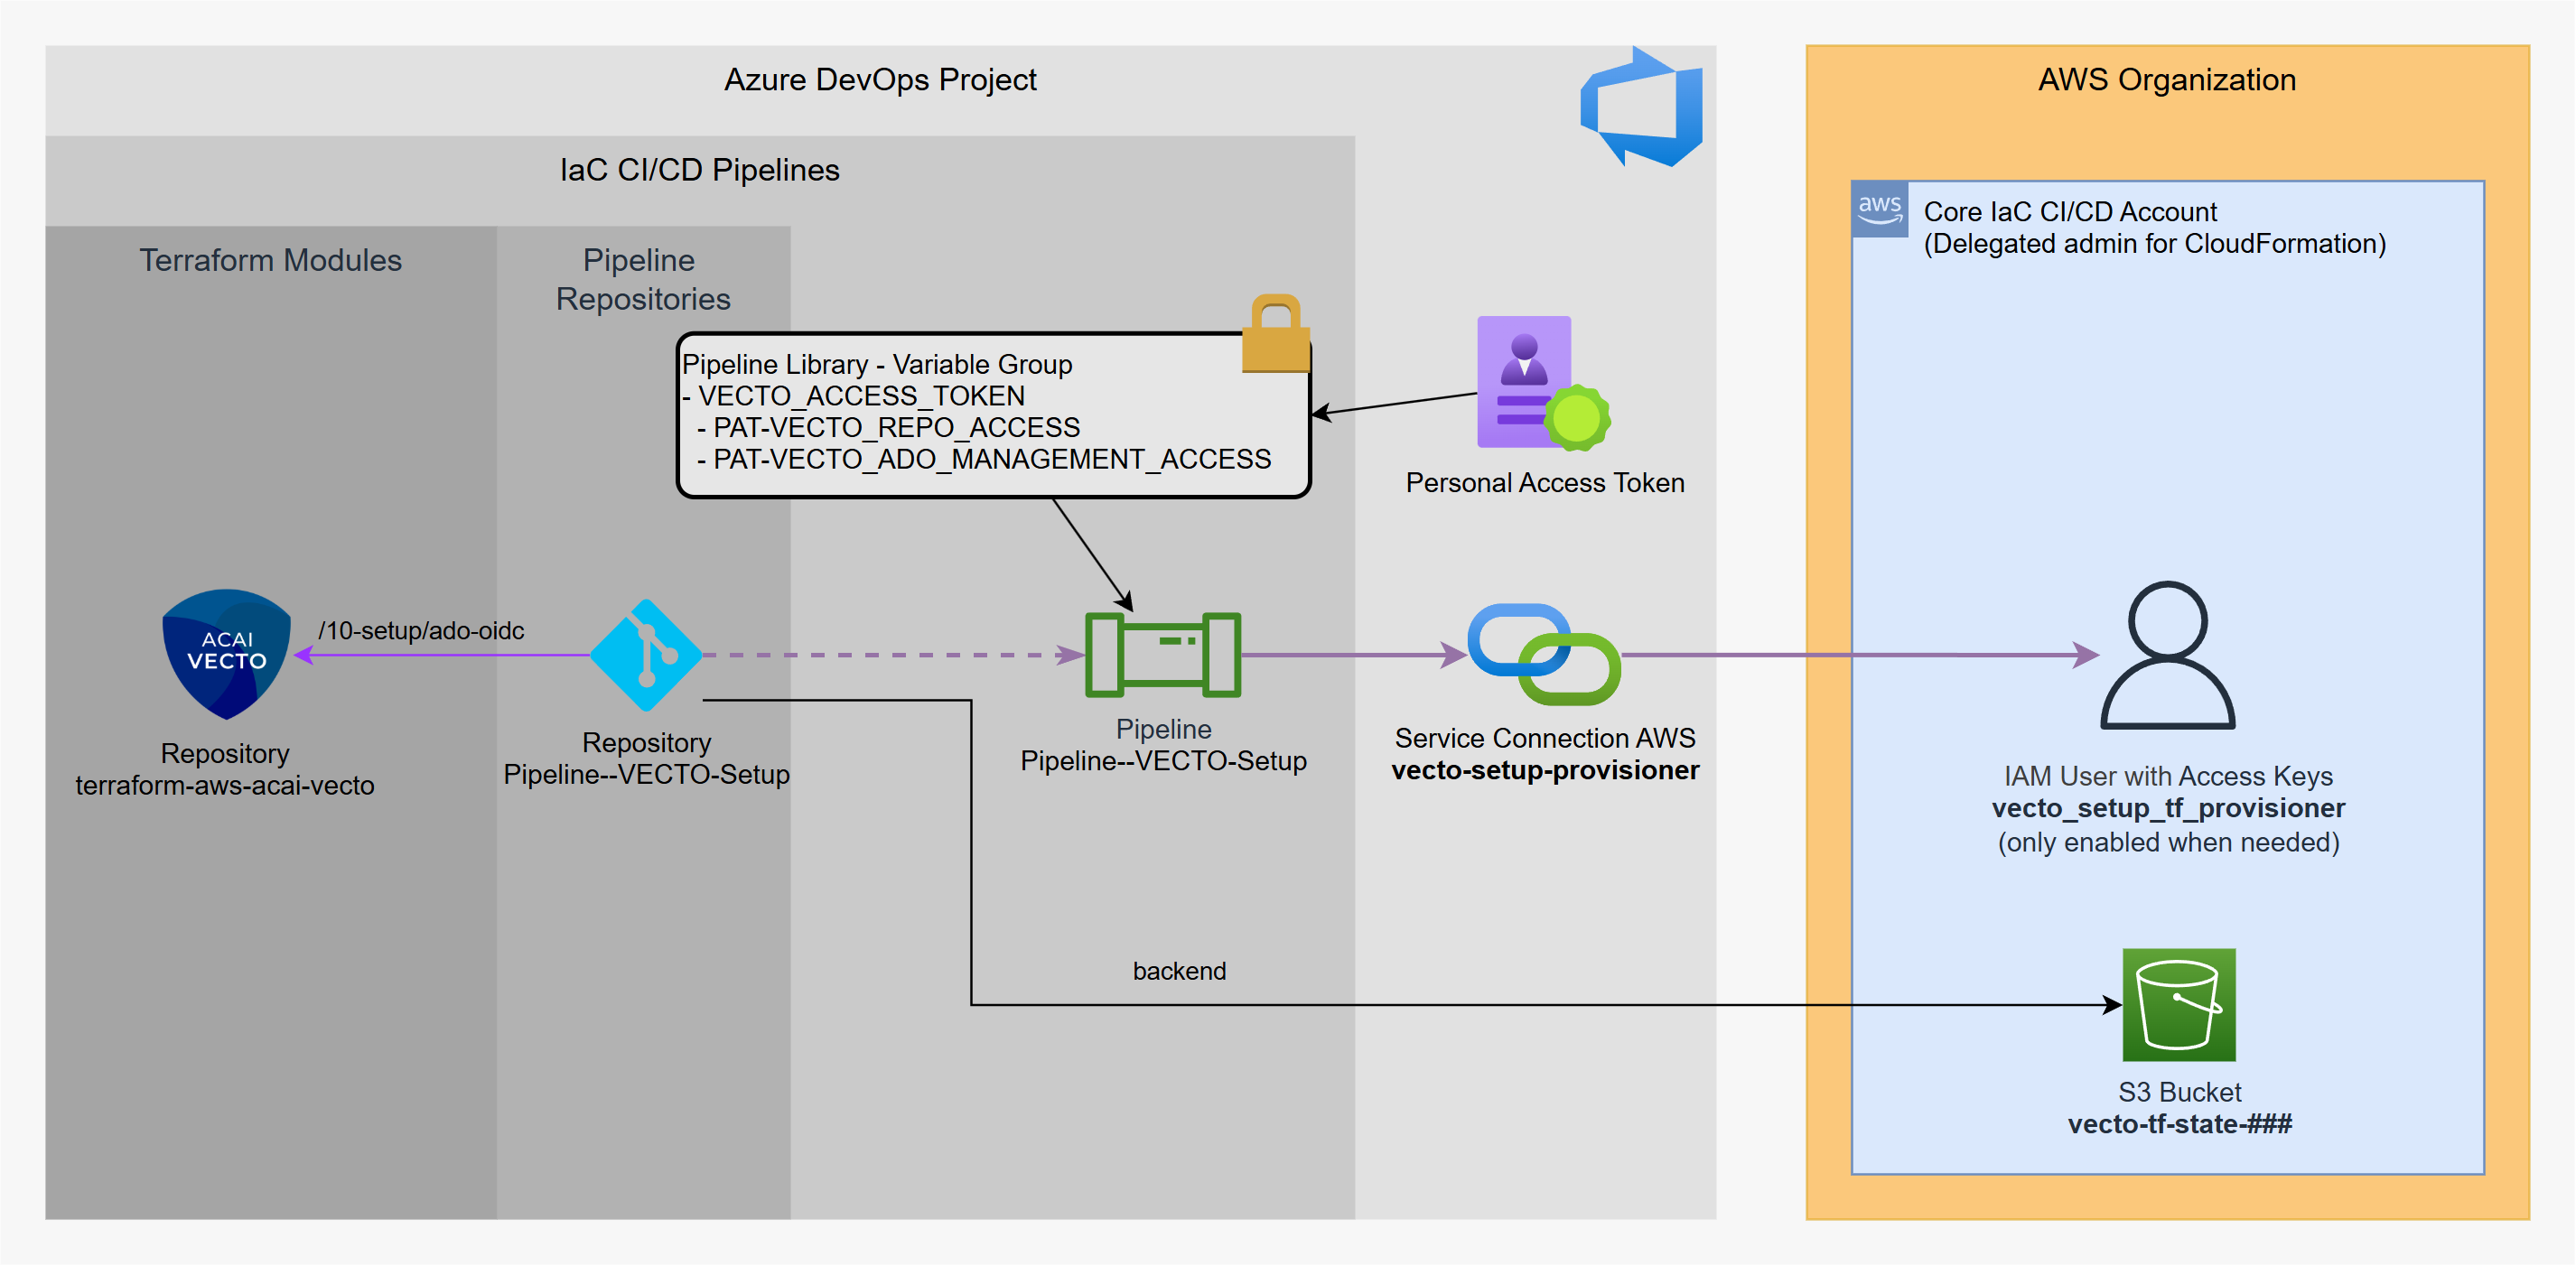
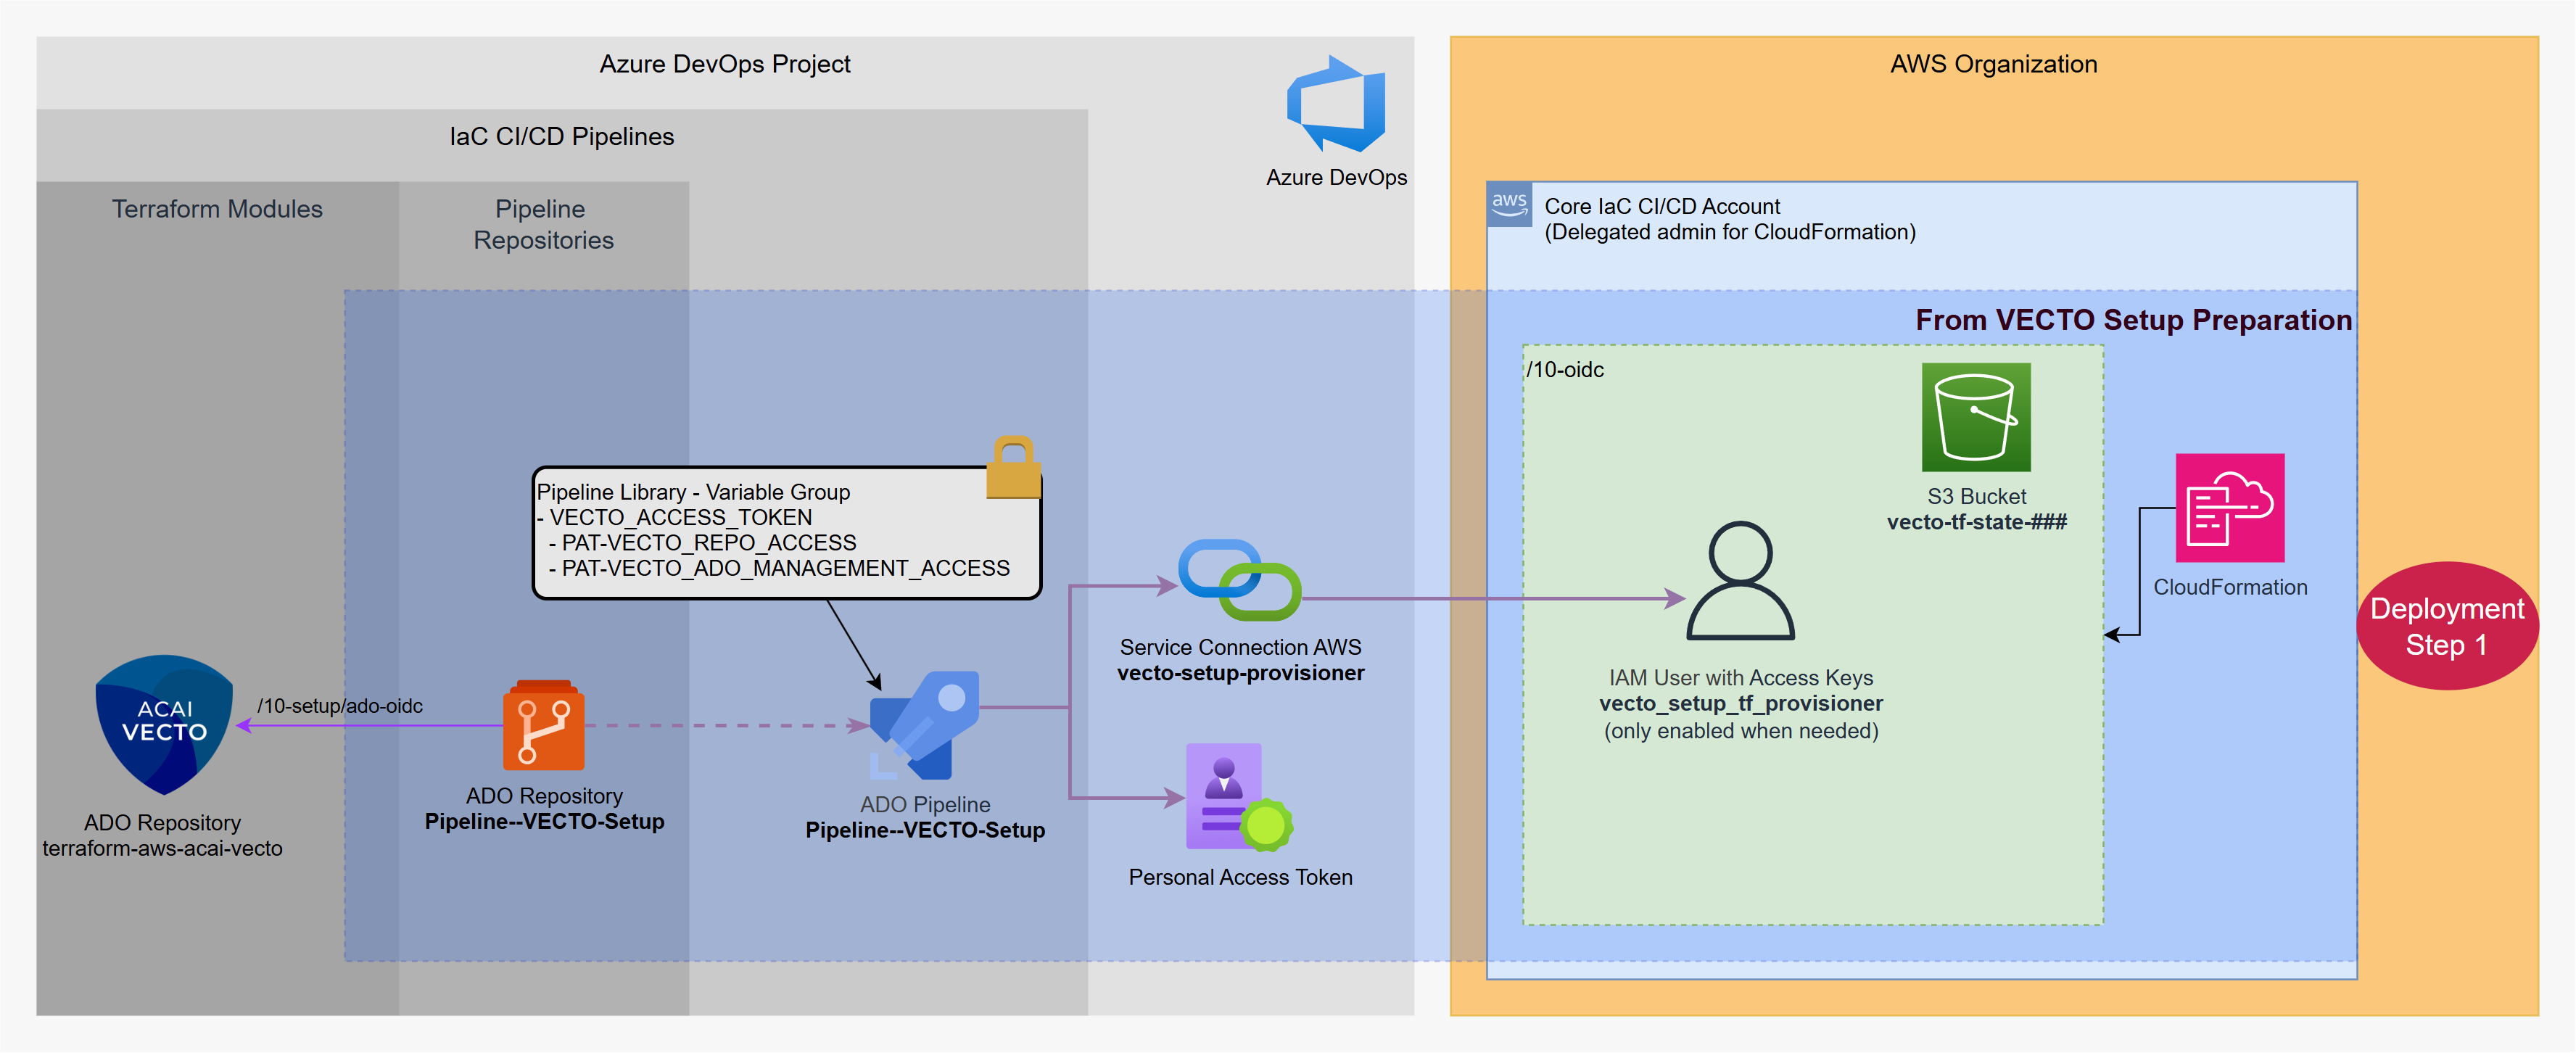
Step 1 - VECTO Setup Preparation
In this step you will create the following resources:
AWS Side (via CloudFormation):
- IAM User with CLI Credentials
- S3 bucket for VECTO Setup Terraform state
Azure DevOps Side:
- Personal Access Token (PAT)
- Pipeline Library Variable Group
- Service Connection AWS
- VECTO Solution Repository (optional)
- VECTO Setup Pipeline Repository
- VECTO Setup Pipeline
Setup Preparation - AWS Side
This preparation step creates the following AWS resources using a CloudFormation template:
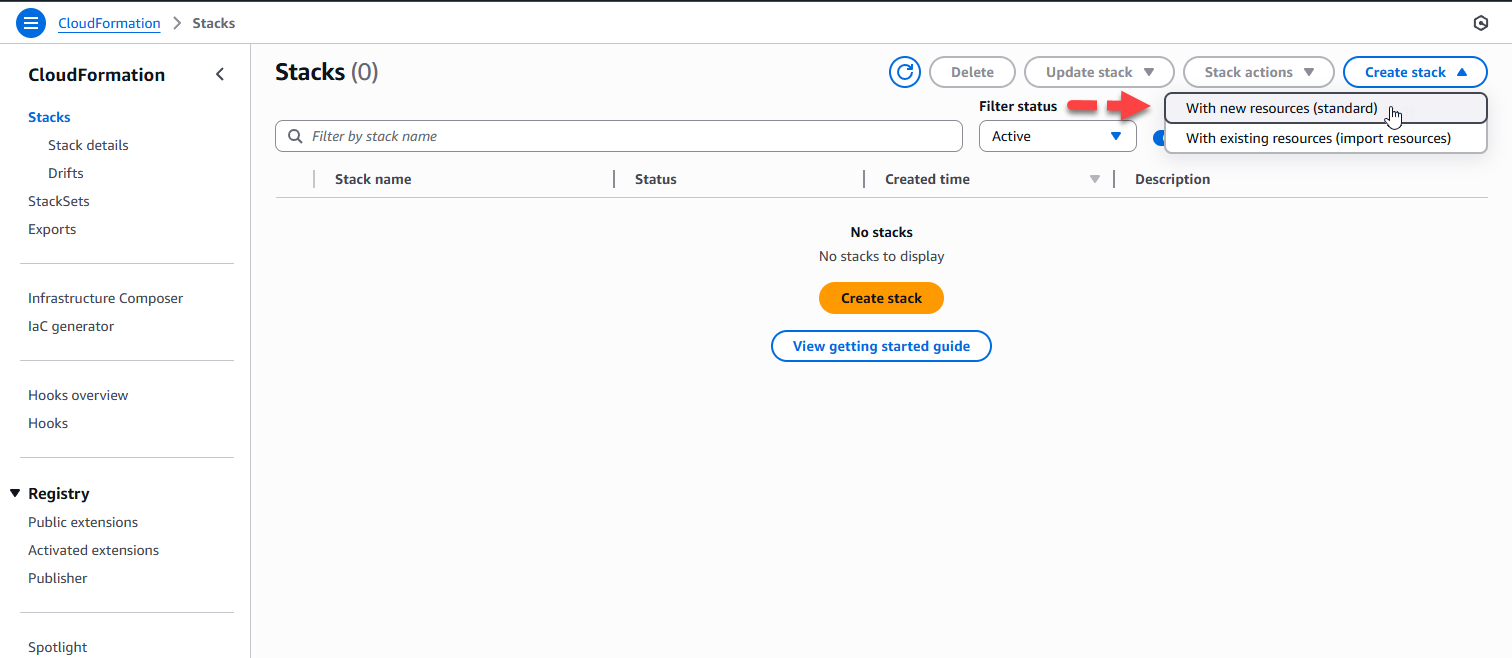
Step 1 – Create VECTO Setup CloudFormation Stack
- Login to the Core IaC CI/CD AWS account and navigate to CloudFormation.
- Select: Create stack → With new resources
Step 2 – Configure Stack Template
Apply the shown settings and paste this URL as Amazon S3 URL:
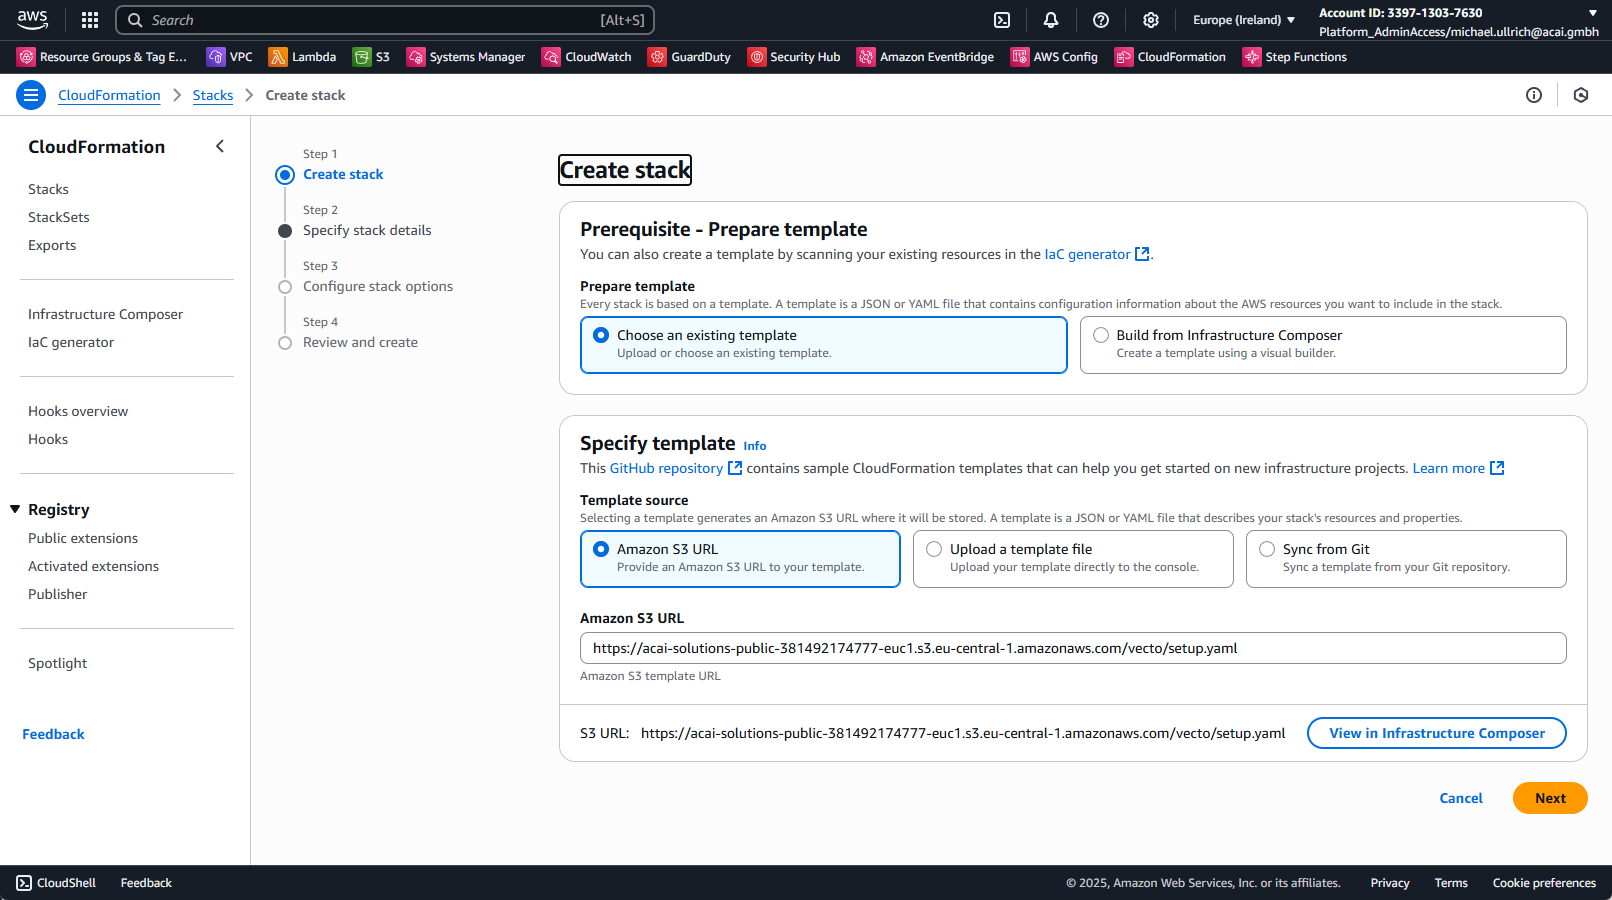
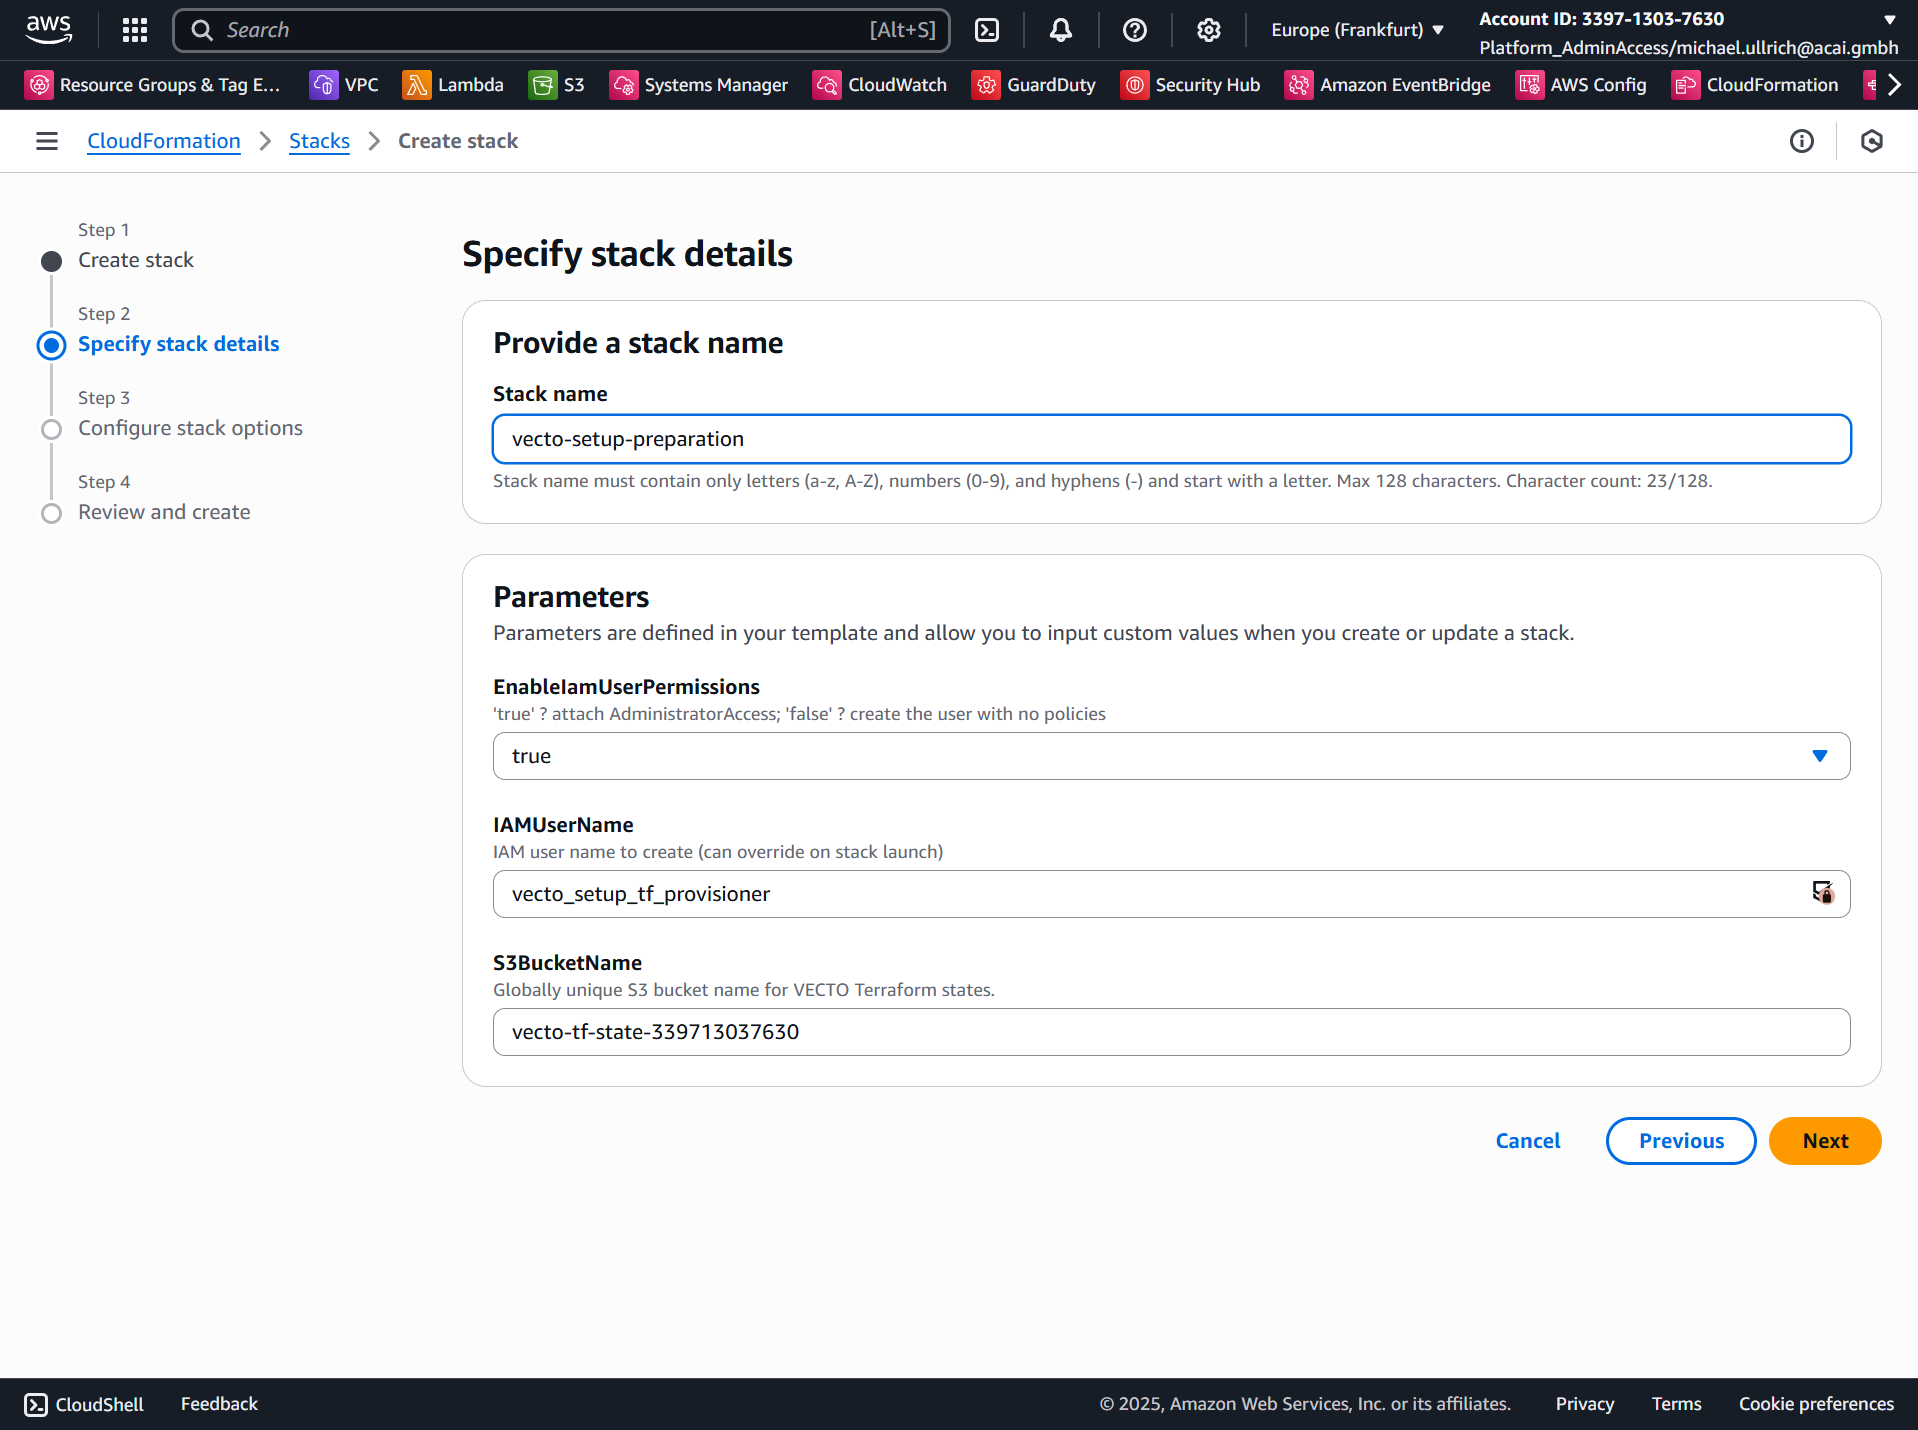
Step 3 – Specify Stack Details
- Specify a stack name: e.g.
vecto-setup-preparation - For the parameter VectoTerraformStateBucketName, ensure you provide a globally unique name (e.g., by adding the account ID as suffix). The {segregation_id} is optional and will allow the parallel deployment of multiple VECTO instances to the same Core IaC CI/CD account.
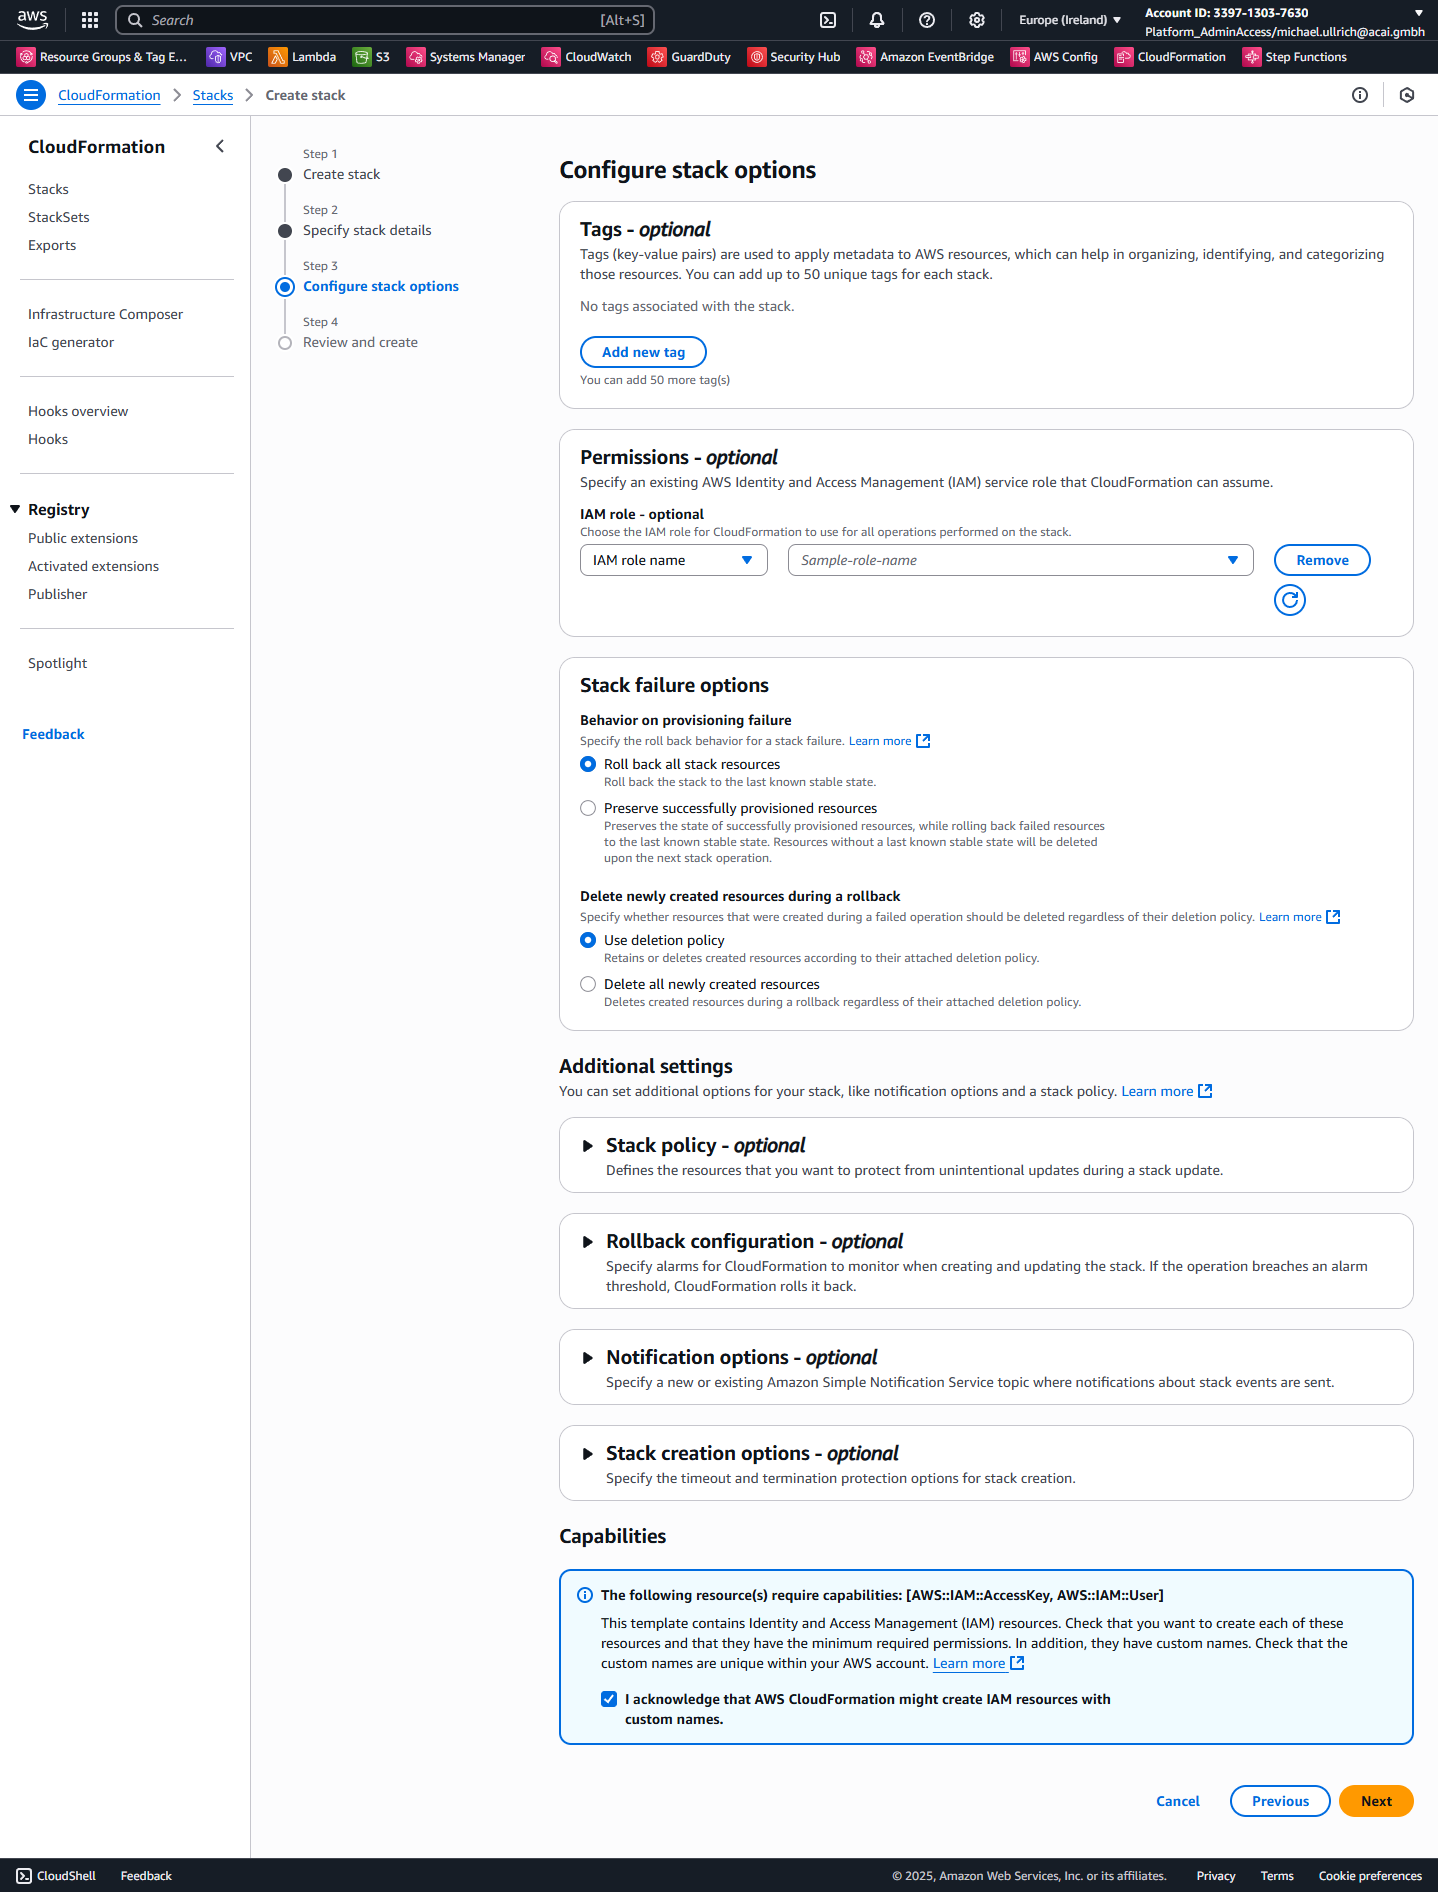
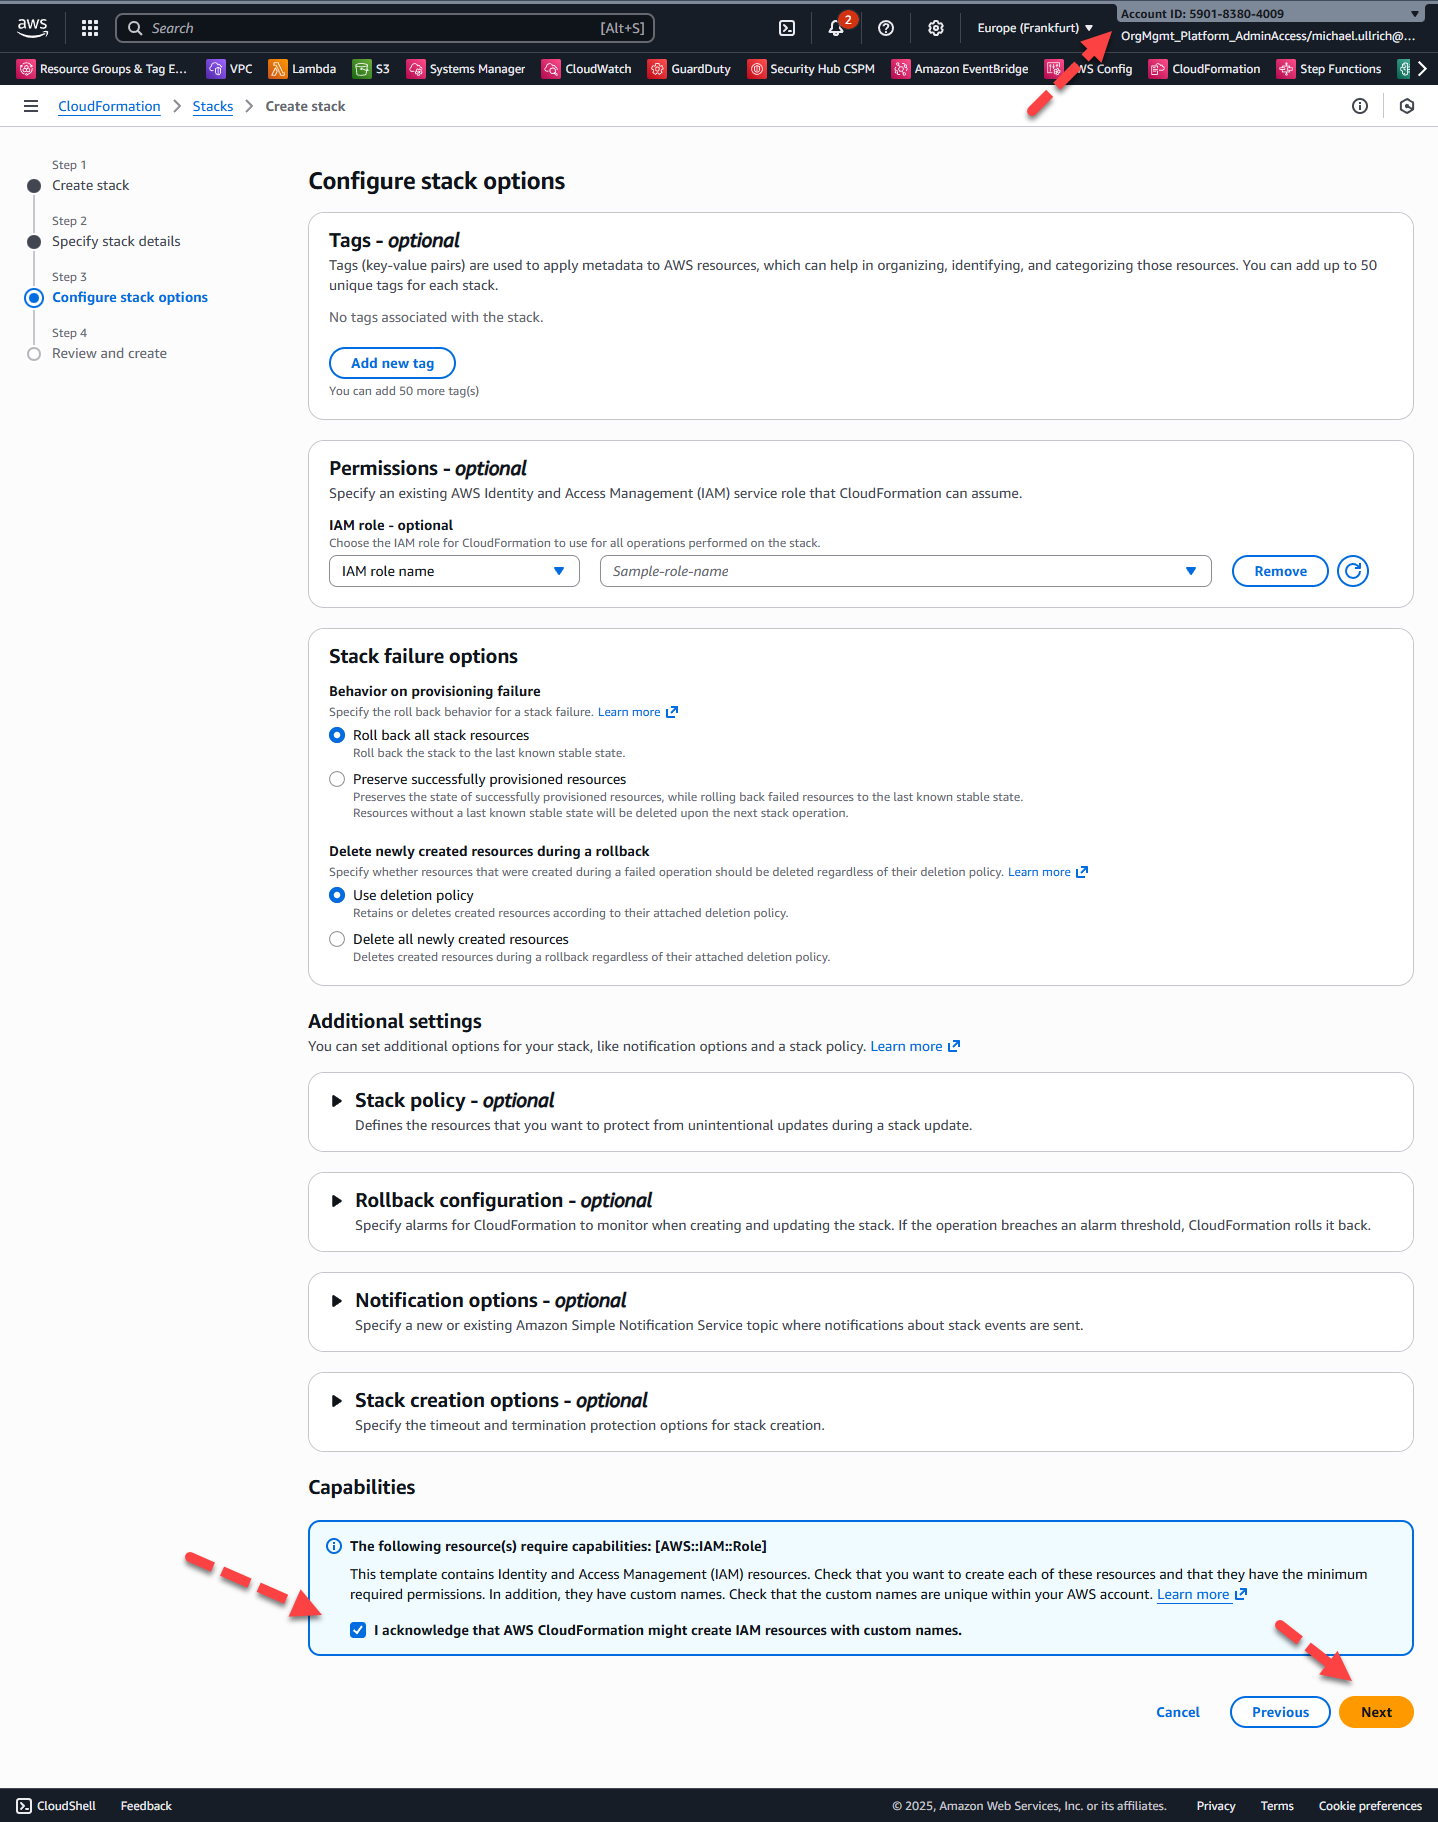
Step 4 – Configure Stack Options
Check the checkbox and click Next:
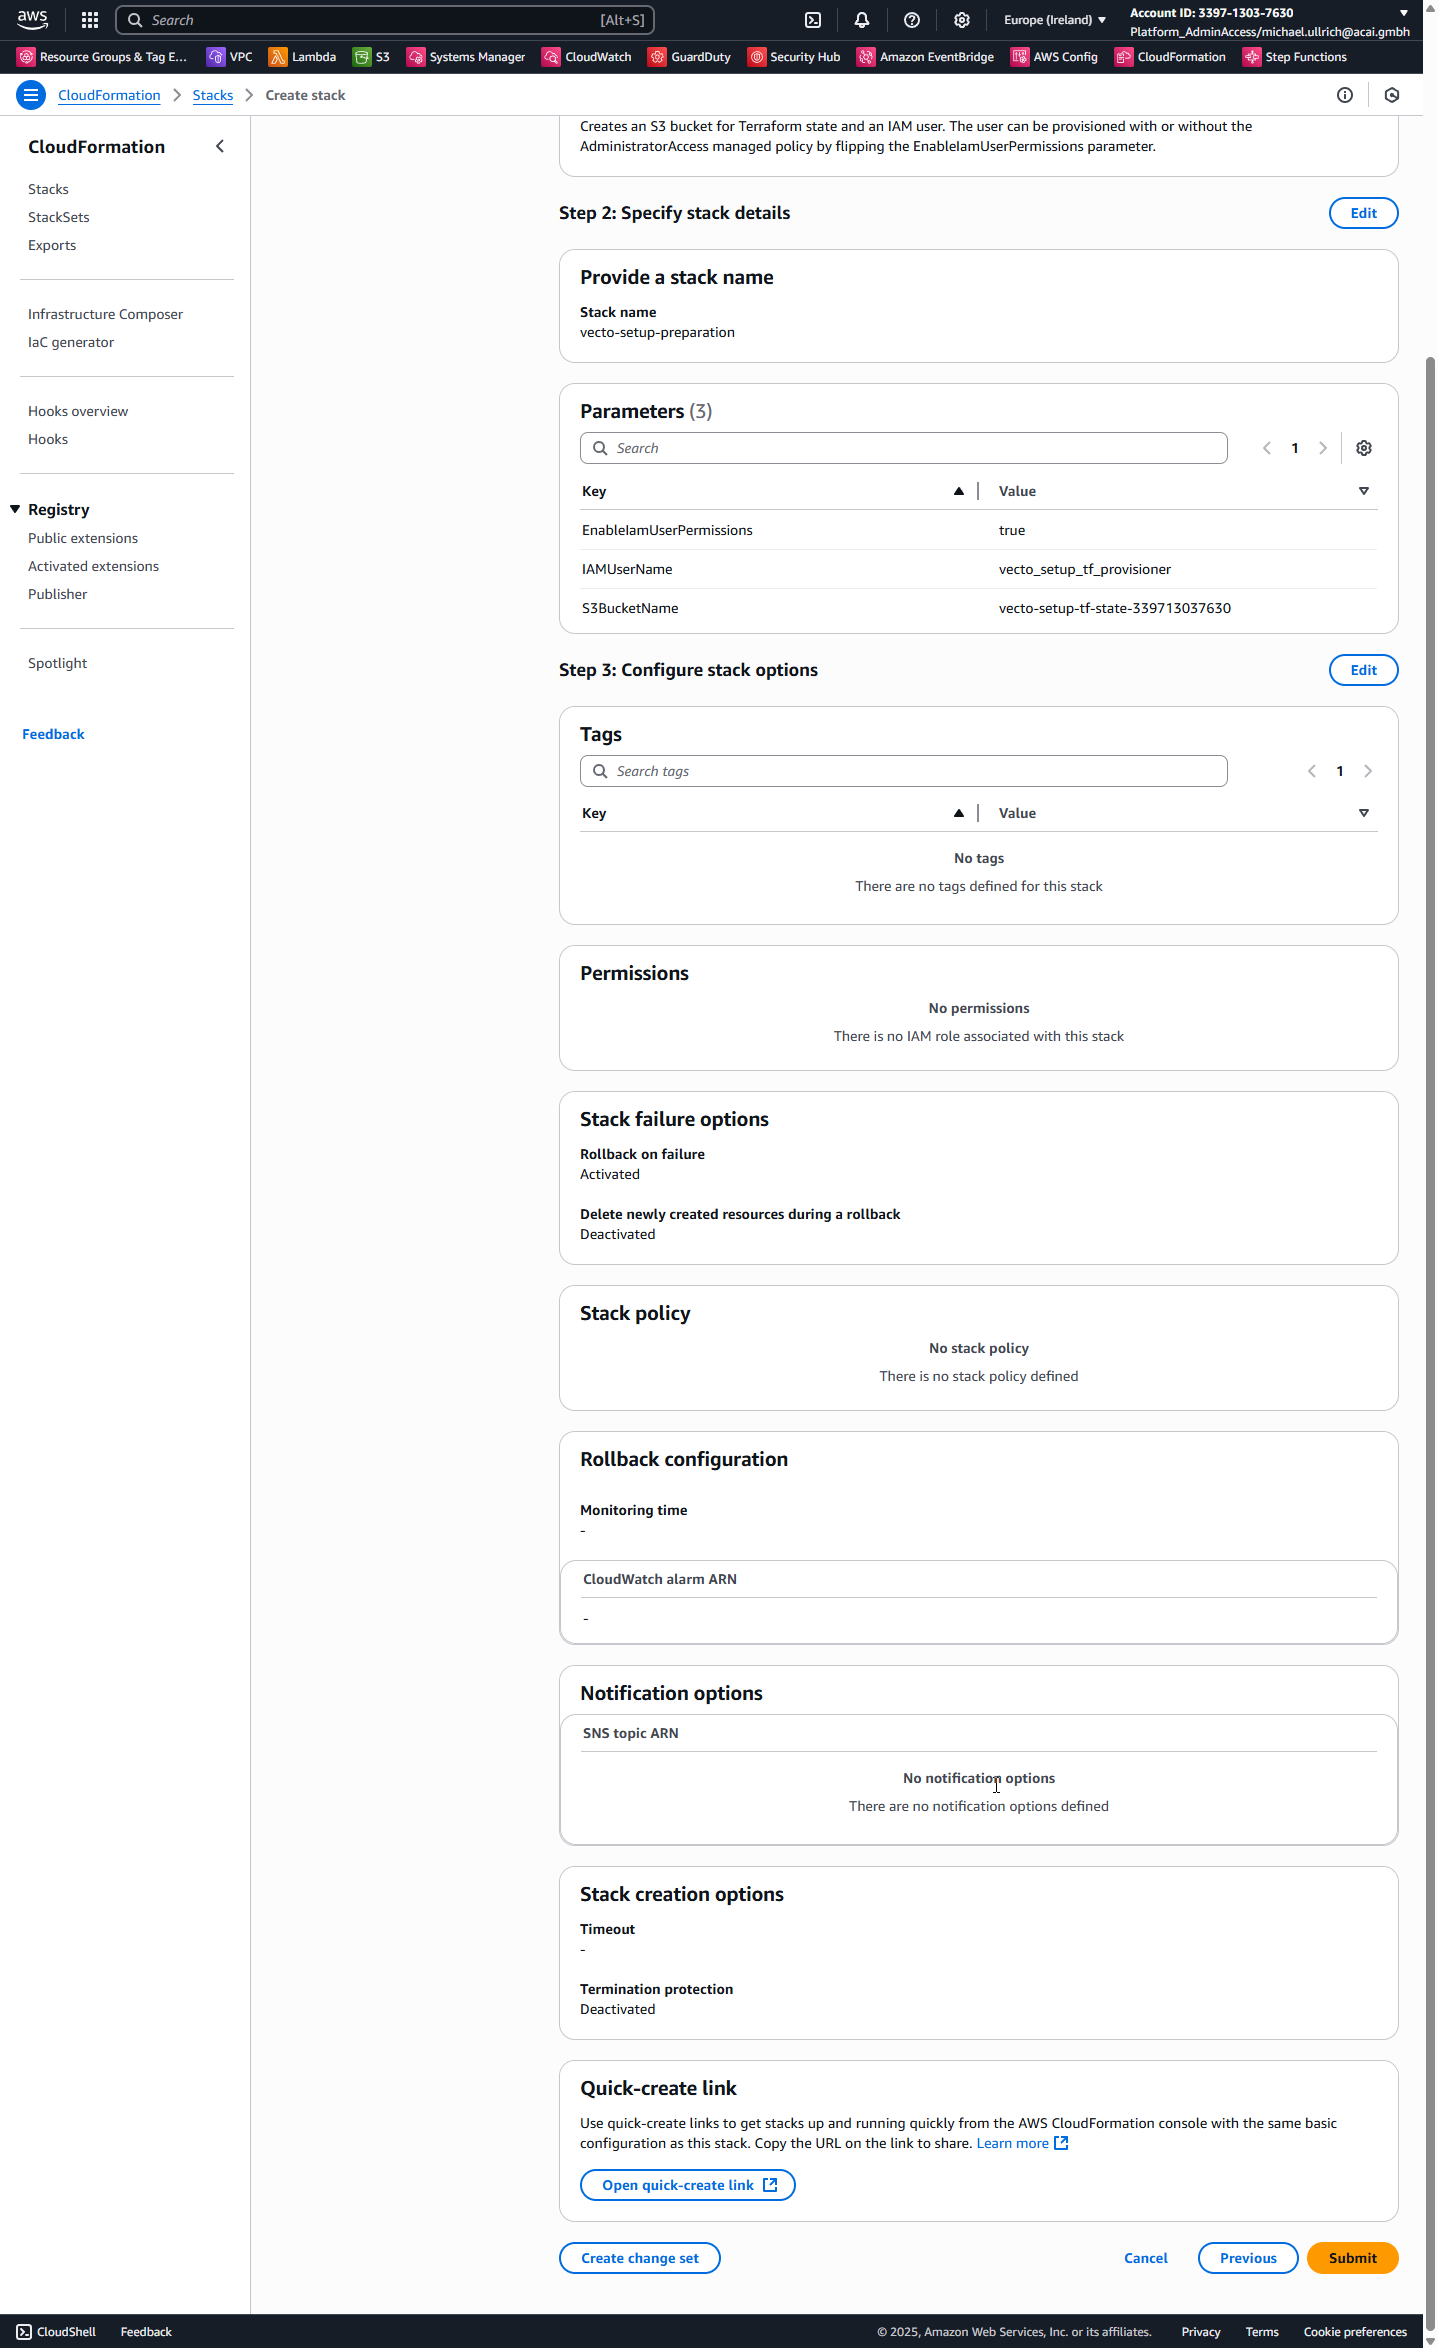
Step 5 – Review and Submit
Click: Submit
Step 6 – View Stack Outputs
After the CloudFormation stack deployment completes, navigate to the Outputs tab to view the created resources.

- Note the TerraformStateBucketName value from the outputs - you'll need this later.
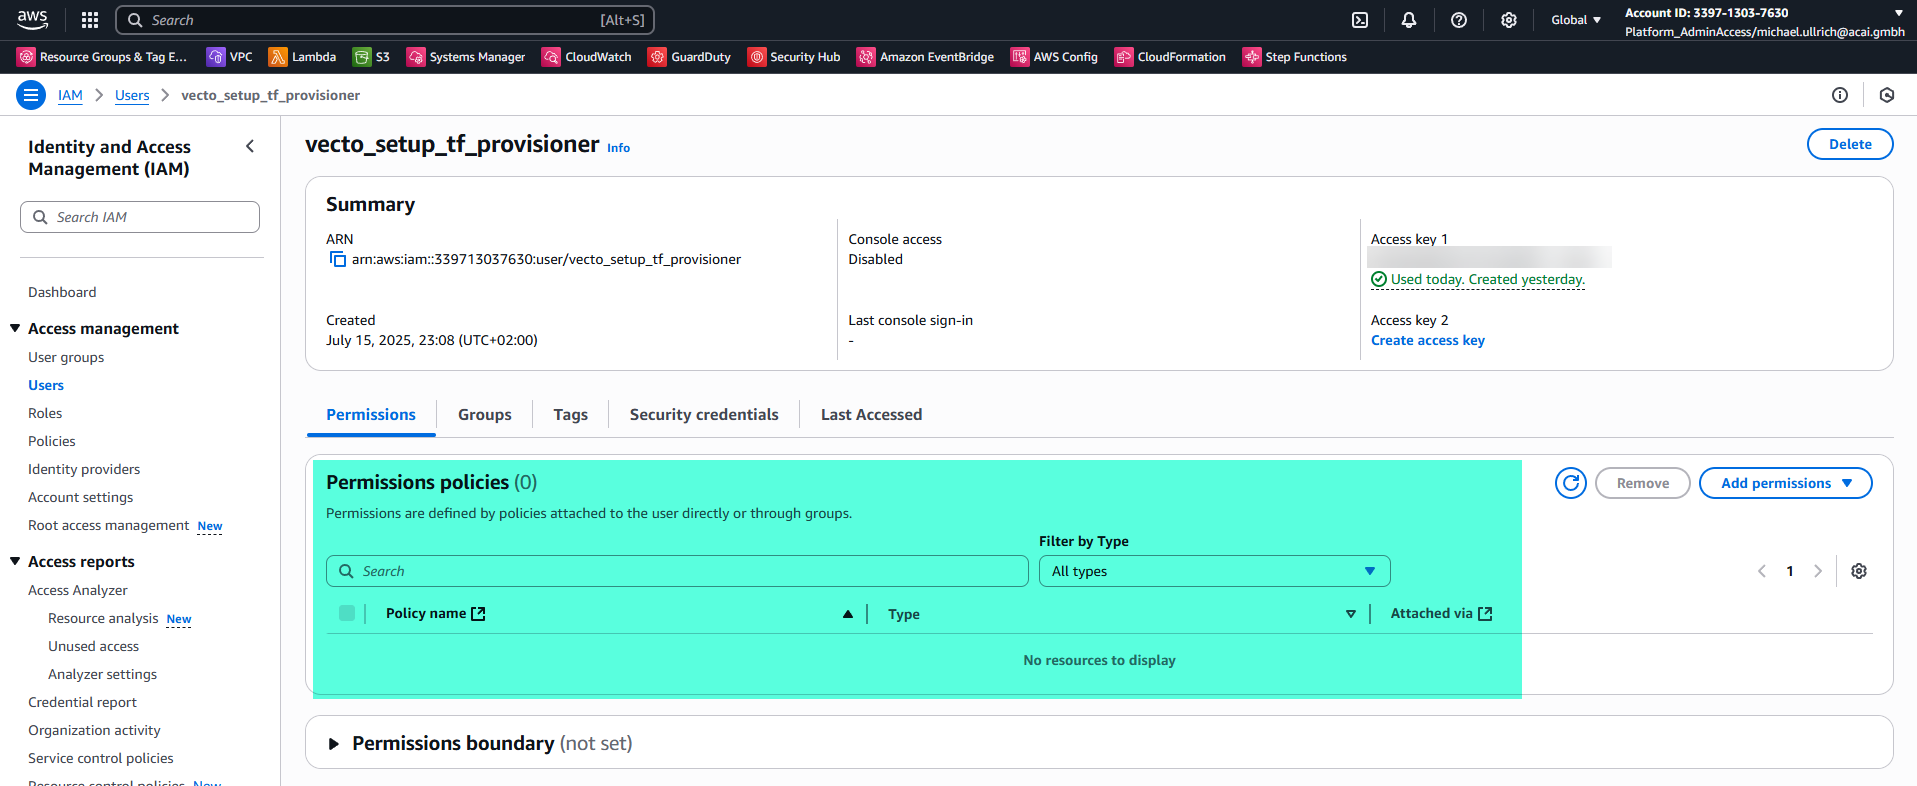
- Navigate to AWS Secrets Manager and locate the secret named vecto_setup_tf_provisioner_access_keys.
- Retrieve the secret value to obtain the AccessKeyId and SecretAccessKey for the created IAM user.
Setup Preparation - Azure DevOps Side
In this preparation, the following ADO resources will be created manually:
- Personal Access Token (PAT)
- Pipeline Library Variable Group
- Service Connection AWS
- VECTO Solution Repository (optional)
- VECTO Setup Pipeline Repository
- VECTO Setup Pipeline
Login to your Azure DevOps project for managing the AWS Core Accounts with administrator permissions.
Personal Access Token (PAT)
VECTO needs a Personal Access Token to create and manage repositories and pipelines in your Azure DevOps project.
The general procedure for working with PATs is described in the Microsoft documentation: Use personal access tokens to authenticate
Step 1 – Open the Personal Access Tokens page
Navigate to the PAT management page:
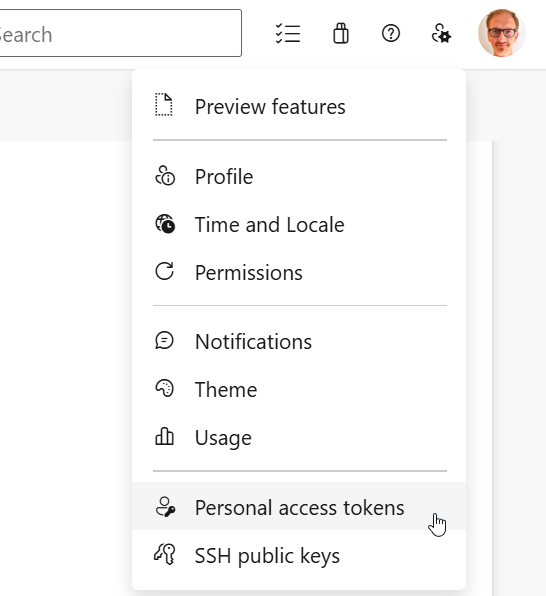
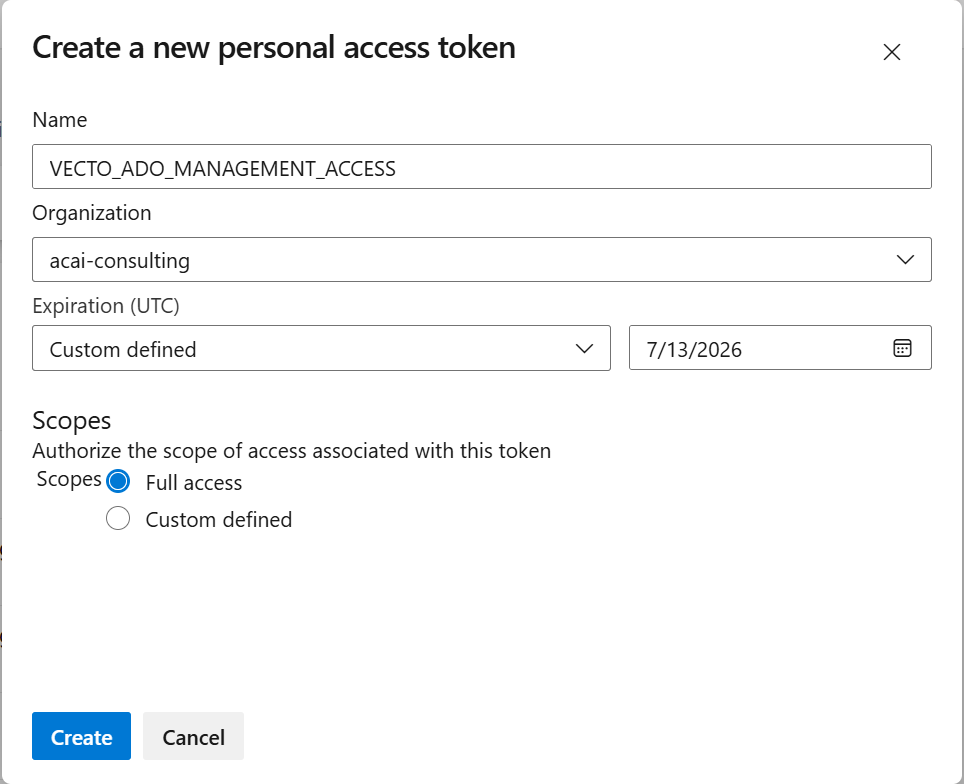
Step 2 – Create a new PAT
- Select: + New Token
- Fill in the form and choose Create:
| Field | Value / Action |
|---|---|
| Name | VECTO_ADO_MANAGEMENT_ACCESS |
| Organization | Select the organization that hosts the Azure DevOps project. |
| Expiration | Pick a validity period (maximum 1 year). |
| Scopes | Choose Full access. It is recommended to restrict the scope (e.g., Project & Team → Read) when the VECTO setup tasks are completed. |
Step 3 – Store the token securely
- Copy the generated token and keep it in a secure location.
- You will reference it when creating the Pipeline Library variable group in the next step.
Service Connection – AWS
Create an Azure DevOps Service Connection so the VECTO Setup pipeline can authenticate with AWS.
Step 1 – Open the Service connections page
Navigate to: Project Settings → Pipelines → Service connections
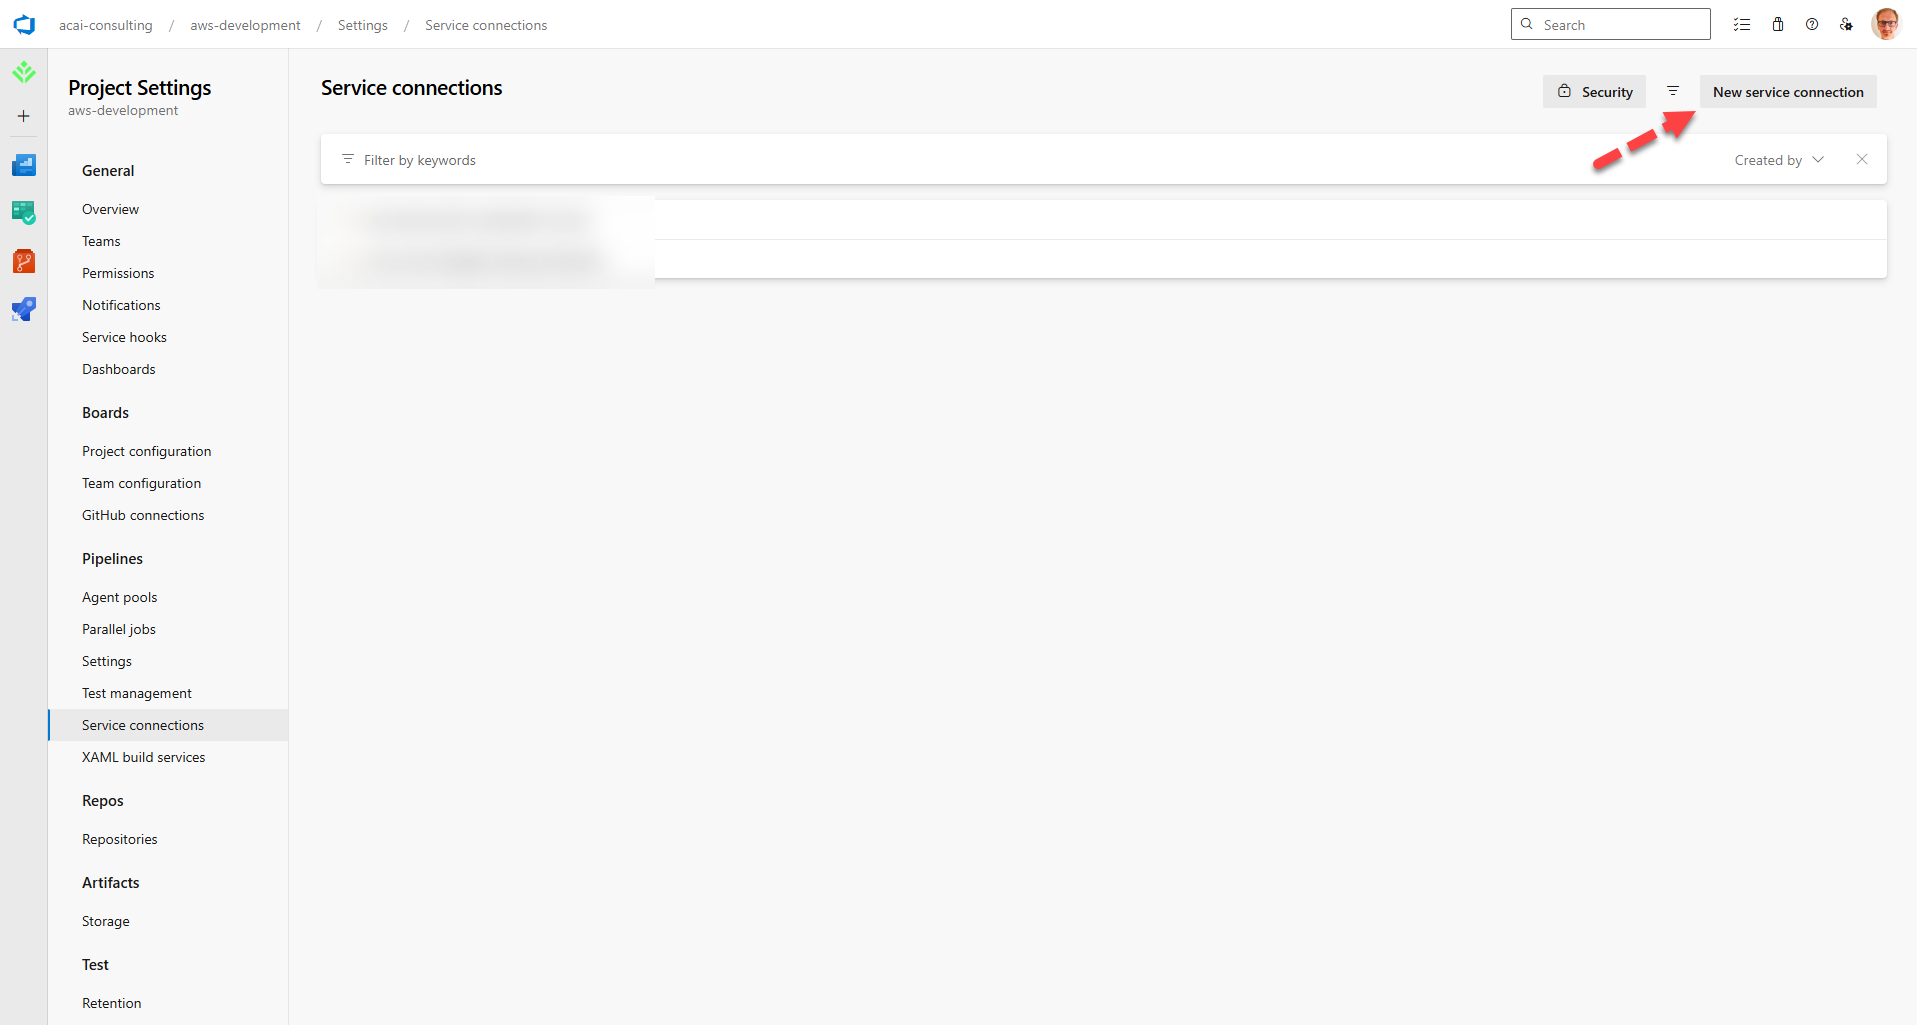
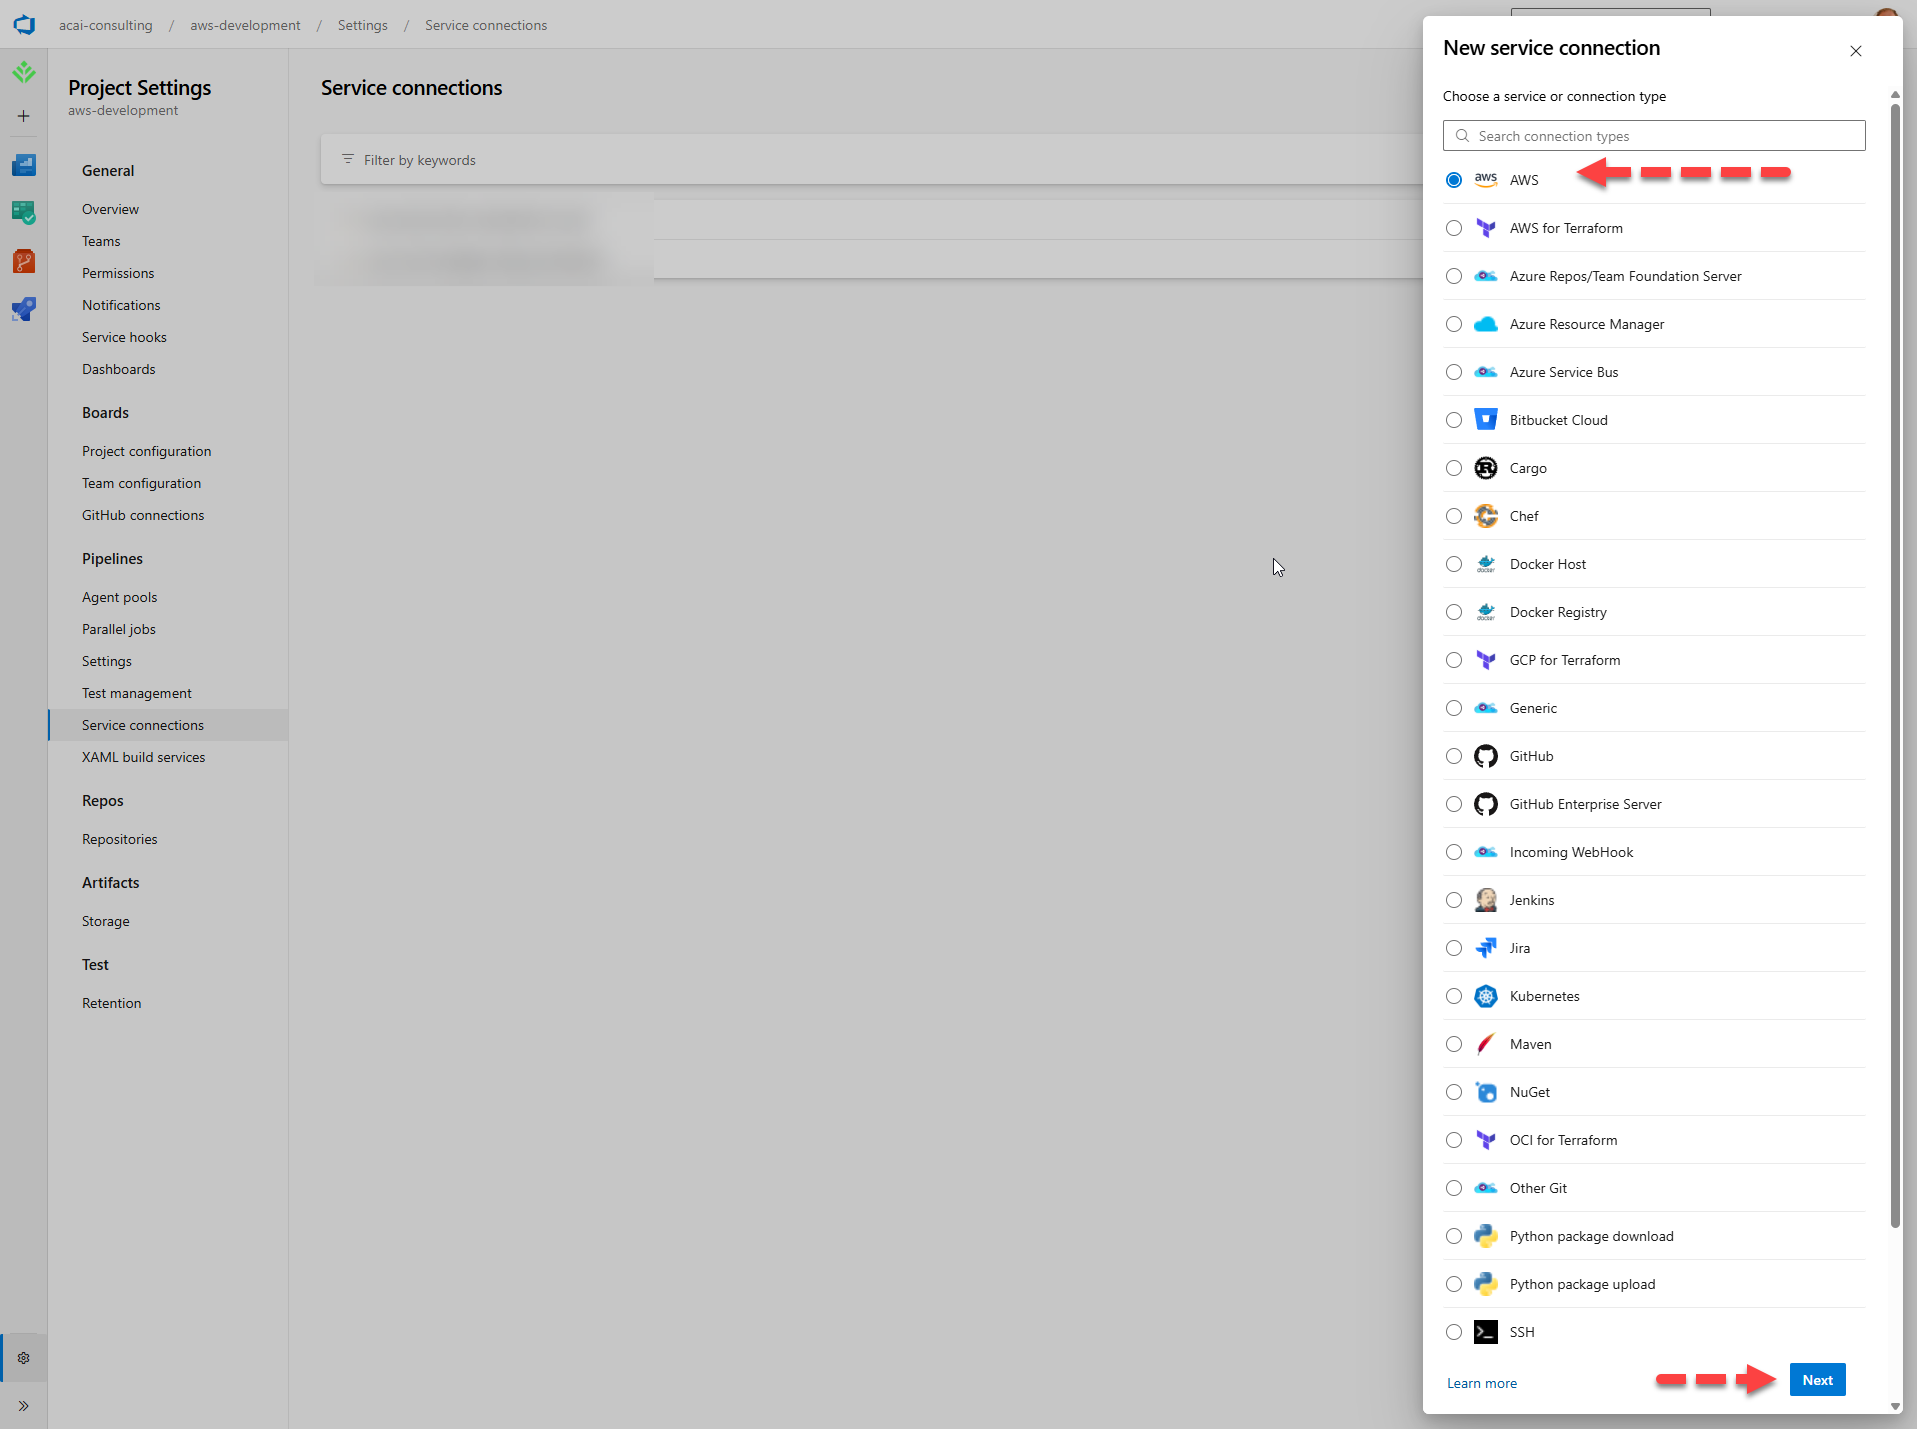
Step 2 – Start the wizard
- Choose: + New service connection
- Select: AWS and click Next
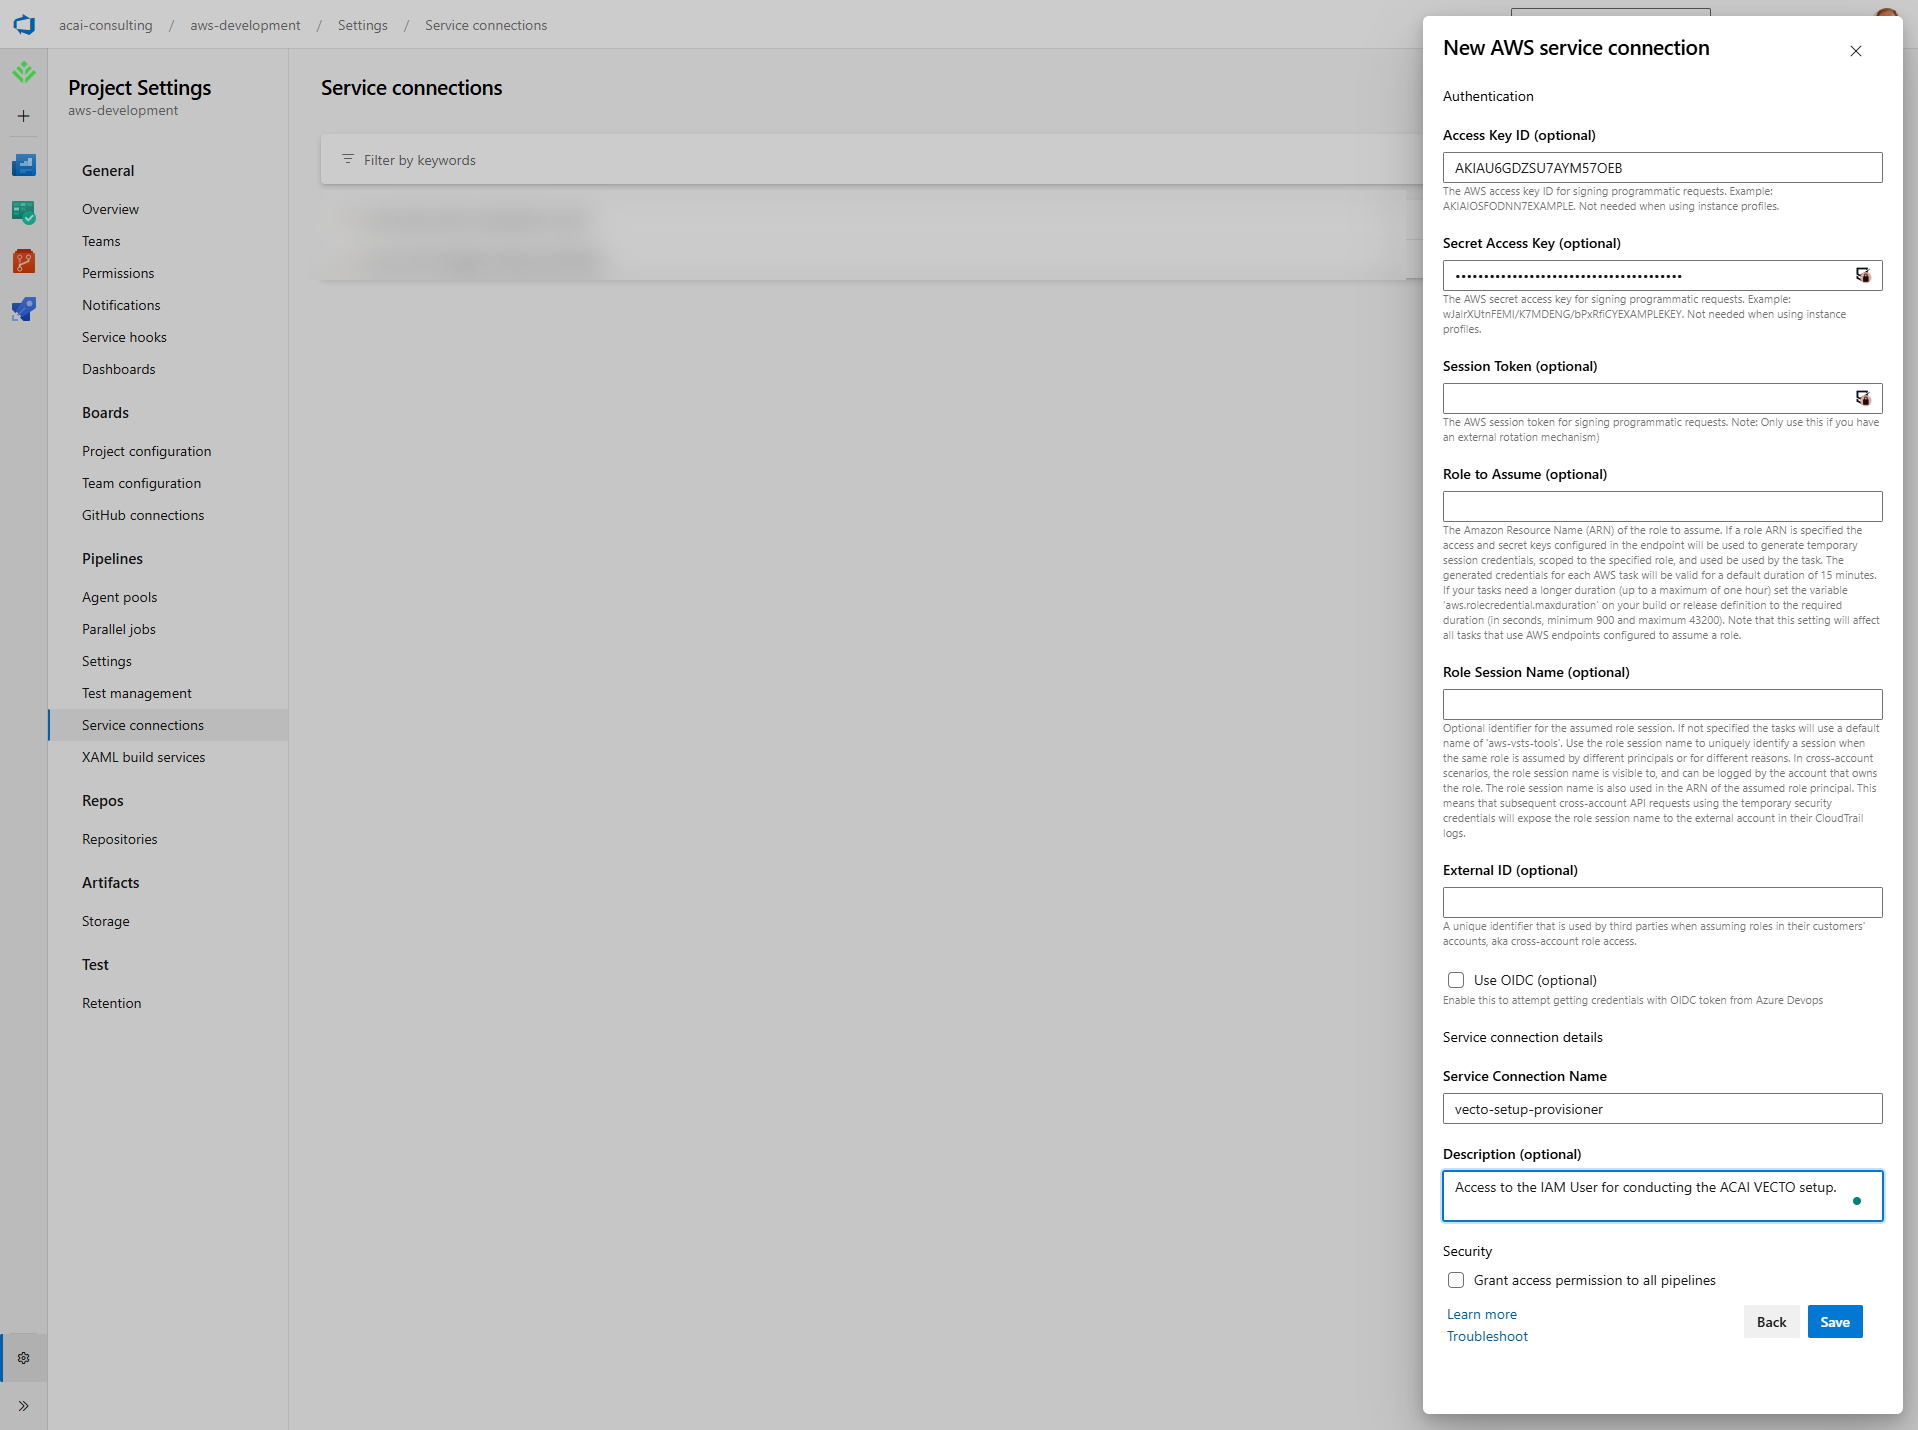
Step 3 – Configure the AWS connection
Complete the form and click Save:
| Field | Value / Description |
|---|---|
| Access Key ID | Access key ID of the IAM user created by the CloudFormation stack (stored in AWS Secrets Manager). |
| Secret Access Key | Secret access key of the same IAM user (stored in AWS Secrets Manager). |
| Service Connection Name | vecto-setup-provisioner{-env_id} env_id = e.g. "prod" or "test" or "dev" |
| Description | Allows the VECTO setup pipeline to access AWS Core VECTO account. |
Retrieve the credentials from AWS Secrets Manager:

Clone the VECTO Solution Repository (optional)
The VECTO Terraform module hosted in customer area of the the acai-solutions GitHub organization.
Optionally you can import it into your Azure DevOps project as follows:
Step 1 – Create an empty repository
# Prerequisite: Azure DevOps CLI with the 'azure-devops' extension
az extension add --name azure-devops
# Configure organization and project defaults
az devops configure --defaults `
    organization=https://dev.azure.com/<YOUR_ADO_ORGANIZATION_NAME> `
    project=<YOUR_ADO_PROJECT_NAME>

# Create the target repository
az repos create `
    --name terraform-aws-acai-vecto `
    --organization https://dev.azure.com/<YOUR_ADO_ORGANIZATION_NAME> `
    --project <YOUR_ADO_PROJECT_NAME>
# Configure organization and project defaults
az devops configure --defaults \
    organization=https://dev.azure.com/<YOUR_ADO_ORGANIZATION_NAME> \
    project=<YOUR_ADO_PROJECT_NAME>

# Create the target repository
az repos create  \
    --name terraform-aws-acai-vecto\
    --organization https://dev.azure.com/<YOUR_ADO_ORGANIZATION_NAME> \
    --project <YOUR_ADO_PROJECT_NAME>
Step 2 – Import from ACAI GitHub Repository
# Supply your GitHub PAT with read access to the ACAI repos
$Env:AZURE_DEVOPS_EXT_GIT_SOURCE_PASSWORD_OR_PAT = '<GitHub PAT with ACAI repo access>'

# Import the module from GitHub into the newly created Azure DevOps repo
az repos import create `
    --repository terraform-aws-acai-vecto `
    --git-source-url https://github.com/acai-solutions/terraform-aws-acai-vecto.git `
    --requires-authorization `
    --user-name github-acai-access
# Supply your GitHub PAT with read access to the ACAI repos
export AZURE_DEVOPS_EXT_GIT_SOURCE_PASSWORD_OR_PAT='<GitHub PAT with ACAI repo access>'

# Import the module from GitHub into the newly created Azure DevOps repo
az repos import create \
    --repository terraform-aws-acai-vecto \
    --git-source-url https://github.com/acai-solutions/terraform-aws-acai-vecto.git \
    --requires-authorization \
    --user-name github-acai-access
Clone the VECTO Setup Pipeline Repository
The VECTO Setup Pipeline Repository is hosted in the acai-solutions GitHub organization:
Import it into your Azure DevOps project as follows:
Step 1 – Create an empty repository
# Prerequisite: Azure DevOps CLI with the 'azure-devops' extension
az extension add --name azure-devops
# Configure organization and project defaults
az devops configure --defaults `
    organization=https://dev.azure.com/<YOUR_ADO_ORGANIZATION_NAME> `
    project=<YOUR_ADO_PROJECT_NAME>

# Create the target repository
az repos create `
    --name Pipeline--VECTO-Setup `
    --organization https://dev.azure.com/<YOUR_ADO_ORGANIZATION_NAME> `
    --project <YOUR_ADO_PROJECT_NAME>
# Configure organization and project defaults
az devops configure --defaults \
    organization=https://dev.azure.com/<YOUR_ADO_ORGANIZATION_NAME> \
    project=<YOUR_ADO_PROJECT_NAME>

# Create the target repository
az repos create \
    --name Pipeline--VECTO-Setup \
    --organization https://dev.azure.com/<YOUR_ADO_ORGANIZATION_NAME> \
    --project <YOUR_ADO_PROJECT_NAME>
Step 2 – Import from ACAI GitHub Repository
# Import the module from GitHub into the newly created Azure DevOps repo
az repos import create `
    --repository Pipeline--VECTO-Setup `
    --organization https://dev.azure.com/<YOUR_ADO_ORGANIZATION_NAME> `
    --project <YOUR_ADO_PROJECT_NAME> `
    --git-source-url https://github.com/acai-solutions/terraform-acai-vecto-setup-pipeline.git `
    --user-name github-acai-access
# Import the module from GitHub into the newly created Azure DevOps repo
az repos import create \
    --repository Pipeline--VECTO-Setup \
    --organization https://dev.azure.com/<YOUR_ADO_ORGANIZATION_NAME> \
    --project <YOUR_ADO_PROJECT_NAME> \
    --git-source-url https://github.com/acai-solutions/terraform-acai-vecto-setup-pipeline.git \
    --user-name github-acai-access
In case you host the VECTO Solution Repository locally, you need to adjust the module-source in the Terraform file (link) for your VECTO Setup Pipeline Repository.
A sample deployment of the Pipeline--VECTO-Setup repository is shown here: Link to ACAI AWS Lab
Create VECTO Setup Pipeline
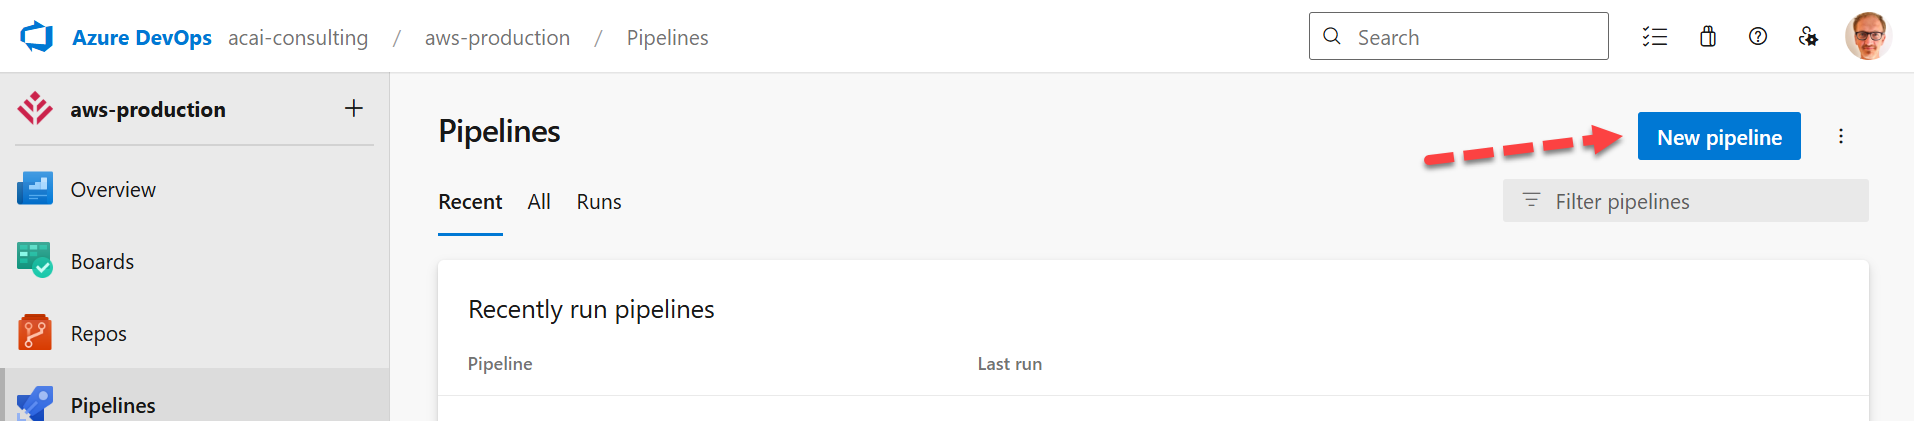
Step 1 – Open the Pipelines page
Navigate to Pipelines and click: New pipeline
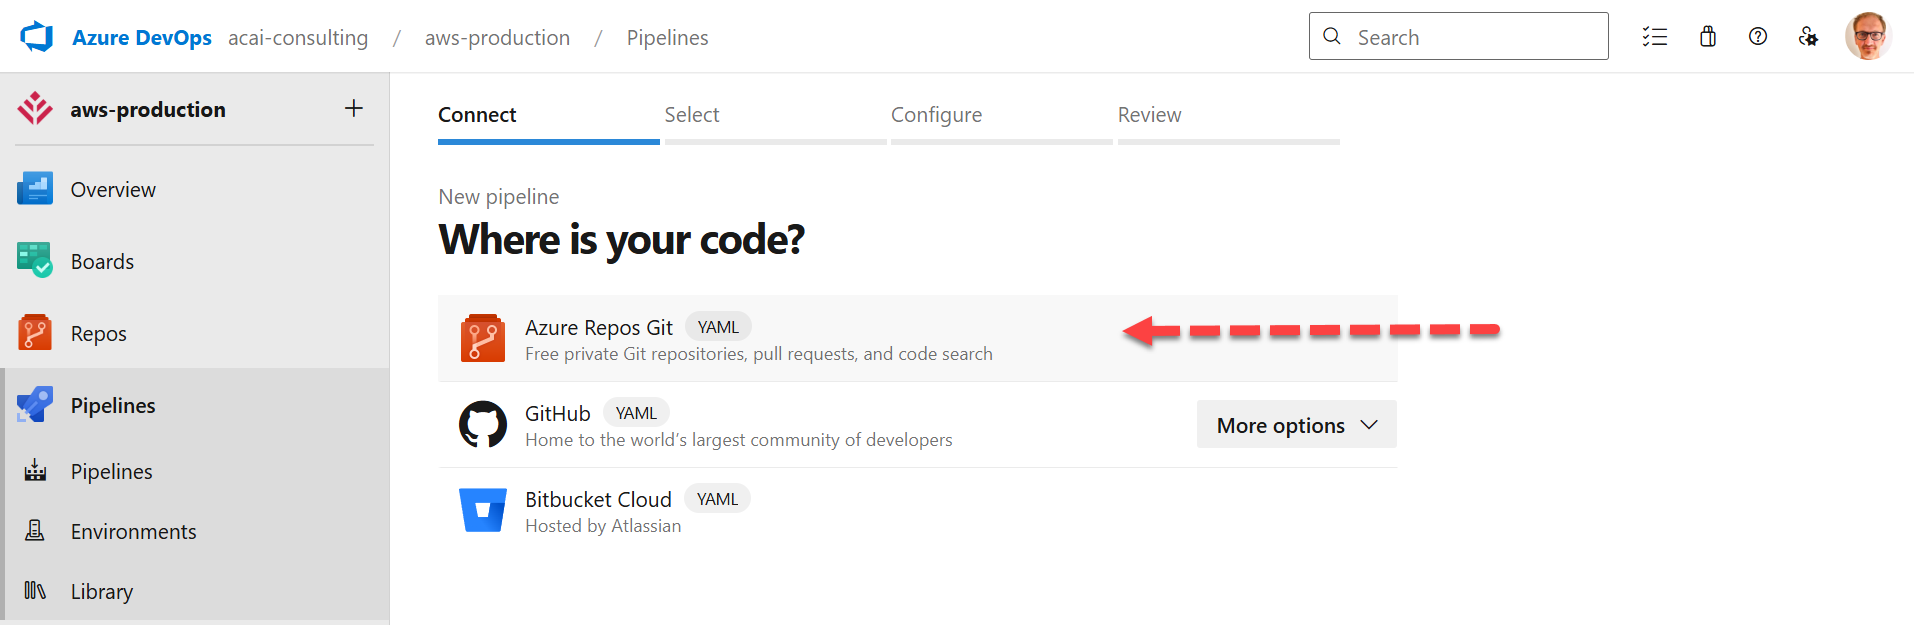
Step 2 – Where is your code?
- Choose: Azure Repos Git
- Select: Pipeline--VECTO-Setup as repository
Step 3 – Create variable for the pipeline
Select: Variables
Step 4 – New variable
Click: New variable
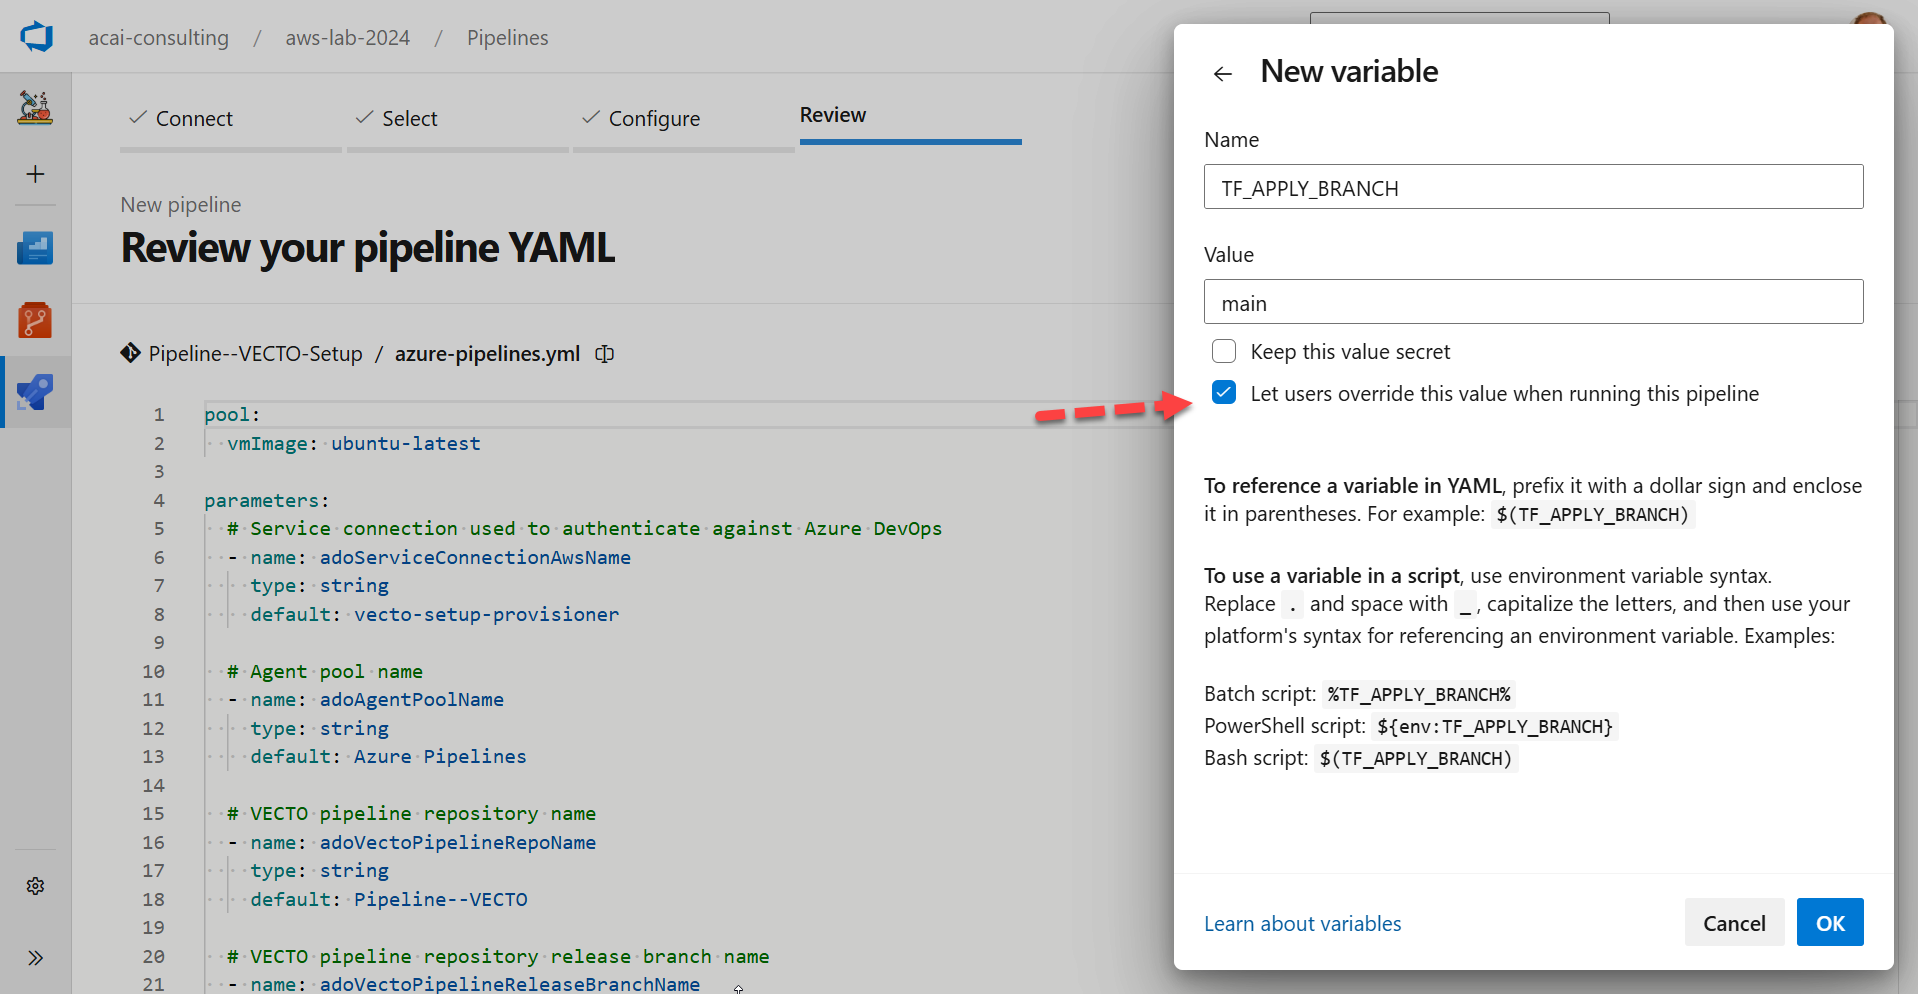
Step 5 – Create the variable
| Field | Value / Action |
|---|---|
| Name | TF_APPLY_BRANCH |
| Value | main - to enable Terraform apply for the main-branch. |
| Checkbox | Enable: Let users override this value when running this pipeline |
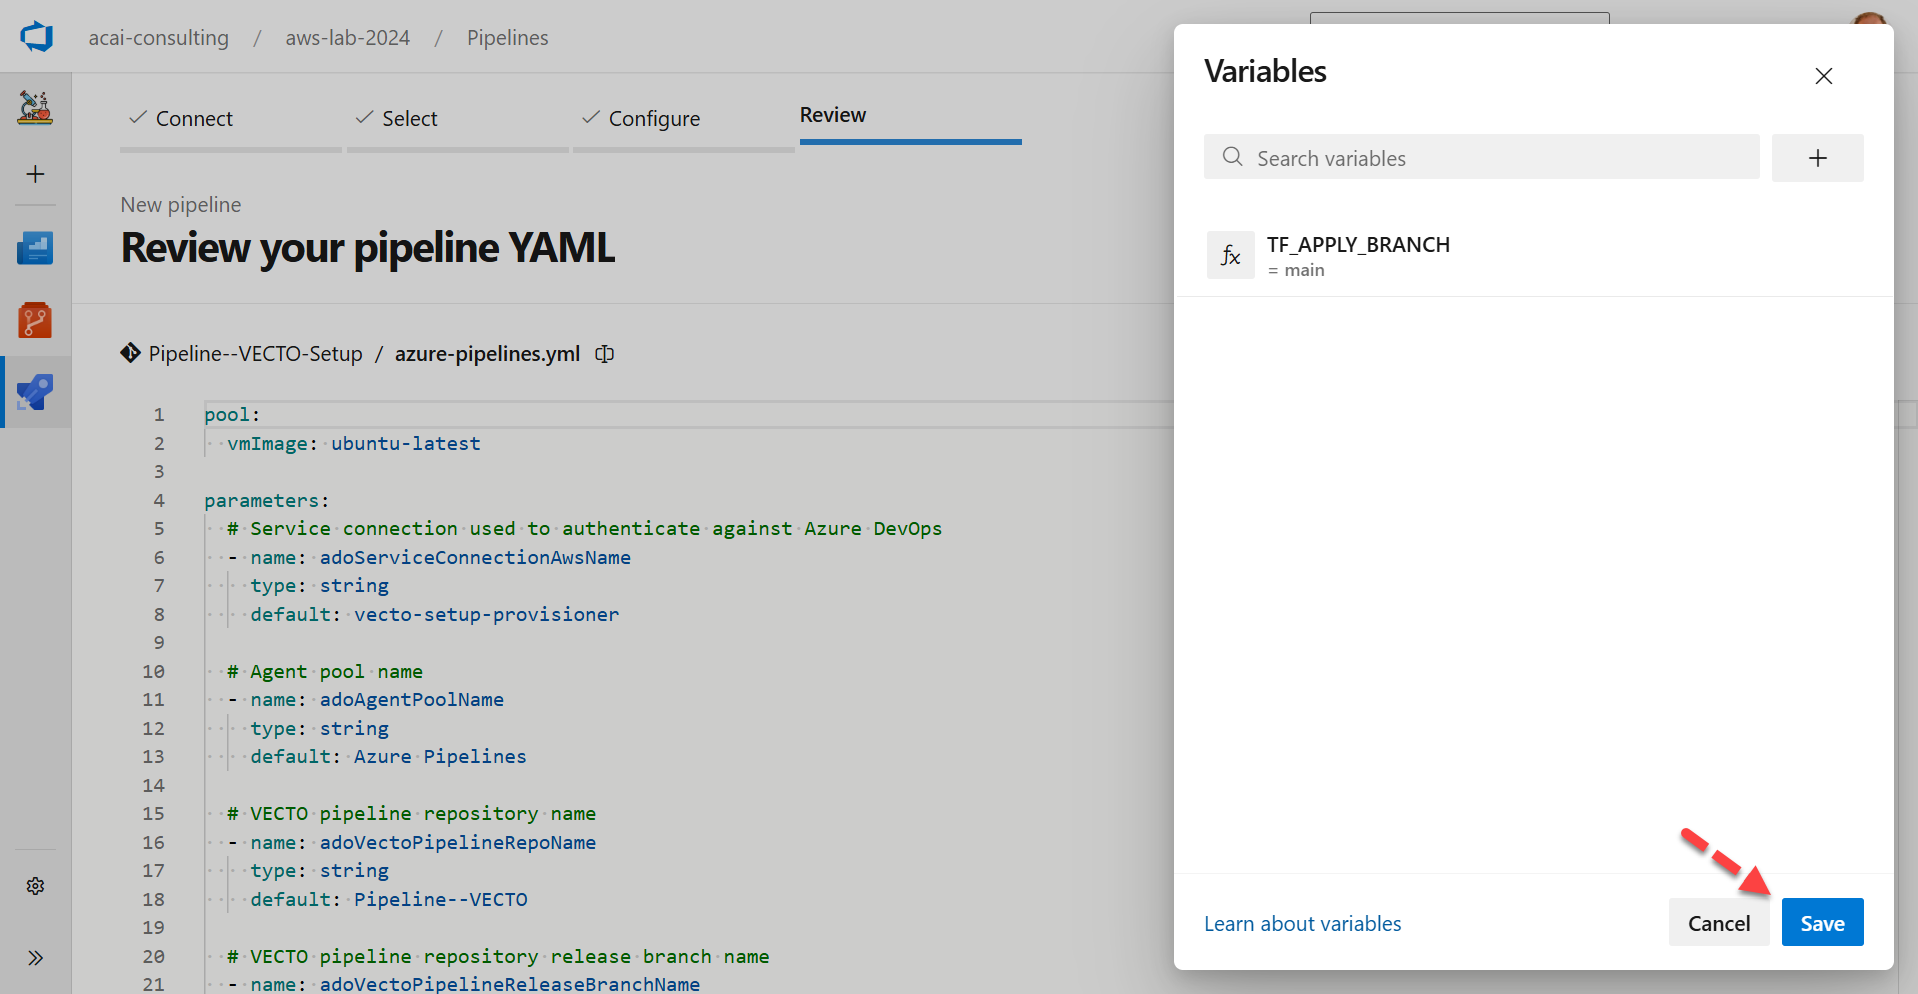
Step 6 – Save the variable
Save the variable:
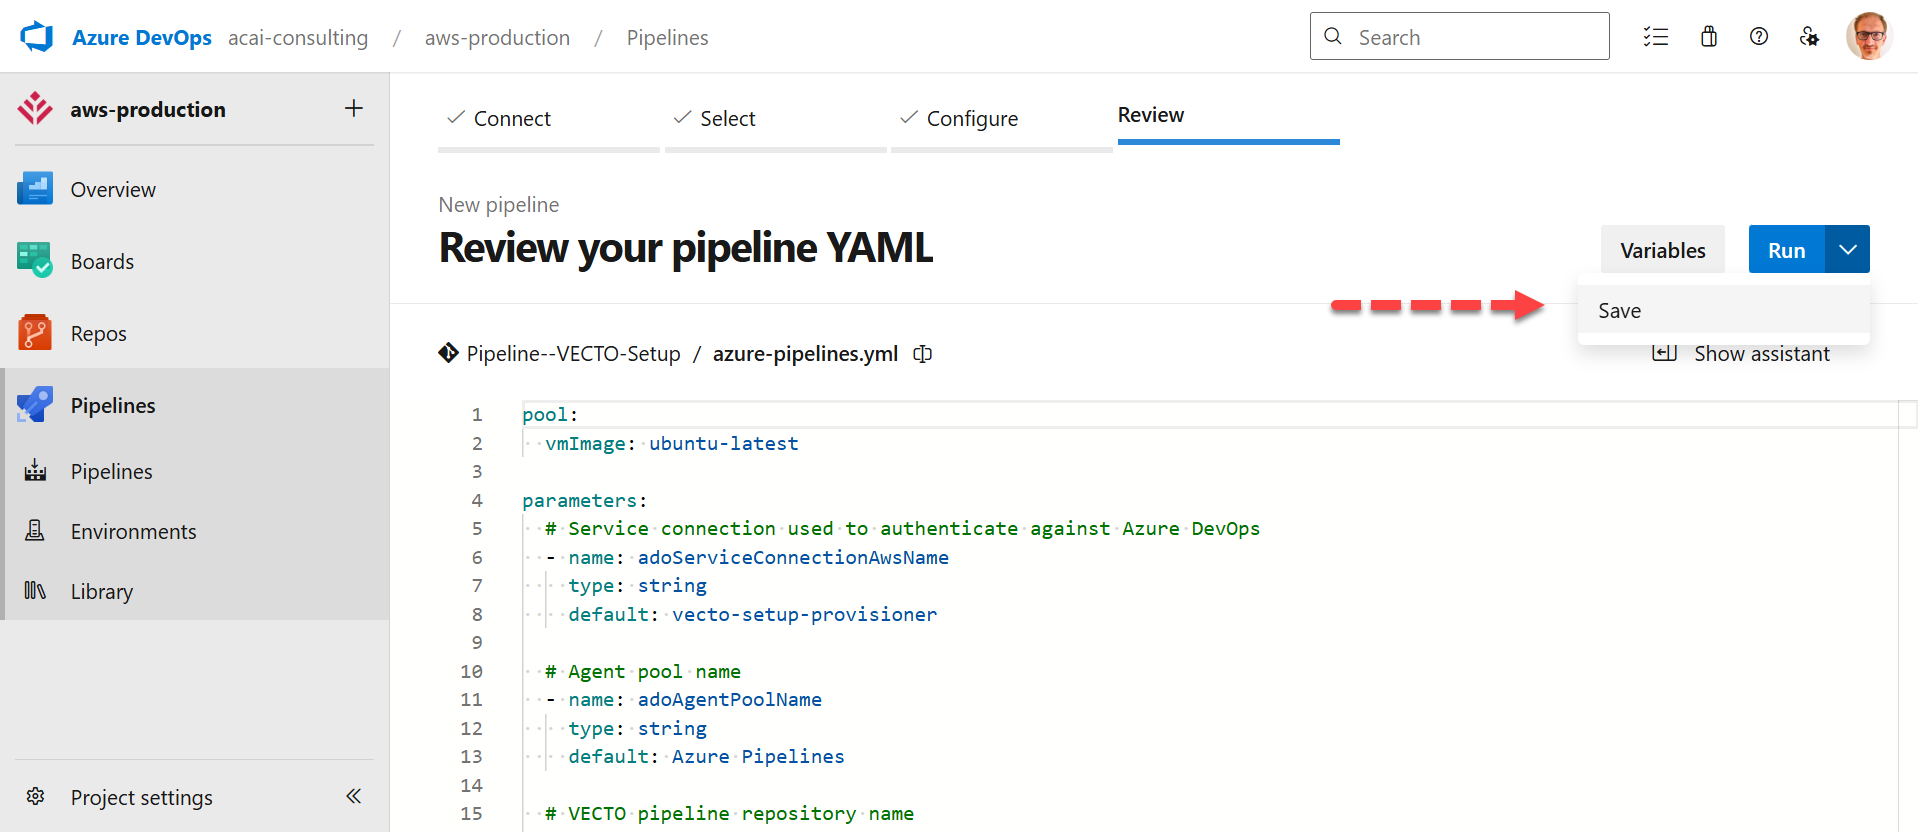
Step 7 – Save the pipeline
Save the pipeline:
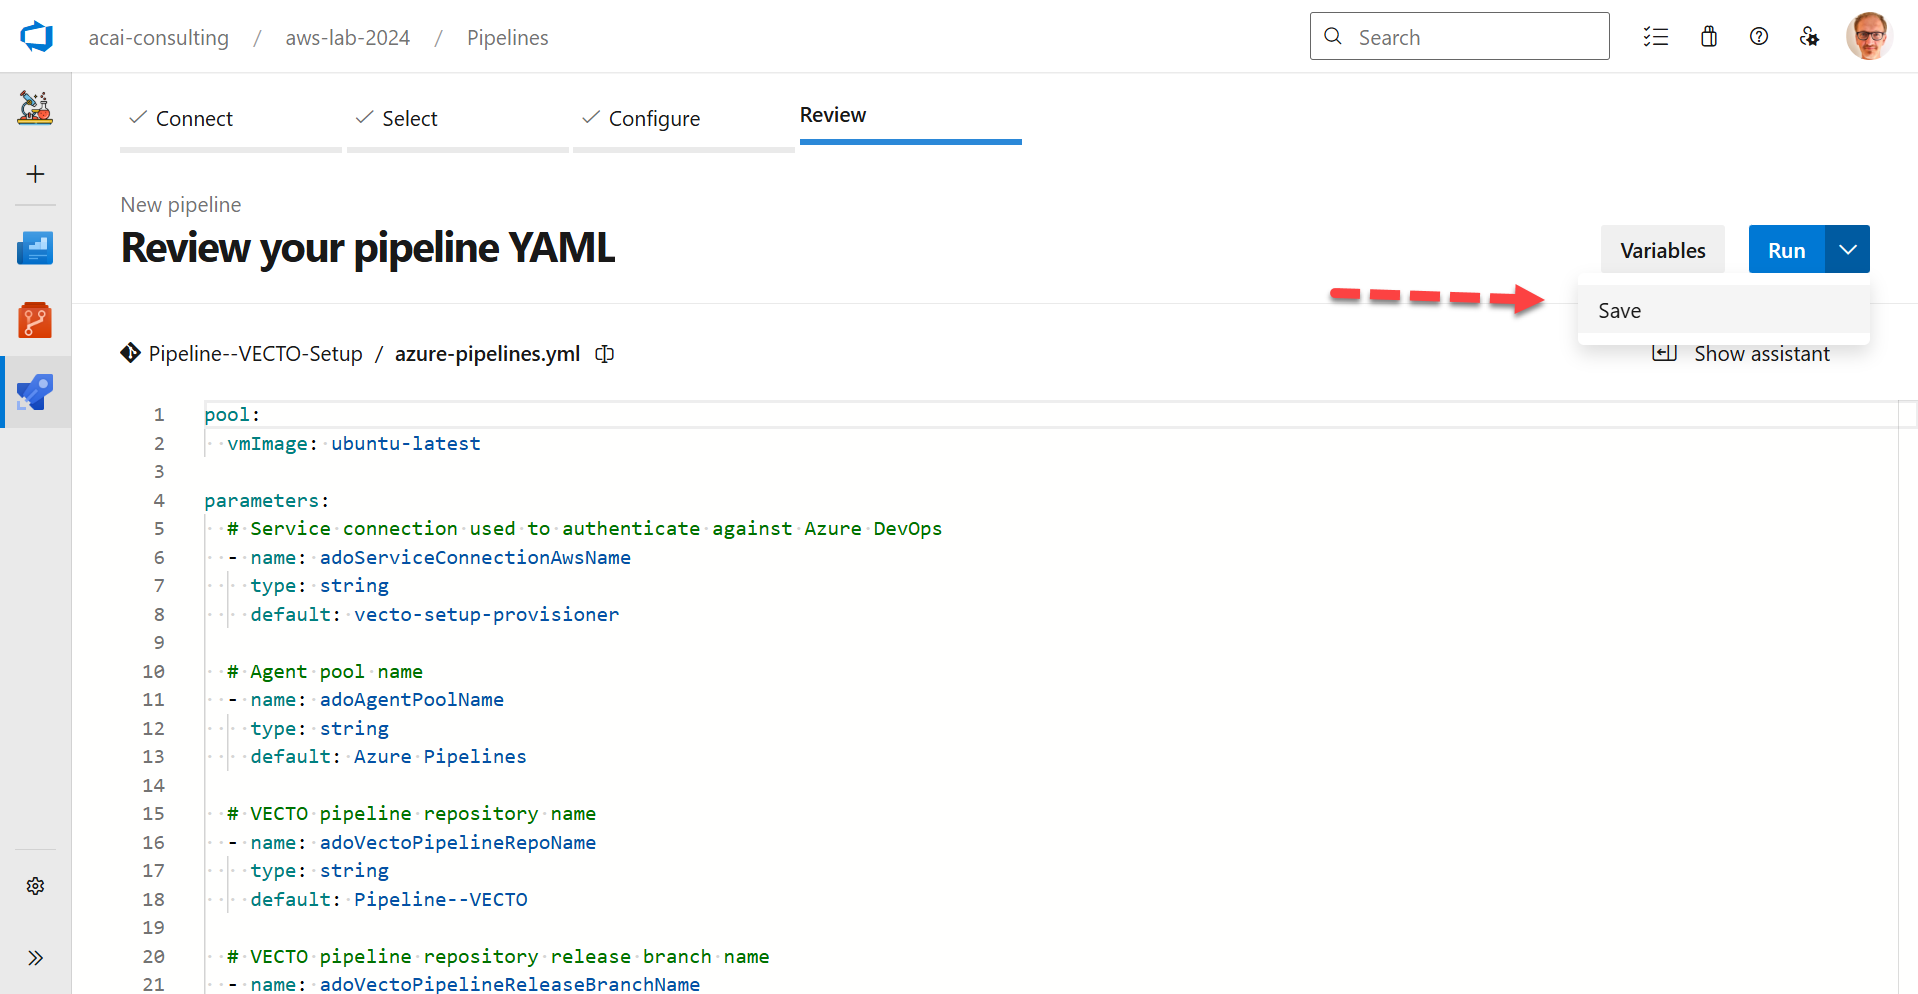
The pipeline should look like this: Link to ACAI AWS Lab
Pipeline Library – Variable Group
The VECTO Setup- and the VECTO Core pipelines require a Personal Access Token (PAT) to create and manage Azure DevOps repositories and pipelines.
Store this PAT in a Pipeline Library Variable Group.
Step 1 – Open Pipelines > Library
Navigate to the Variable Groups page:
https://dev.azure.com/<YOUR_ADO_ORGANIZATION_NAME>/<YOUR_ADO_PROJECT_NAME>/_library?itemType=VariableGroups
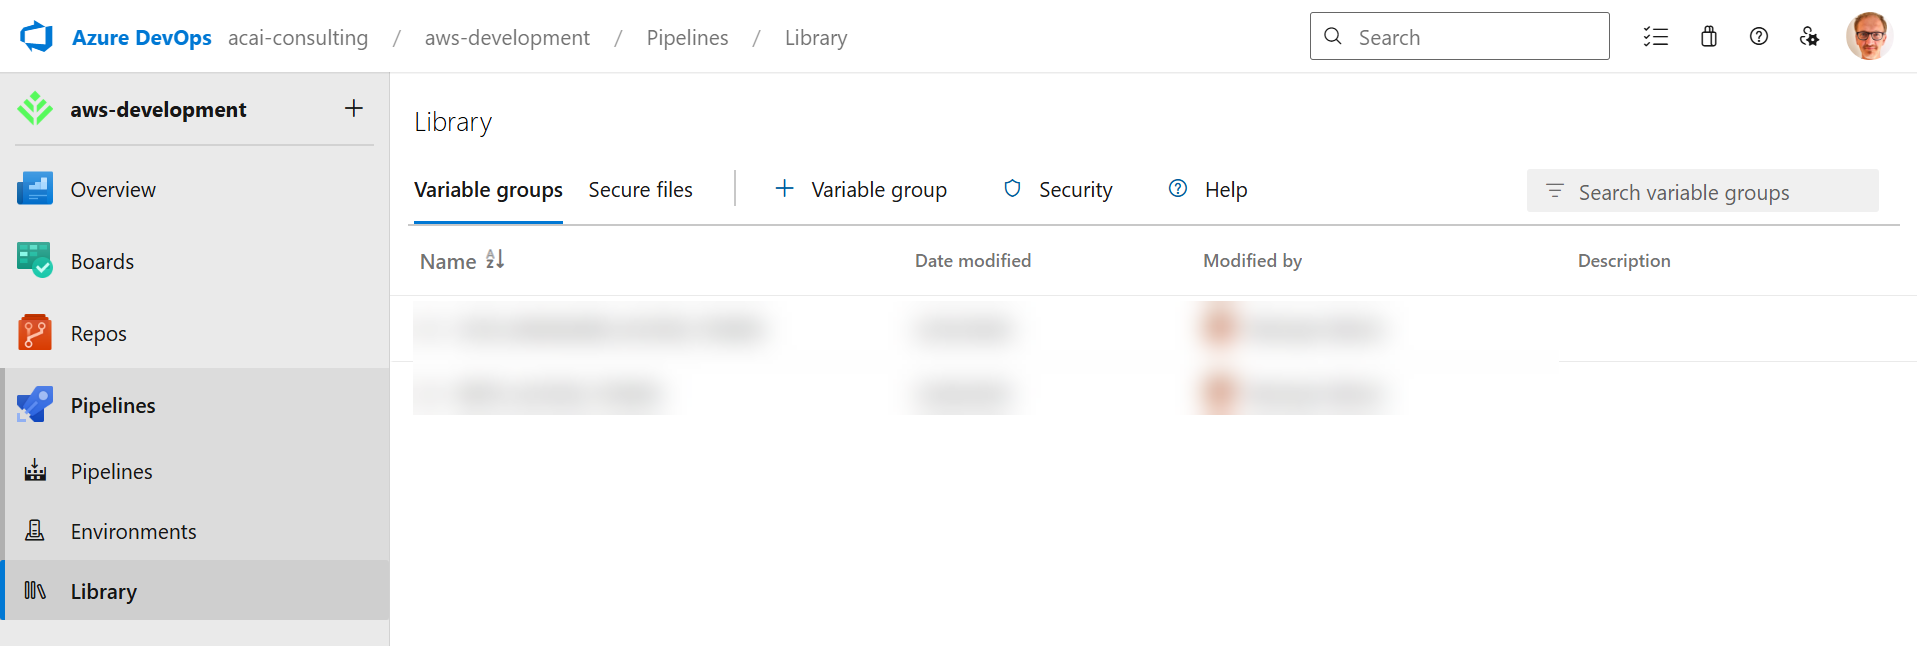
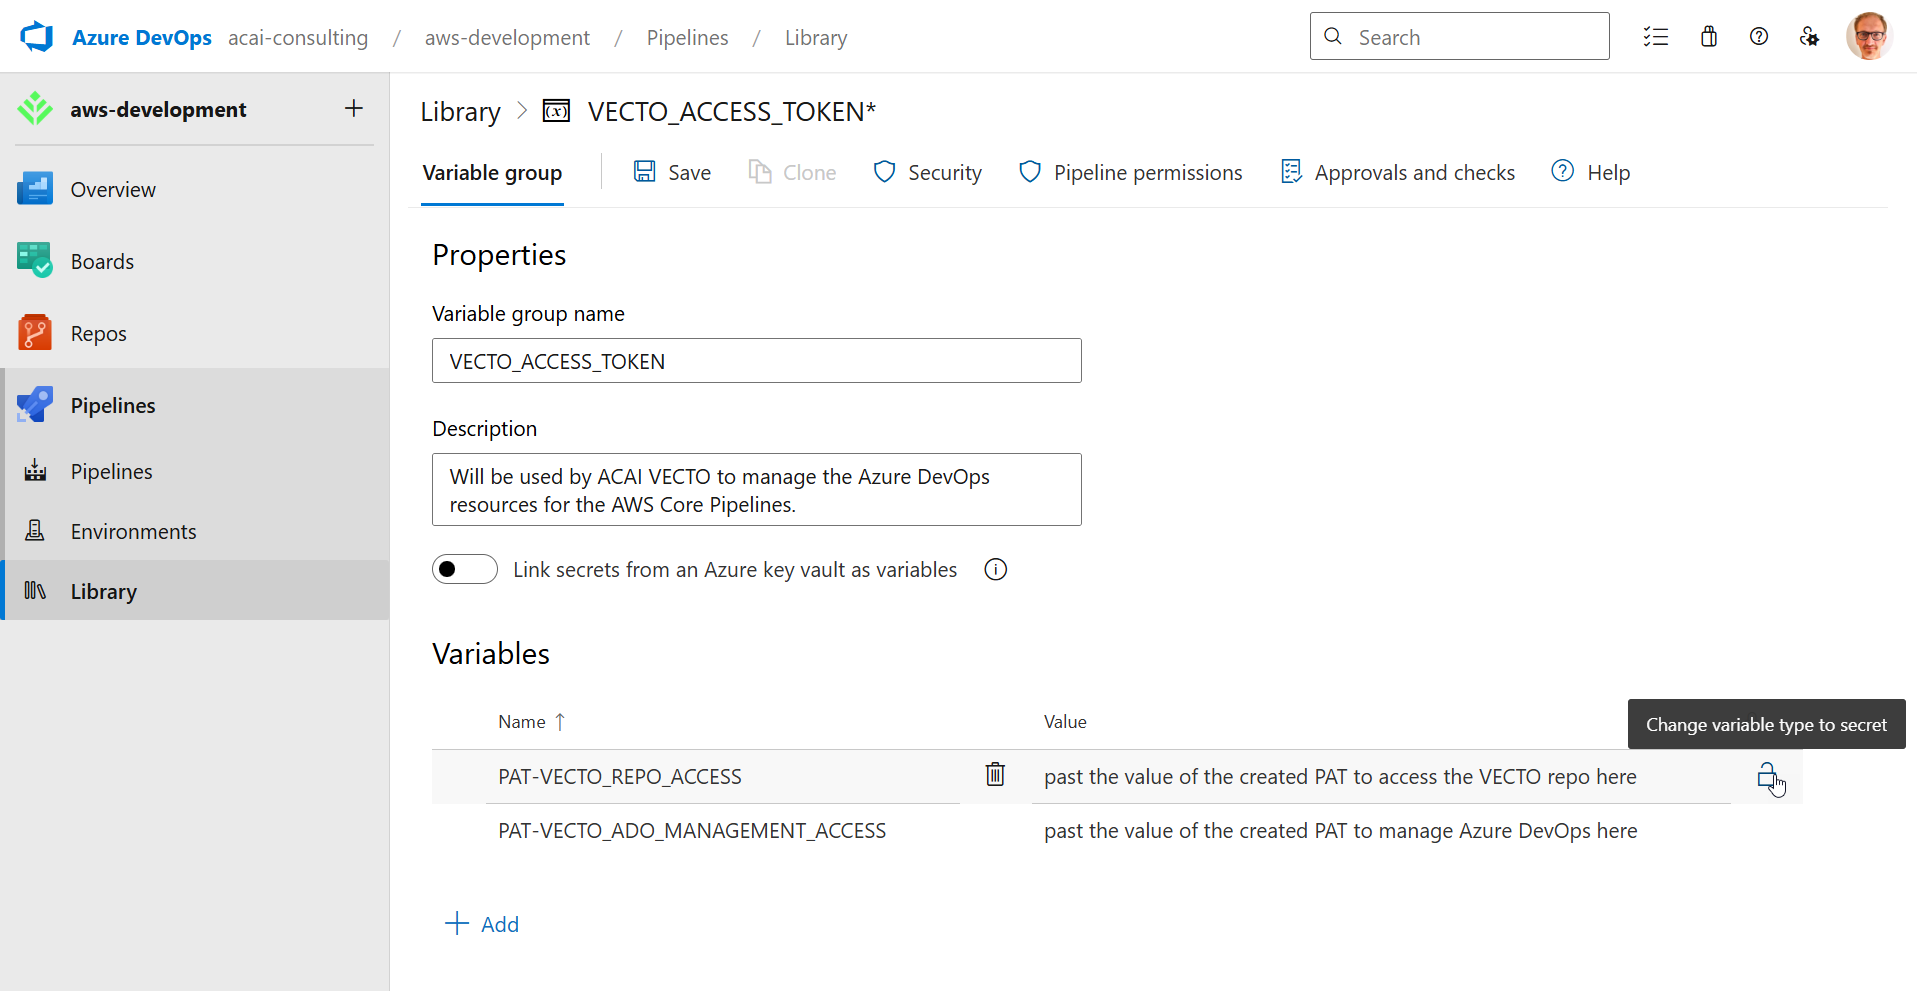
Step 2 – Create the Variable Group
- Select: + Variable group
- Complete the form and click: Save
| Field | Value / Action |
|---|---|
| Variable group name | PAT-VECTO_ACCESS_TOKEN |
| Description | Used by VECTO to manage Azure DevOps resources for the AWS Core pipelines. |
| Variable 1 Name | PAT-VECTO_REPO_ACCESS |
| Variable 1 Value | If you host the VECTO repo in the same Azure DevOps project (default), you can use the PAT you generated earlier (see section Personal Access Token). |
| Variable 1 Value Lock | Enable the lock icon to protect the PAT. |
| Variable 2 Name | PAT-VECTO_ADO_MANAGEMENT_ACCESS |
| Variable 2 Value | Paste the PAT you generated earlier (see section Personal Access Token). |
| Variable 2 Value Lock | Enable the lock icon to protect the PAT. |
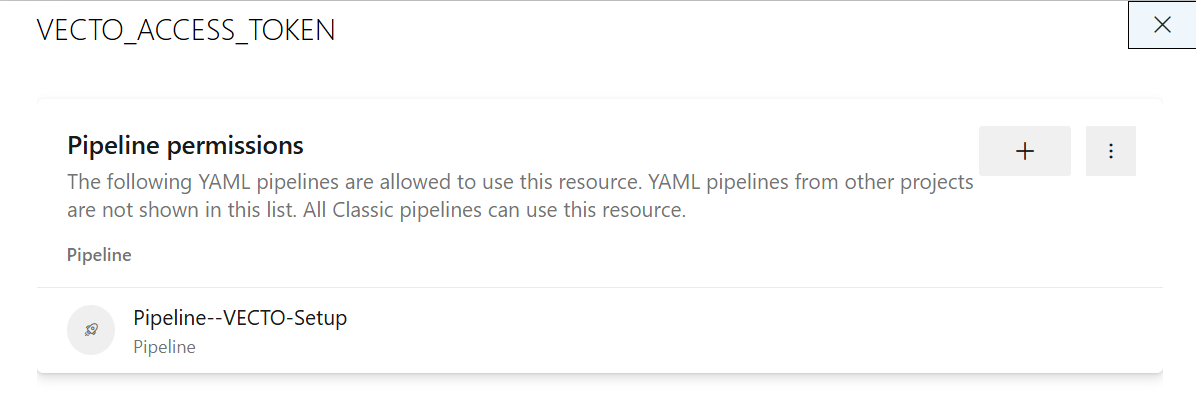
Step 3 – Grant access to the VECTO Setup Pipeline
- Click: Pipeline permissions
- Click + and add the Pipeline--VECTO-Setup pipeline
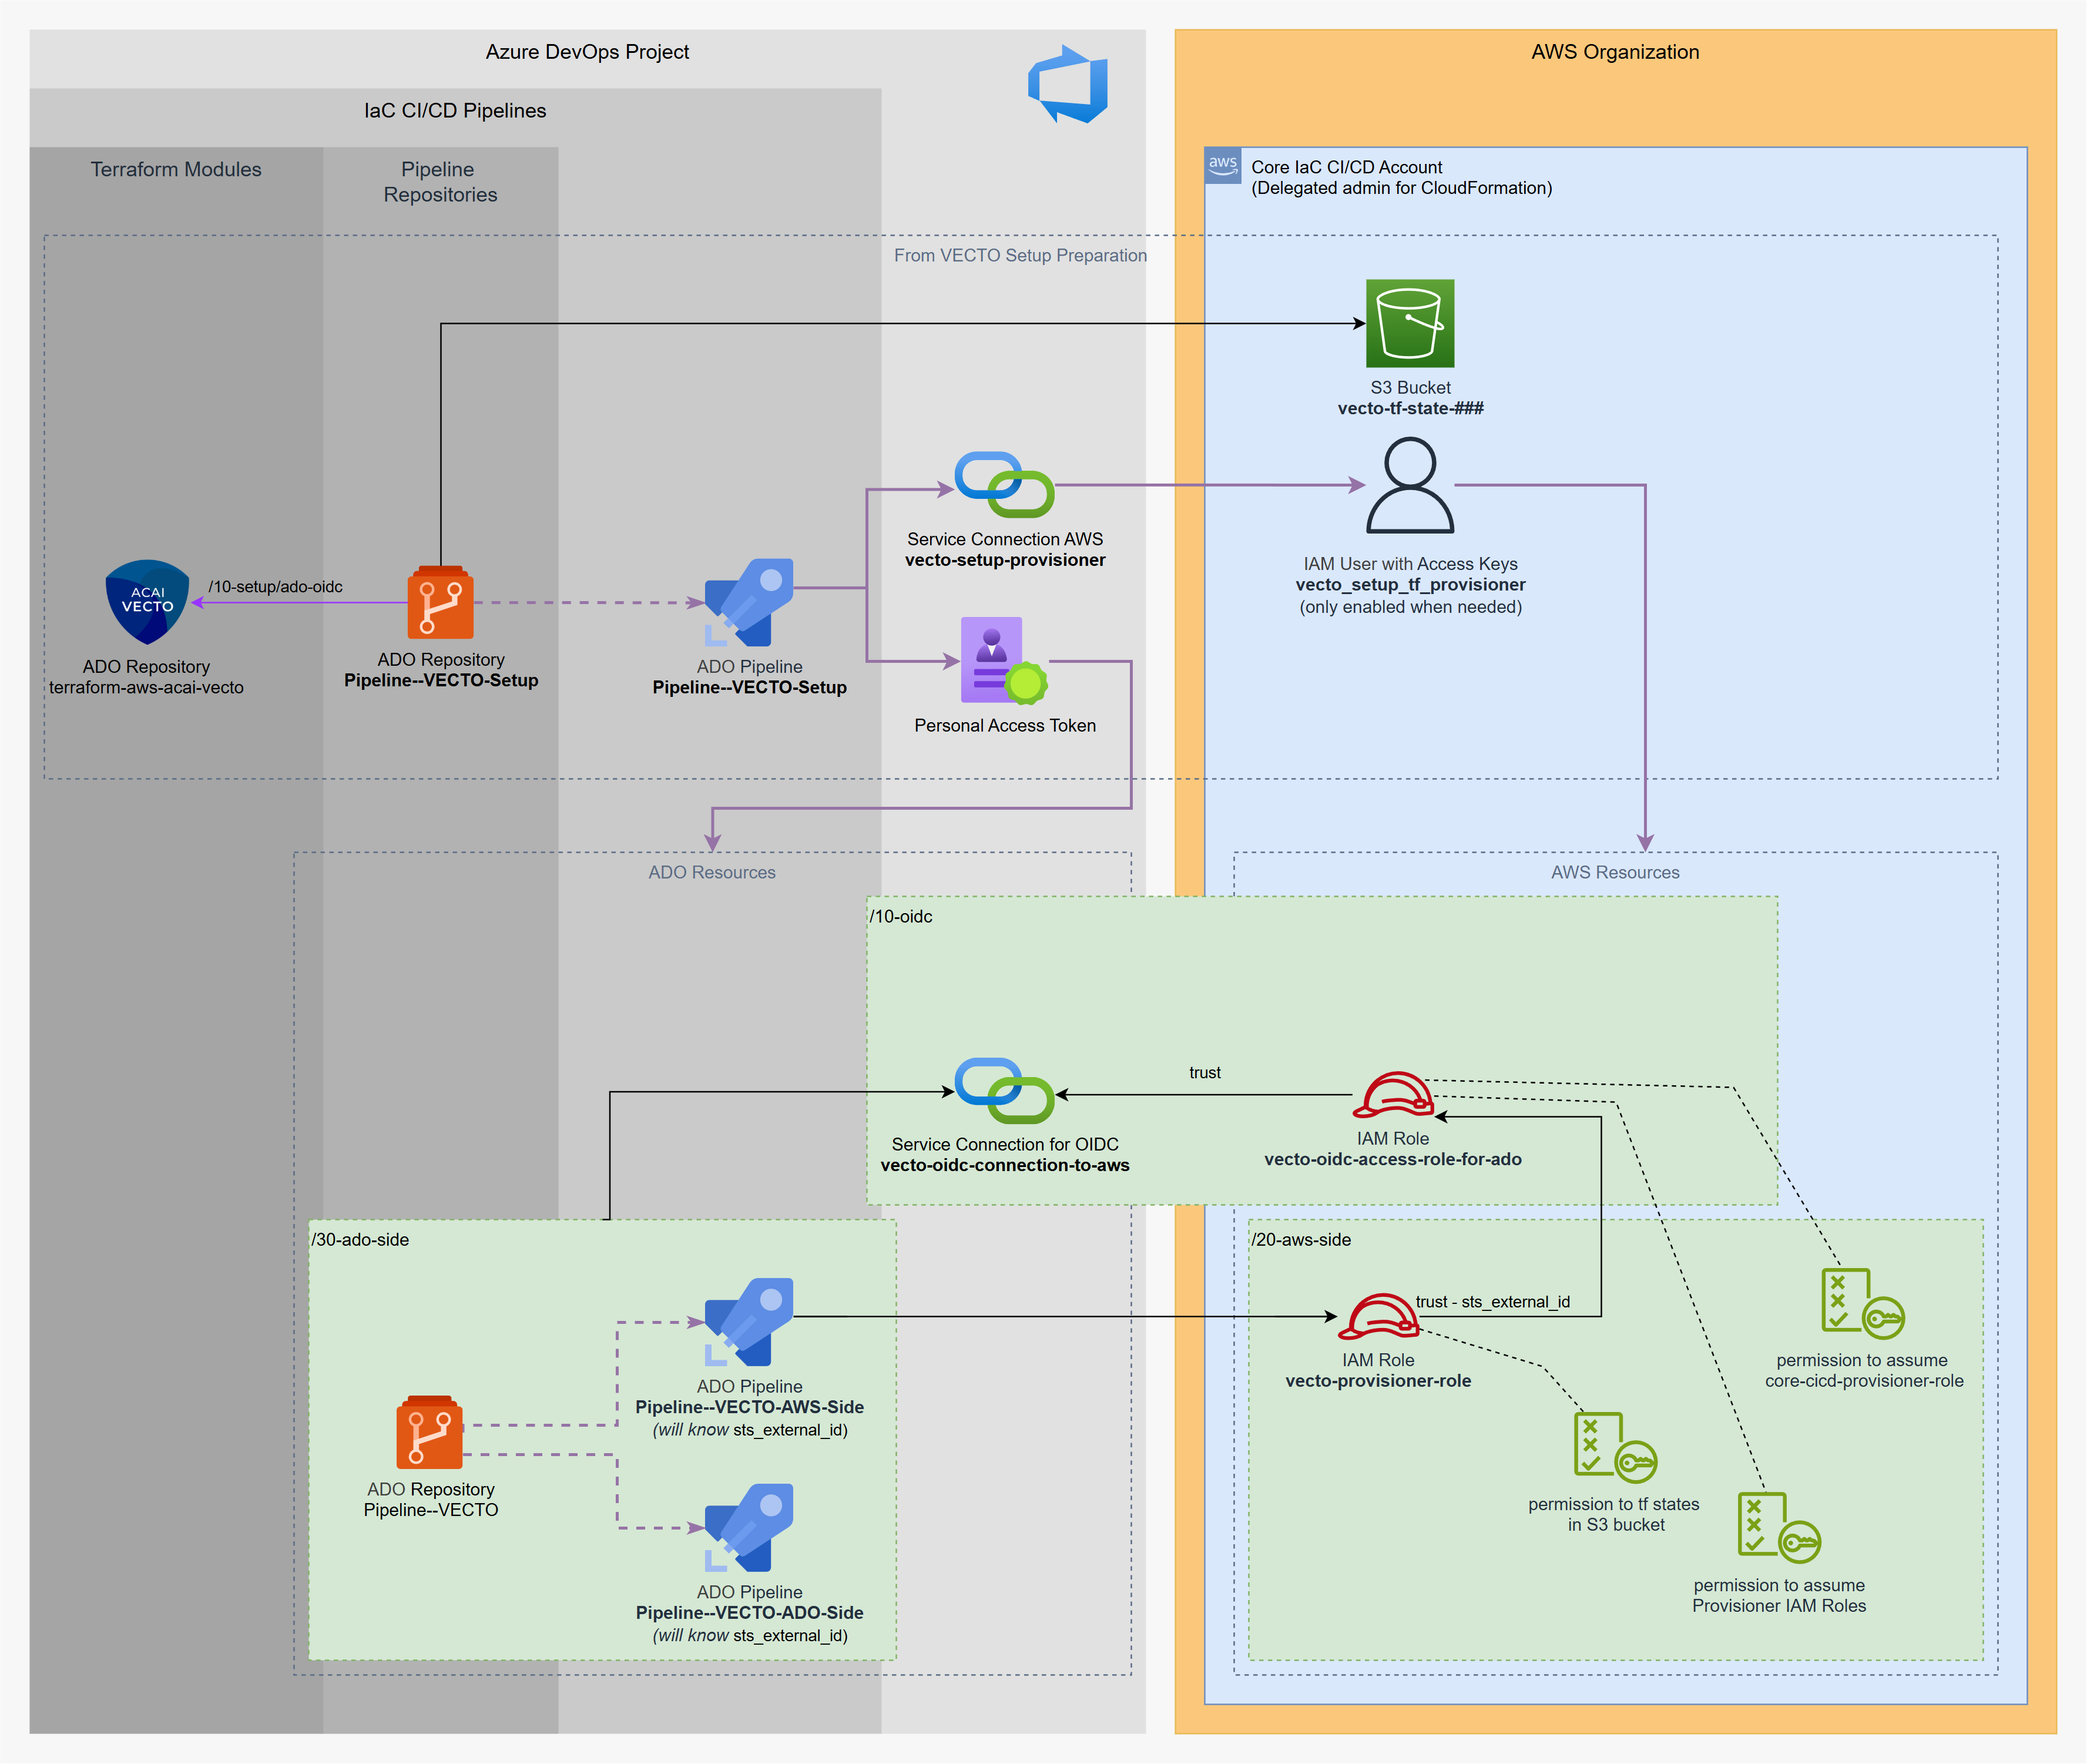
Step 2 - VECTO Setup
Running the VECTO Setup Pipeline will deploy the VECTO Solution with the following resources on the AWS and Azure DevOps side:
- OIDC connection from Azure DevOps to the Core IaC CI/CD AWS account.
- AWS IAM Role for VECTO provisioning:
vecto-provisioner-role - Azure DevOps pipeline-repo and pipelines for VECTO provisioning. Two pipelines will be provisioned, one for provisioning the AWS-part and one for provisioning the ADO-part segregated from each other.
Run VECTO Setup Pipeline
In this step, you will update the VECTO Setup parameters and deploy the solution.
If you manage multiple AWS Organizations (for example, Dev/Test and Production), create a separate VECTO deployment for each Organization. Do this by creating a branch per AWS Organization in your VECTO Setup repository so each branch can hold organization-specific pipeline parameters, Terraform state bucket names, and resource prefixes.
Recommended branch naming examples:
- aws-lz-dev
- aws-lz-test
- aws-lz-prod
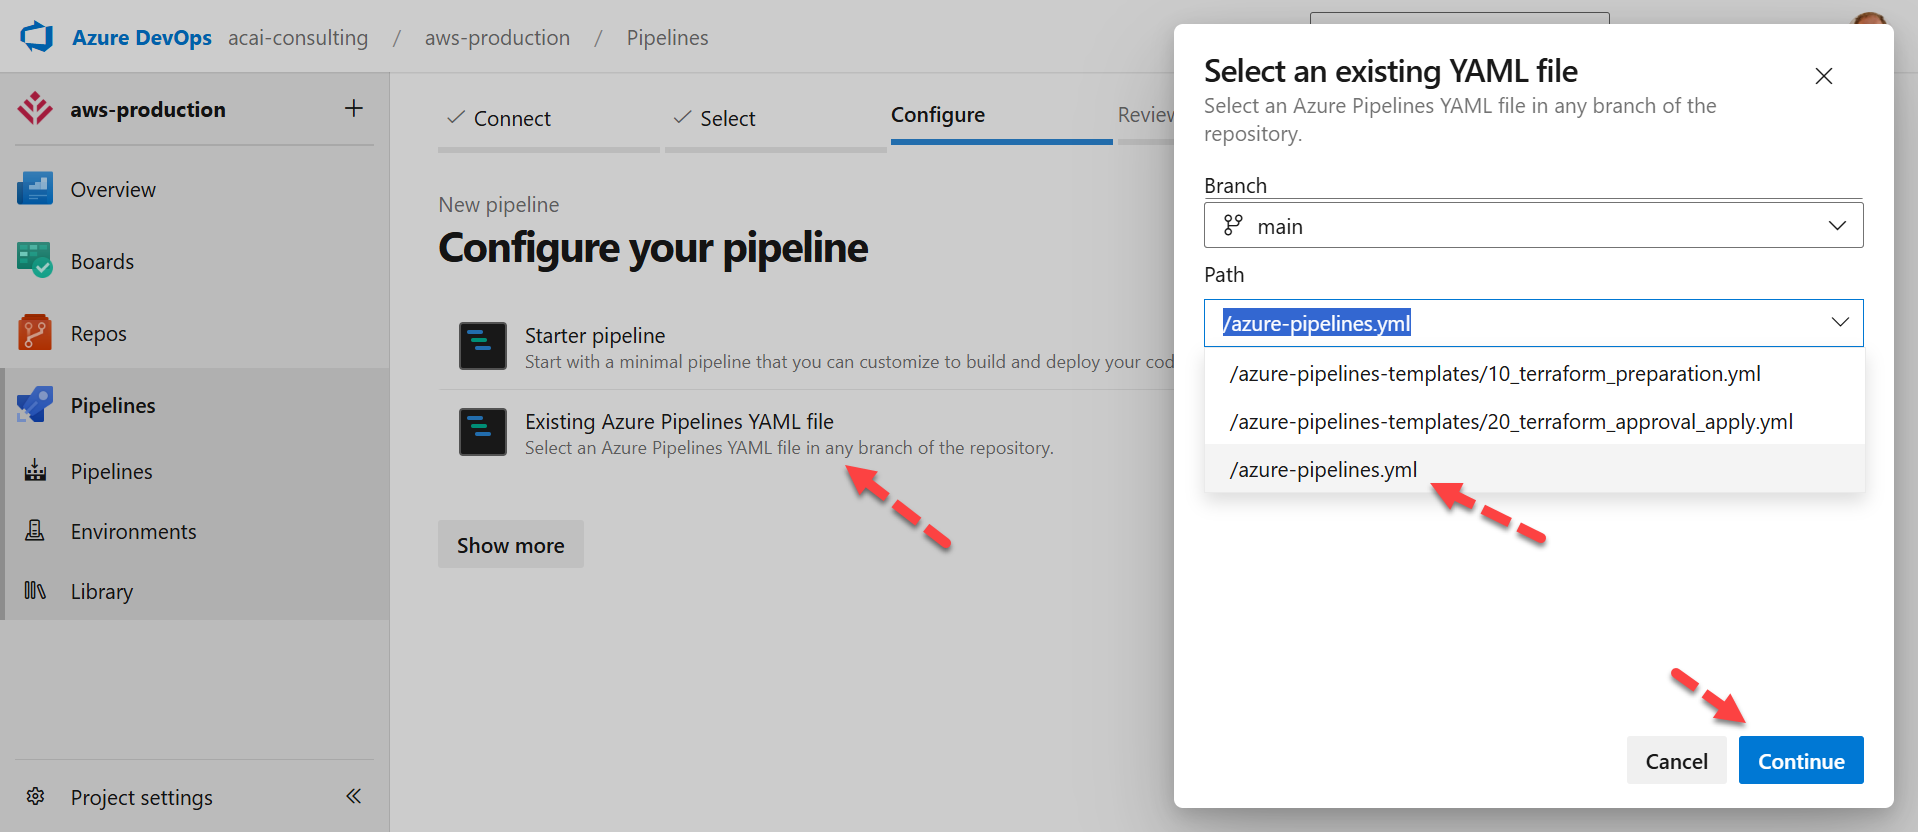
Step 1 – Update the Pipeline Variables
In the appropriate branch of your VECTO Setup repository, locate the file './azure-pipelines.yml' and edit the following variables section as needed:
variables:
#...
# env_id = e.g. "Prod" or "Test" or "Dev"
# segregation_id = '' or 'security' for security-team

# S3 bucket for VECTO Terraform remote state as created by VECTO Preparation CloudFormation.
- name: awsVectoTfStateBucketName
  value: 'vecto-setup-tf-state-<VECTO_ACCOUNT_ID>'

# Azure DevOps service connection name for AWS access keys used by the setup pipeline.
- name: adoServiceConnectionAwsName
  value: 'vecto-setup-provisioner{-lower(env_id)}'

# Variable group name that holds pipeline secrets/PATs for the VECTO pipeline.
- name: adoVectoPipelineVariableGroupName
  value: 'VECTO_ACCESS_TOKEN'

# Base Git URL hosting the VECTO Terraform module repository.
# If you host it in your own environment, put your URL.
- name: vectoRepoGitUrl
  value: 'github.com/acai-solutions/'

# Name of the Terraform module repository containing VECTO definitions.
# If you host it in your own environment, put your repository name.
- name: vectoRepoName
  value: 'terraform-aws-acai-vecto'

# Branch of the module repository to use for provisioning.
- name: vectoRepoBranchName
  value: '2.1.1'

# Name of the created OIDC-based Azure DevOps service connection used to access AWS.
# The suffix 'aws-lz-prod' should represent the target AWS Organization.
- name: oidcAdoServiceConnectionName
  value: 'acai-vecto-oidc-connection-to-aws-lz{-lower(env_id)}'

# Set to true if an existing OIDC provider for Azure DevOps is already deployed in AWS.
# This will be the case if you have a parallel VECTO installation running in the AWS Organization.
- name: oidcAwsProviderDeployed
  value: false

# Agent pool name used to run the AWS pipeline jobs.
- name: adoAgentPoolName
  value: 'Azure Pipelines'

# Display name of the VECTO pipeline created in Azure DevOps.
- name: adoVectoPipelineName
  value: 'AWS-LZ{-env_id}-VECTO'

# Azure DevOps Pipeline-Path for the VECTO Pipelines.
- name: adoVectoPipelinePathName
  value: '/AWS-LZ-VECTO'

# Repository name in Azure DevOps that will host the VECTO pipeline definitions.
- name: adoVectoPipelineRepoName
  value: 'AWS-LZ-VECTO'

# Branch name that will represent the AWS Organization.
- name: adoVectoPipelineReleaseBranchName
  value: 'aws-lz{-lower(env_id)}'

# Optional prefix to segregate the VECTO Terraform states,
# in case of different parallel VECTO deployments in an AWS Organization.
- name: awsVectoTfStateFilePrefix
  value: '{segregation_id}'

# Optional prefix to segregate the VECTO AWS resources,
# in case of different parallel VECTO deployments in an AWS Organization.
- name: awsResourceNamePrefix
  value: '{segregation_id}'

# AWS region where the VECTO resources will be provisioned.
- name: awsRegionName
  value: 'eu-central-1'

# Terraform CLI version to be used by the pipelines.
- name: tfVersion
  value: '1.5.7'
Step 2 – Run the VECTO Setup Pipeline
- In Pipelines, select: All pipelines
- Choose: Pipeline--VECTO-Setup
- Select the correct branch and ensure the pipeline variable
TF_APPLY_BRANCHhas the right value. - Click Run to execute the Terraform stages.
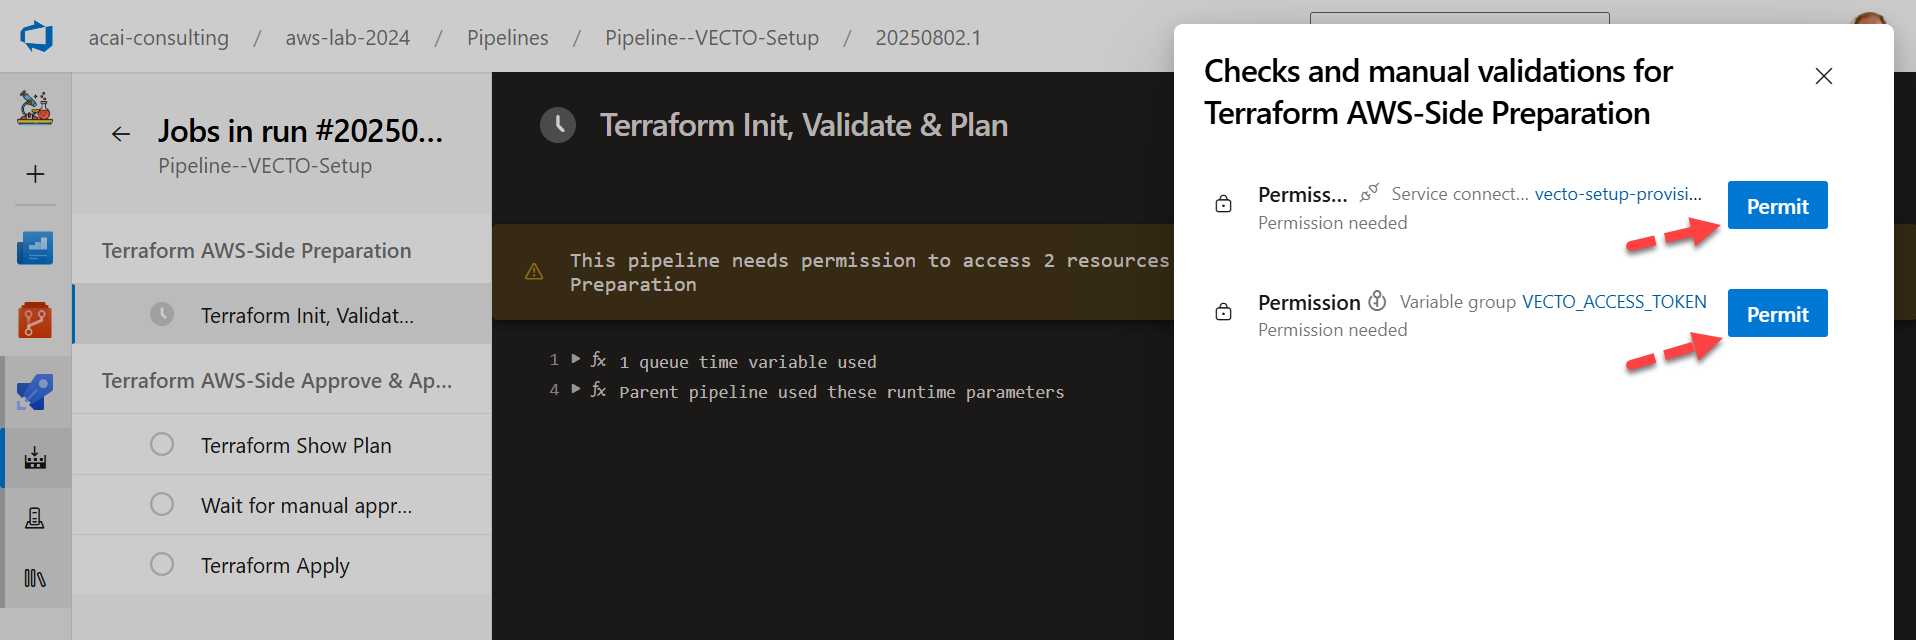
Step 3 – Grant permissions to pipeline
In the first run you are asked to provide permissions to the variable group.
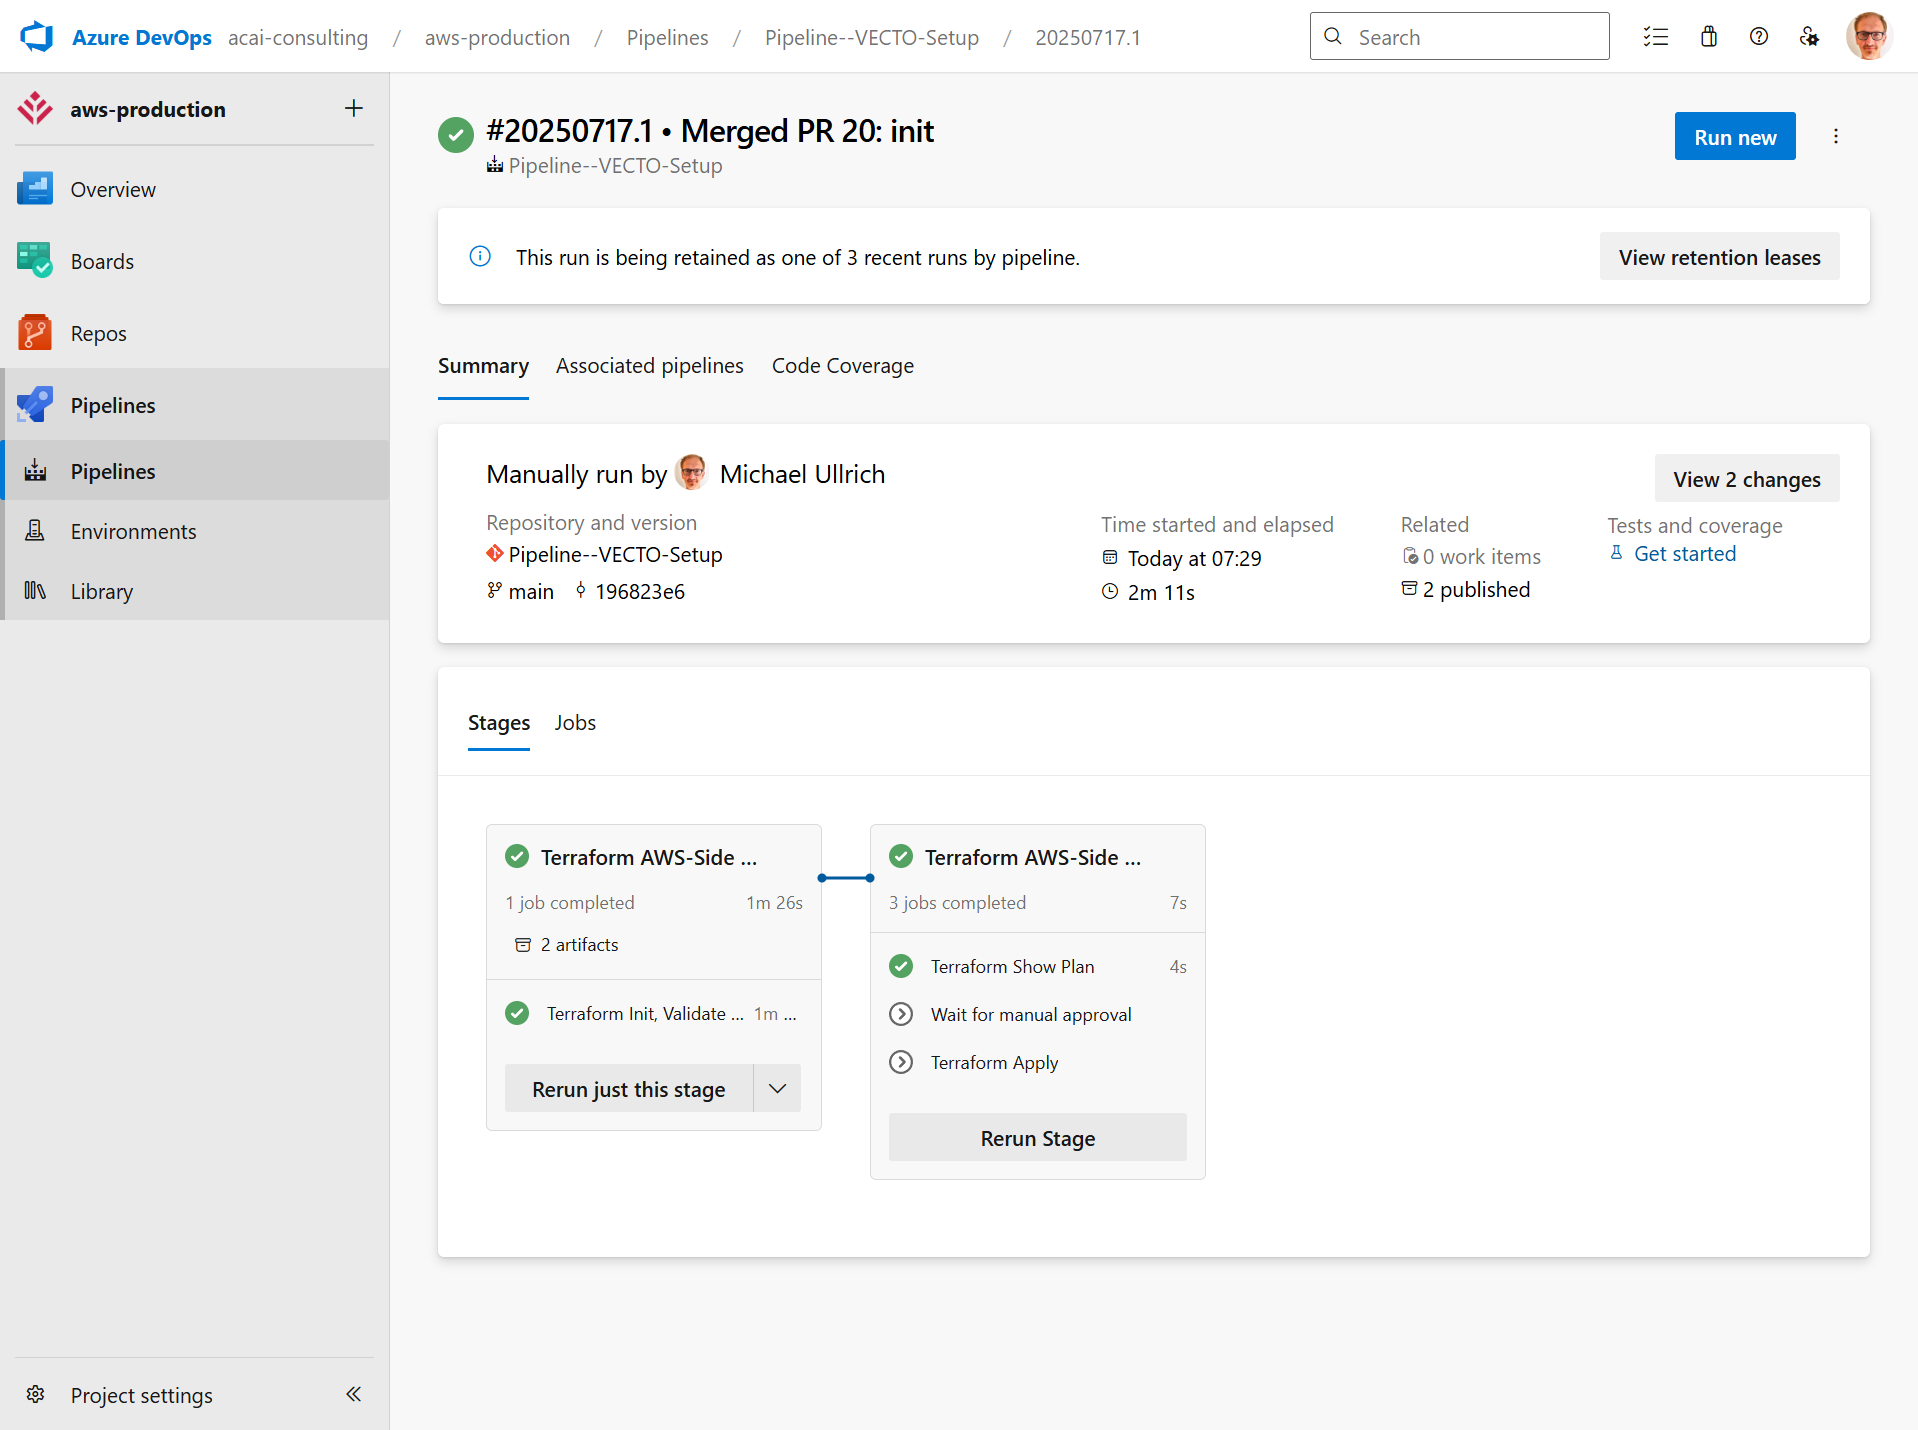
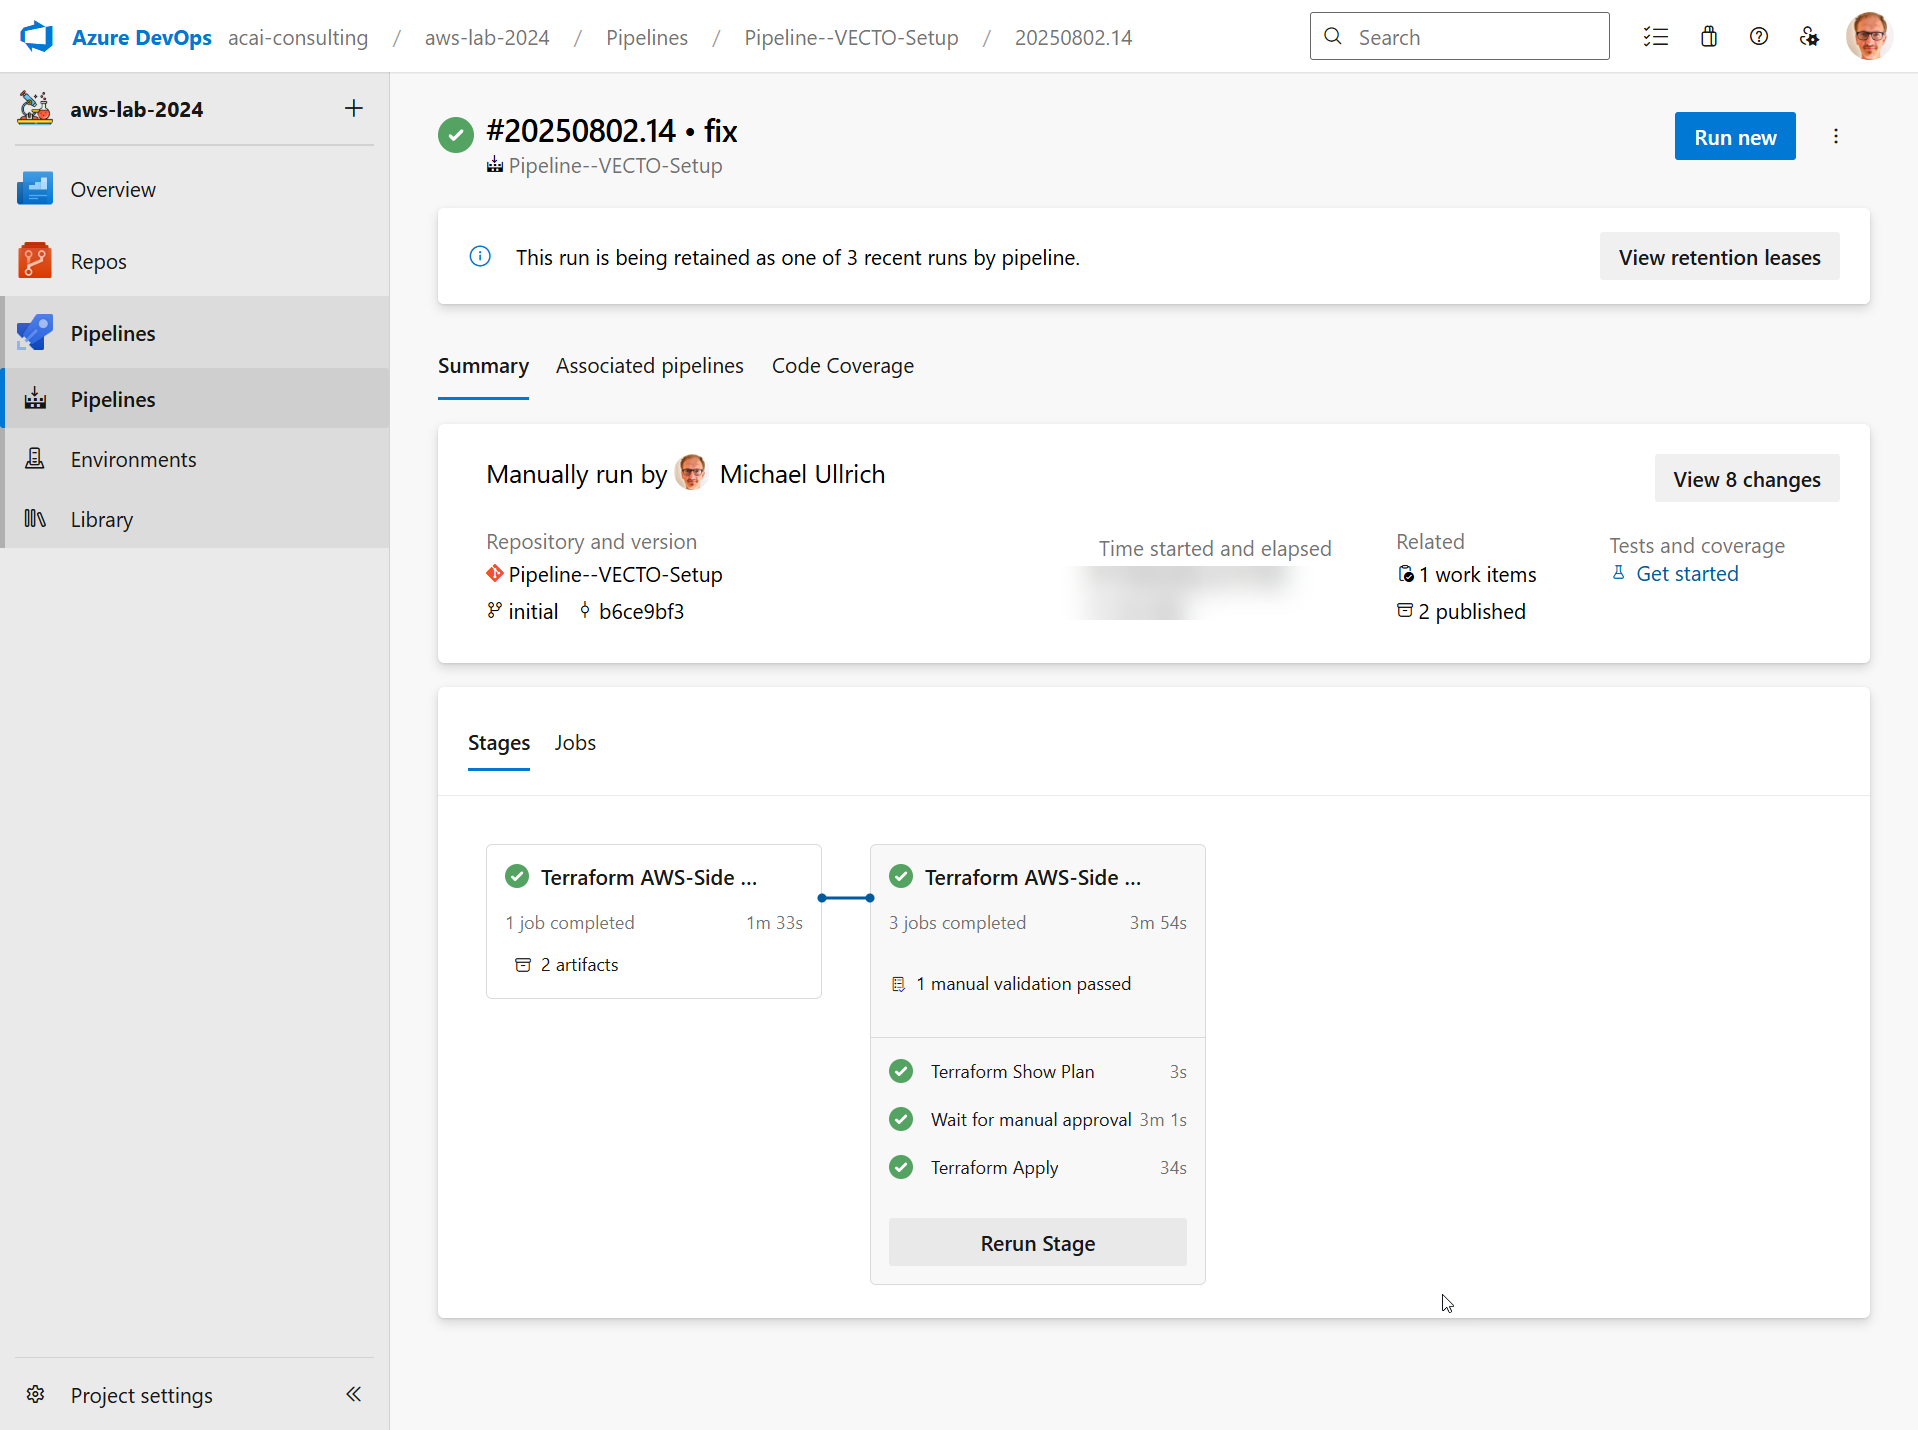
Step 3 – VECTO Setup pipeline will be executed
VECTO Setup for Organization Management
In case you want to access the AWS Organization Management account from the VECTO Pipelines (which will be the most common case) you will need to provision the vecto--pipeline-stacksets--member-role to this account.
The IAM role will be assumed by the Core IaC CI/CD account to provision the VECTO Pipeline Target Principals.
The IAM role will be provisioned by CloudFormation.
Step 1 – Create CloudFormation Stack for vecto--pipeline-stacksets--member-role
- Login to the AWS Organization Management account and navigate to CloudFormation.
- Select: Create stack → With new resources
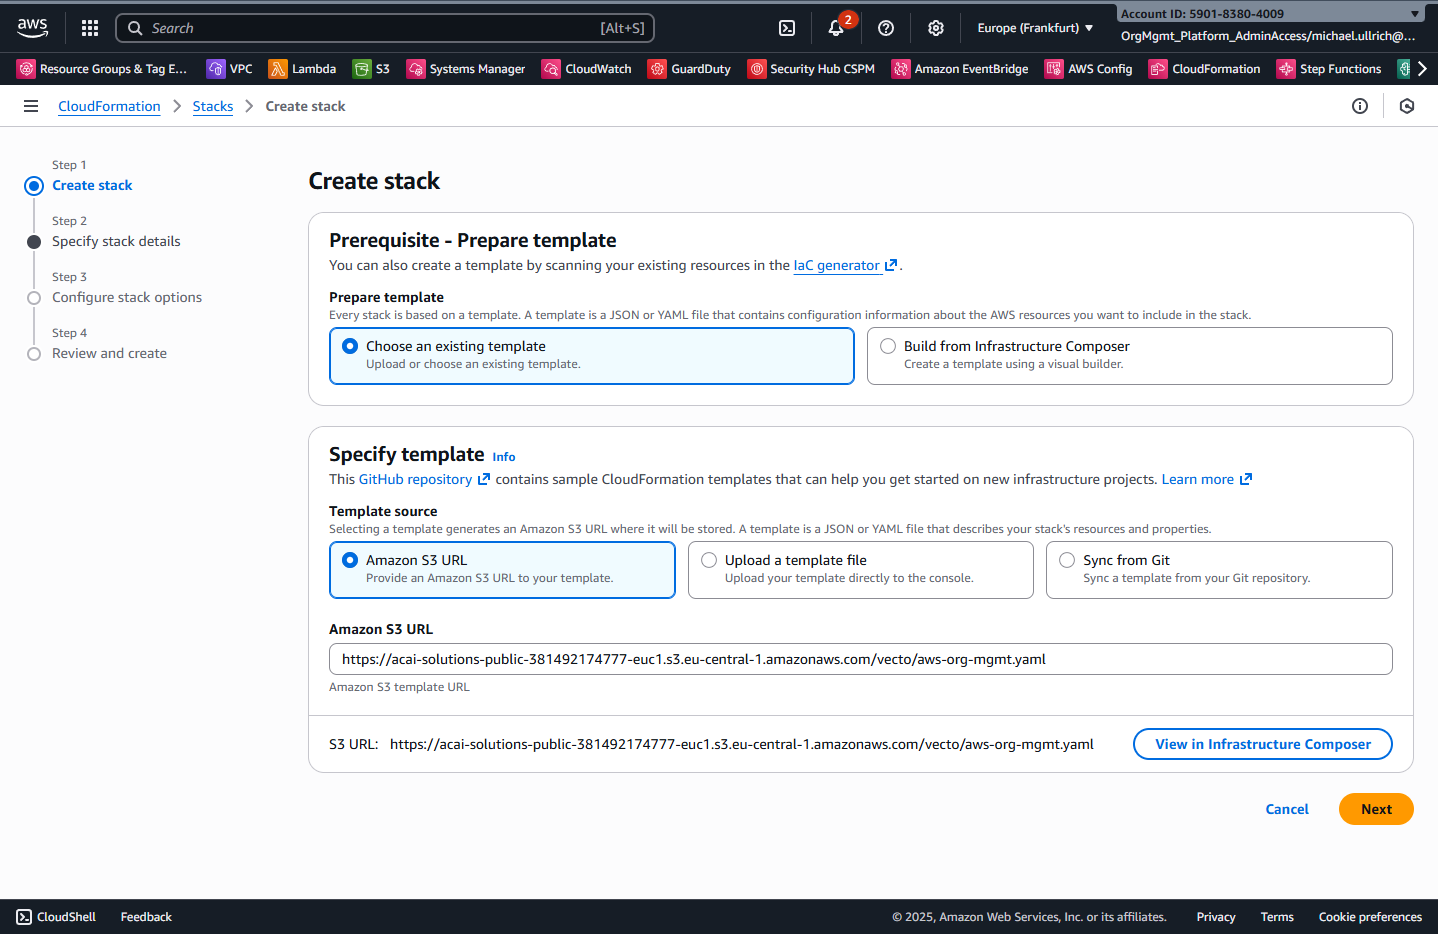
Step 2 – Configure Stack Template
Apply the shown settings and paste this URL as Amazon S3 URL:
https://acai-solutions-public-381492174777-euc1.s3.eu-central-1.amazonaws.com/vecto/aws-org-mgmt.yaml
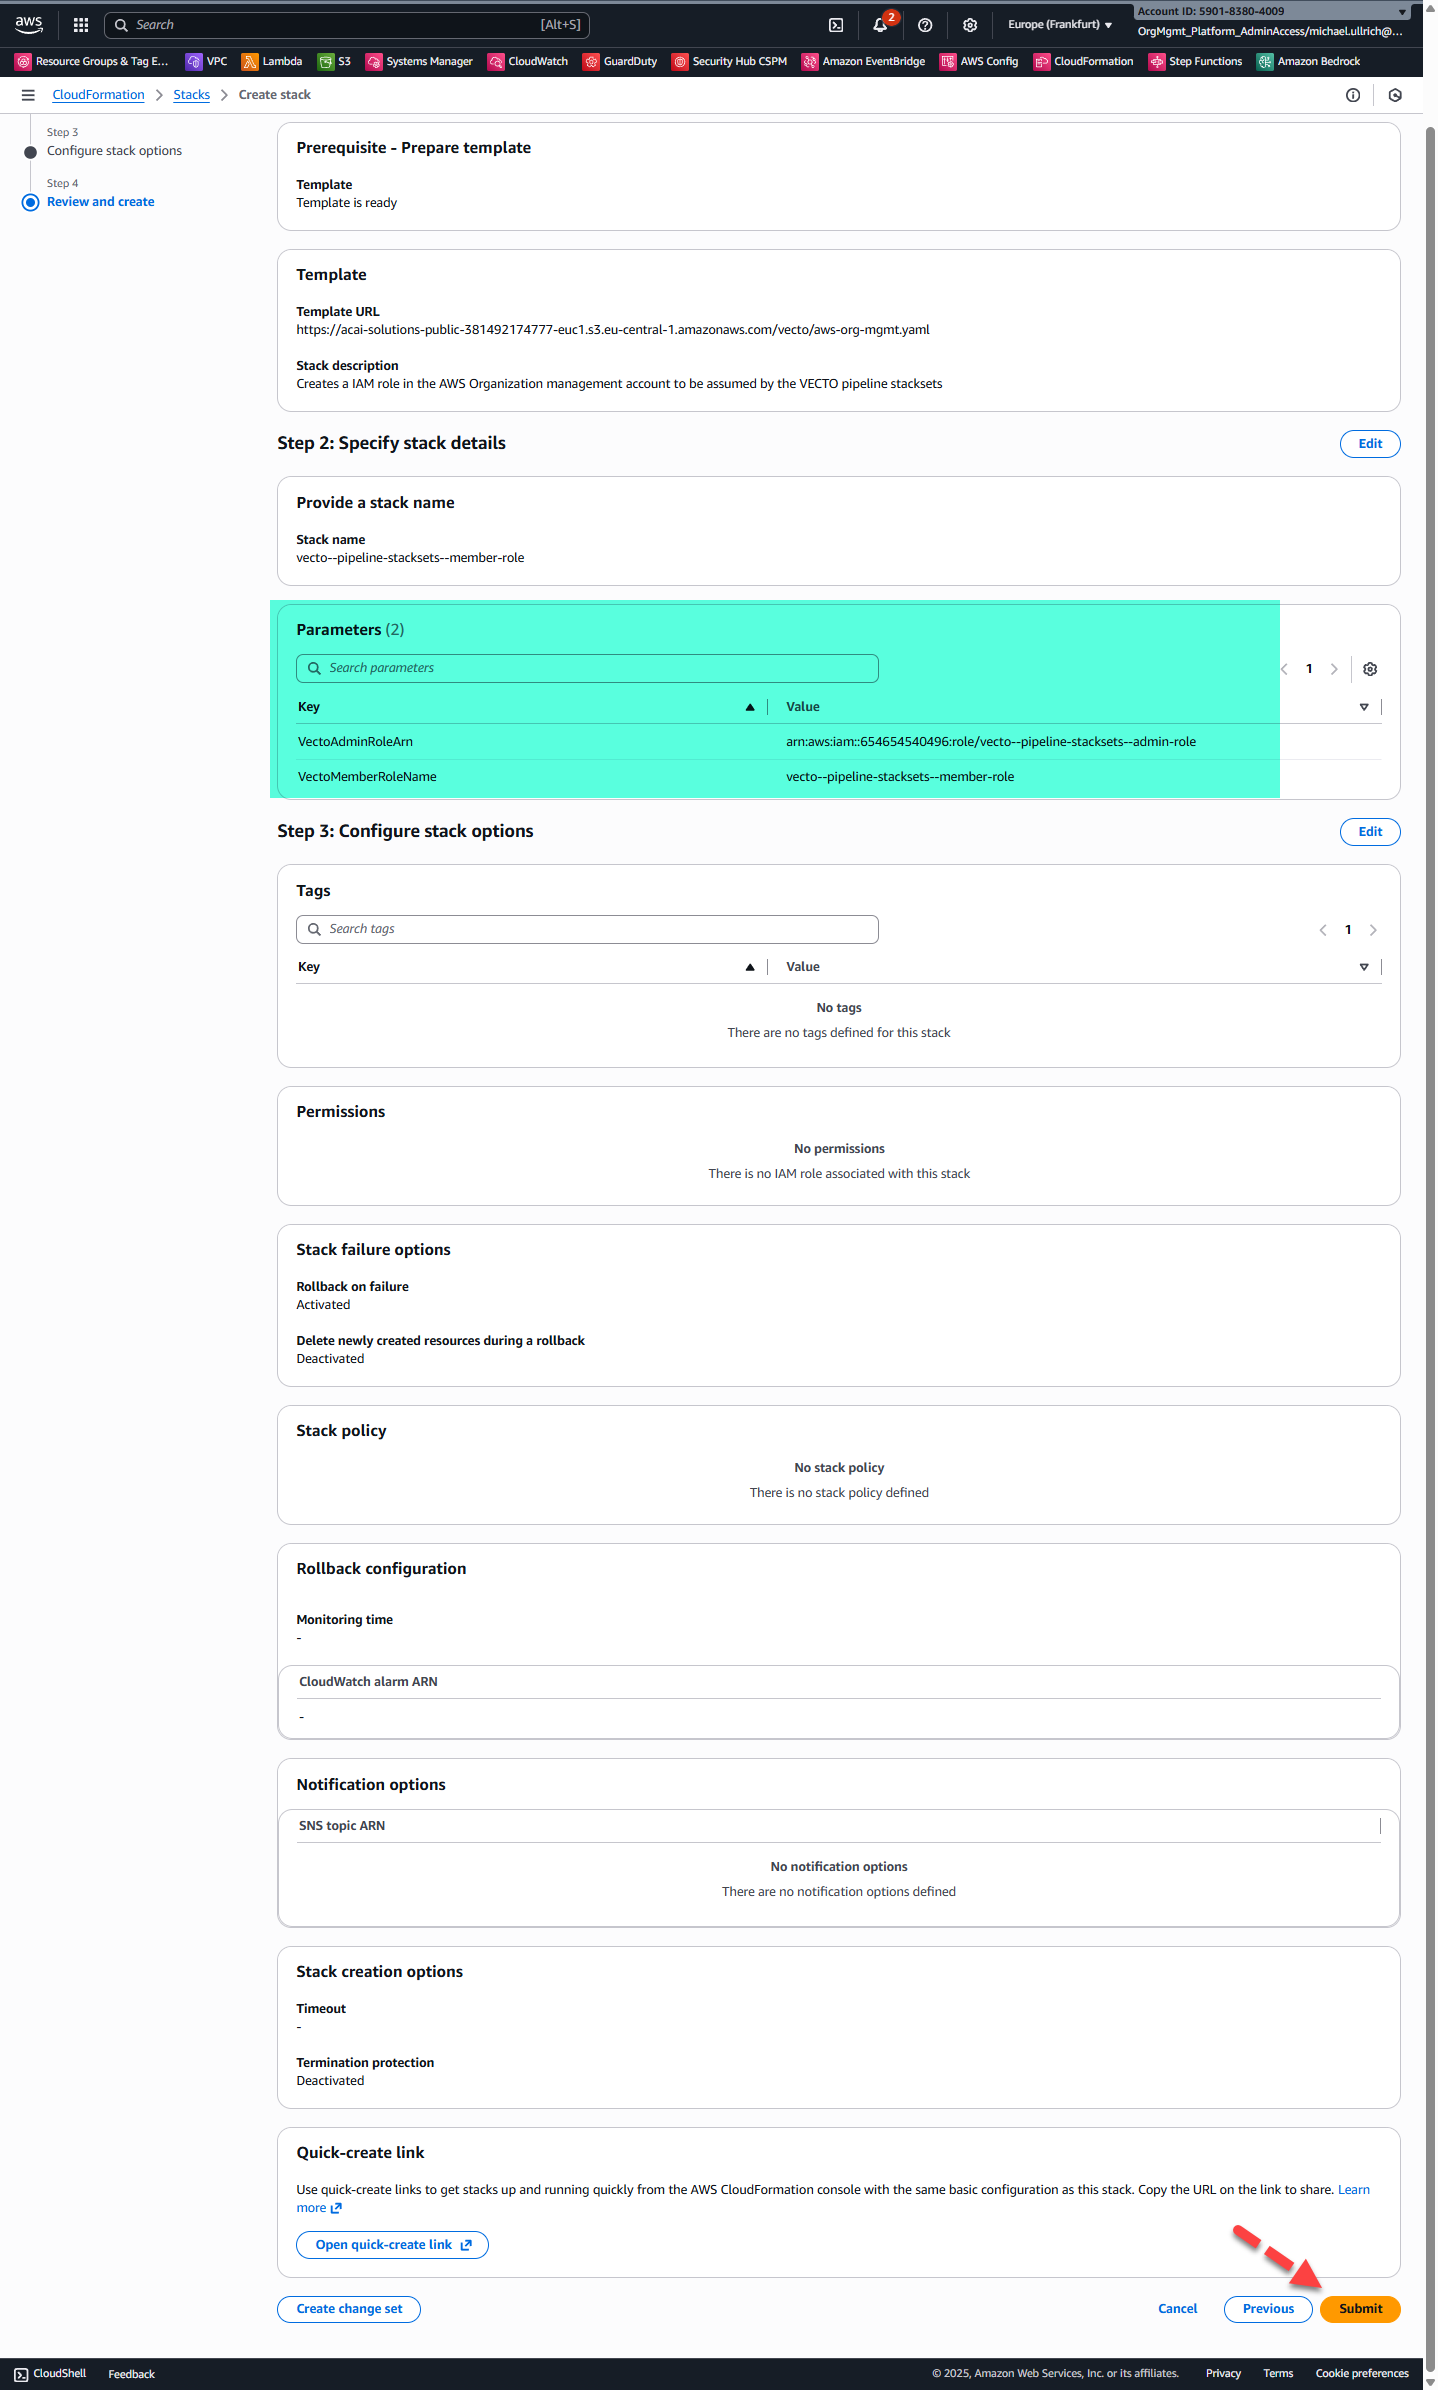
Step 3 – Specify Stack Details
- Specify a stack name: e.g.,
vecto--pipeline-stacksets--member-role - For the StackSet parameters, provide the following values from the apply-stage of the VECTO SETUP Pipeline run:


Step 4 – Configure Stack Options
Step 5 – Review and Submit
Step 6 – View Stack Outputs
After the CloudFormation stack deployment completes, navigate to the Resource tab to view the created resource.
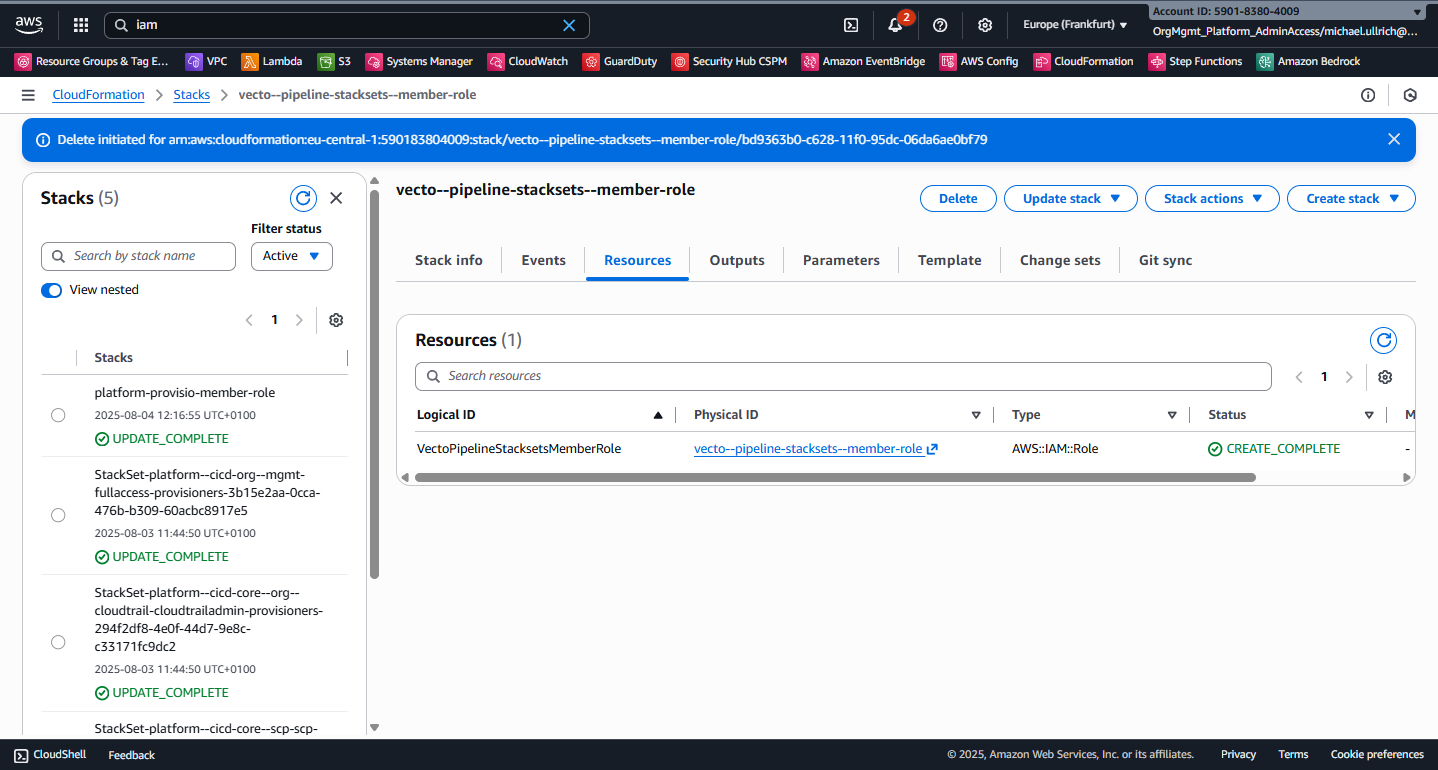
Now VECTO is able to provision VECTO Pipeline Target Principals in the AWS Organization Management account.
Cleanup VECTO Preparation Stage
With the OIDC connection established between Azure DevOps and the Core IaC CI/CD AWS account, the AWS IAM User can now be disabled (see section Setup Preparation - AWS Side).
Step 1 – Update VECTO Setup CloudFormation Stack
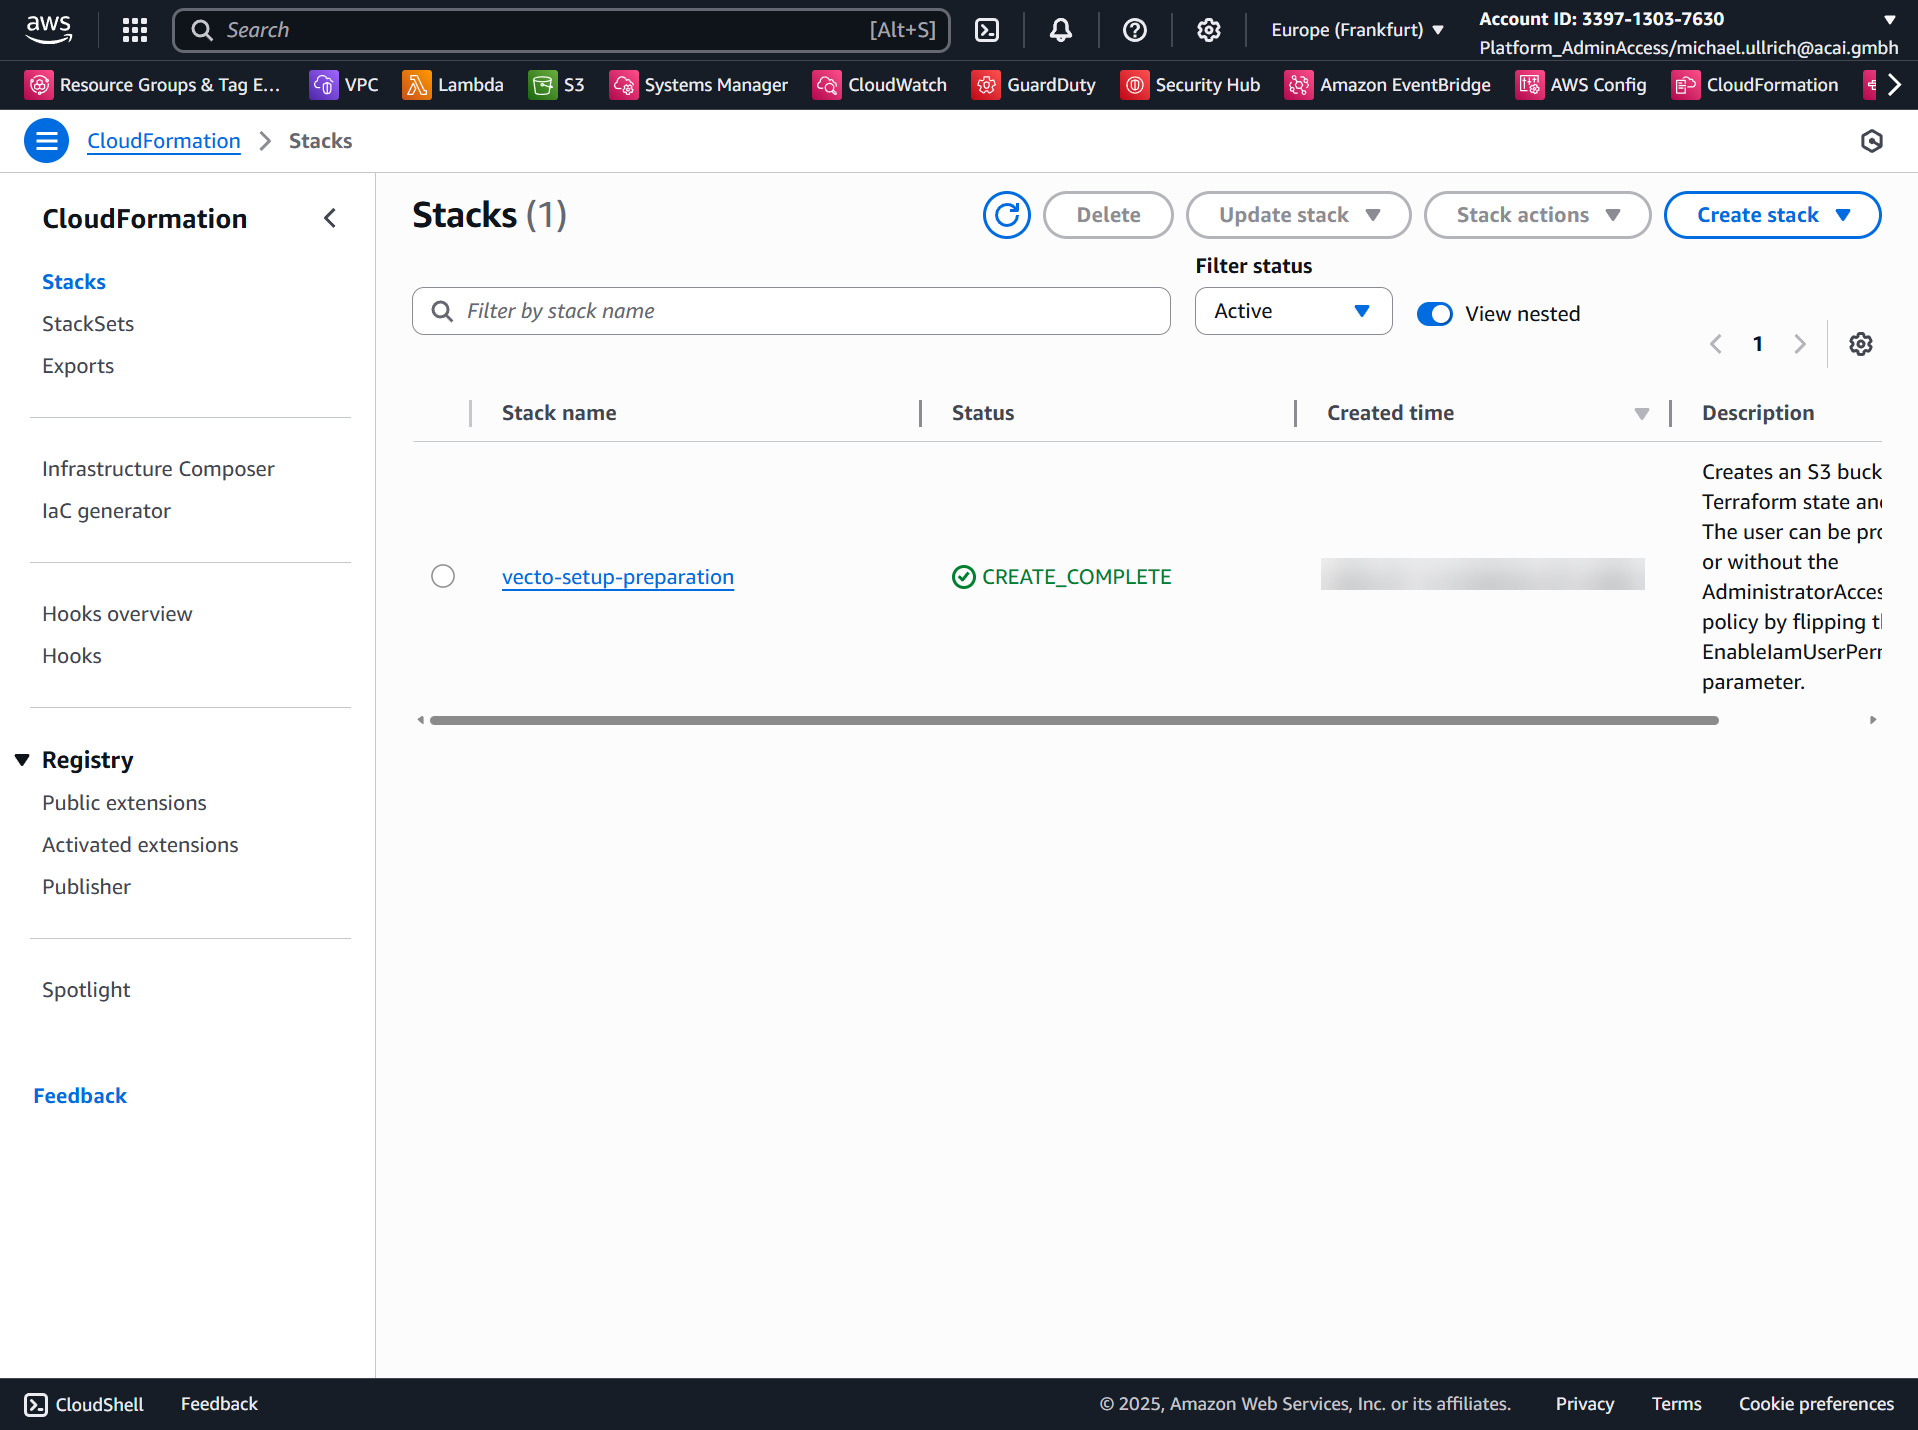
- Login to the Core IaC CI/CD AWS account and navigate to CloudFormation.
- Select the stack vecto-setup-preparation:
Step 2 – Update stack
Click: Update Stack → Make a direct update.

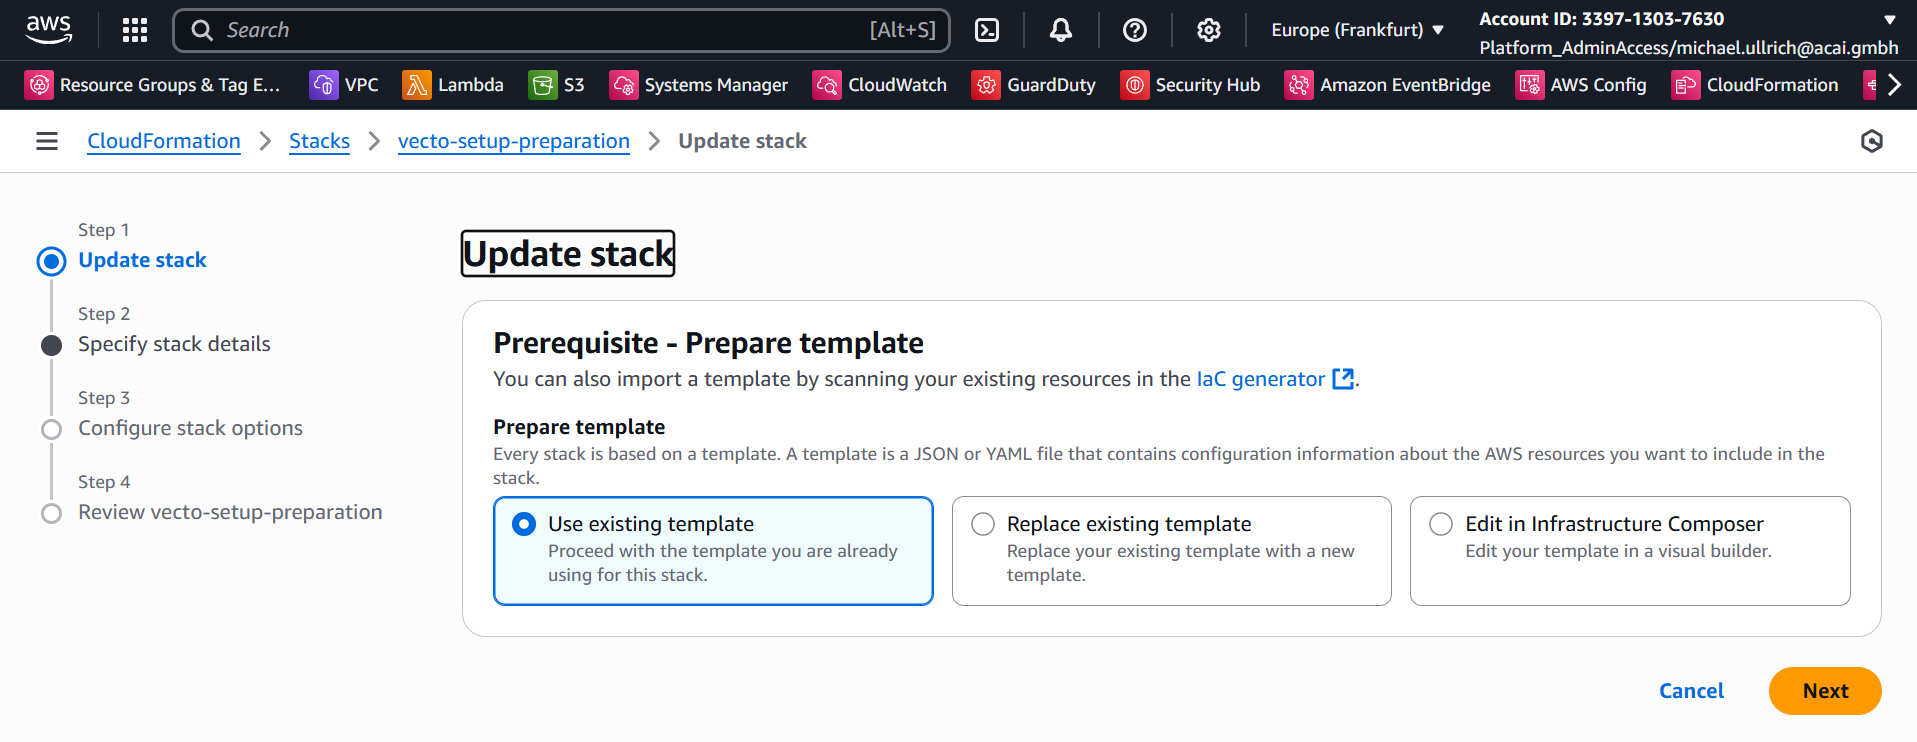
Step 3 – Specify the update
Keep Use existing template and click Next:
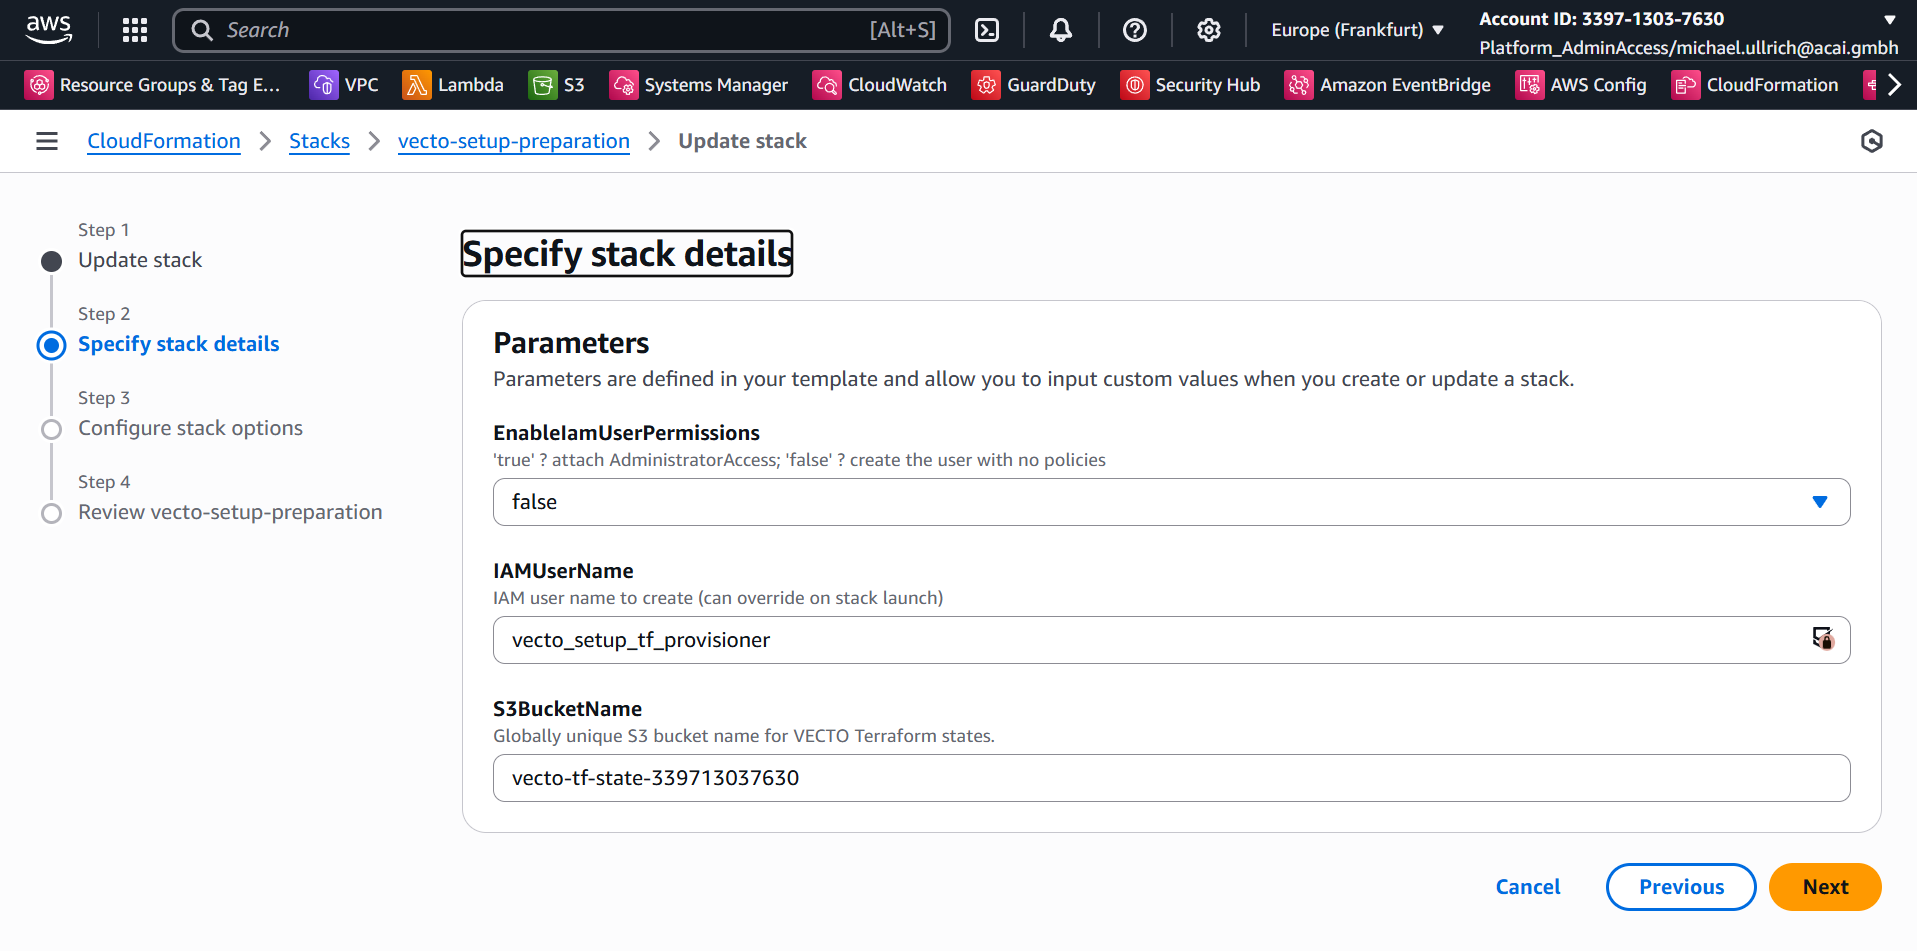
Step 4 – Specify Change Set Details
Change EnableIamUserPermissions to false and click Next:
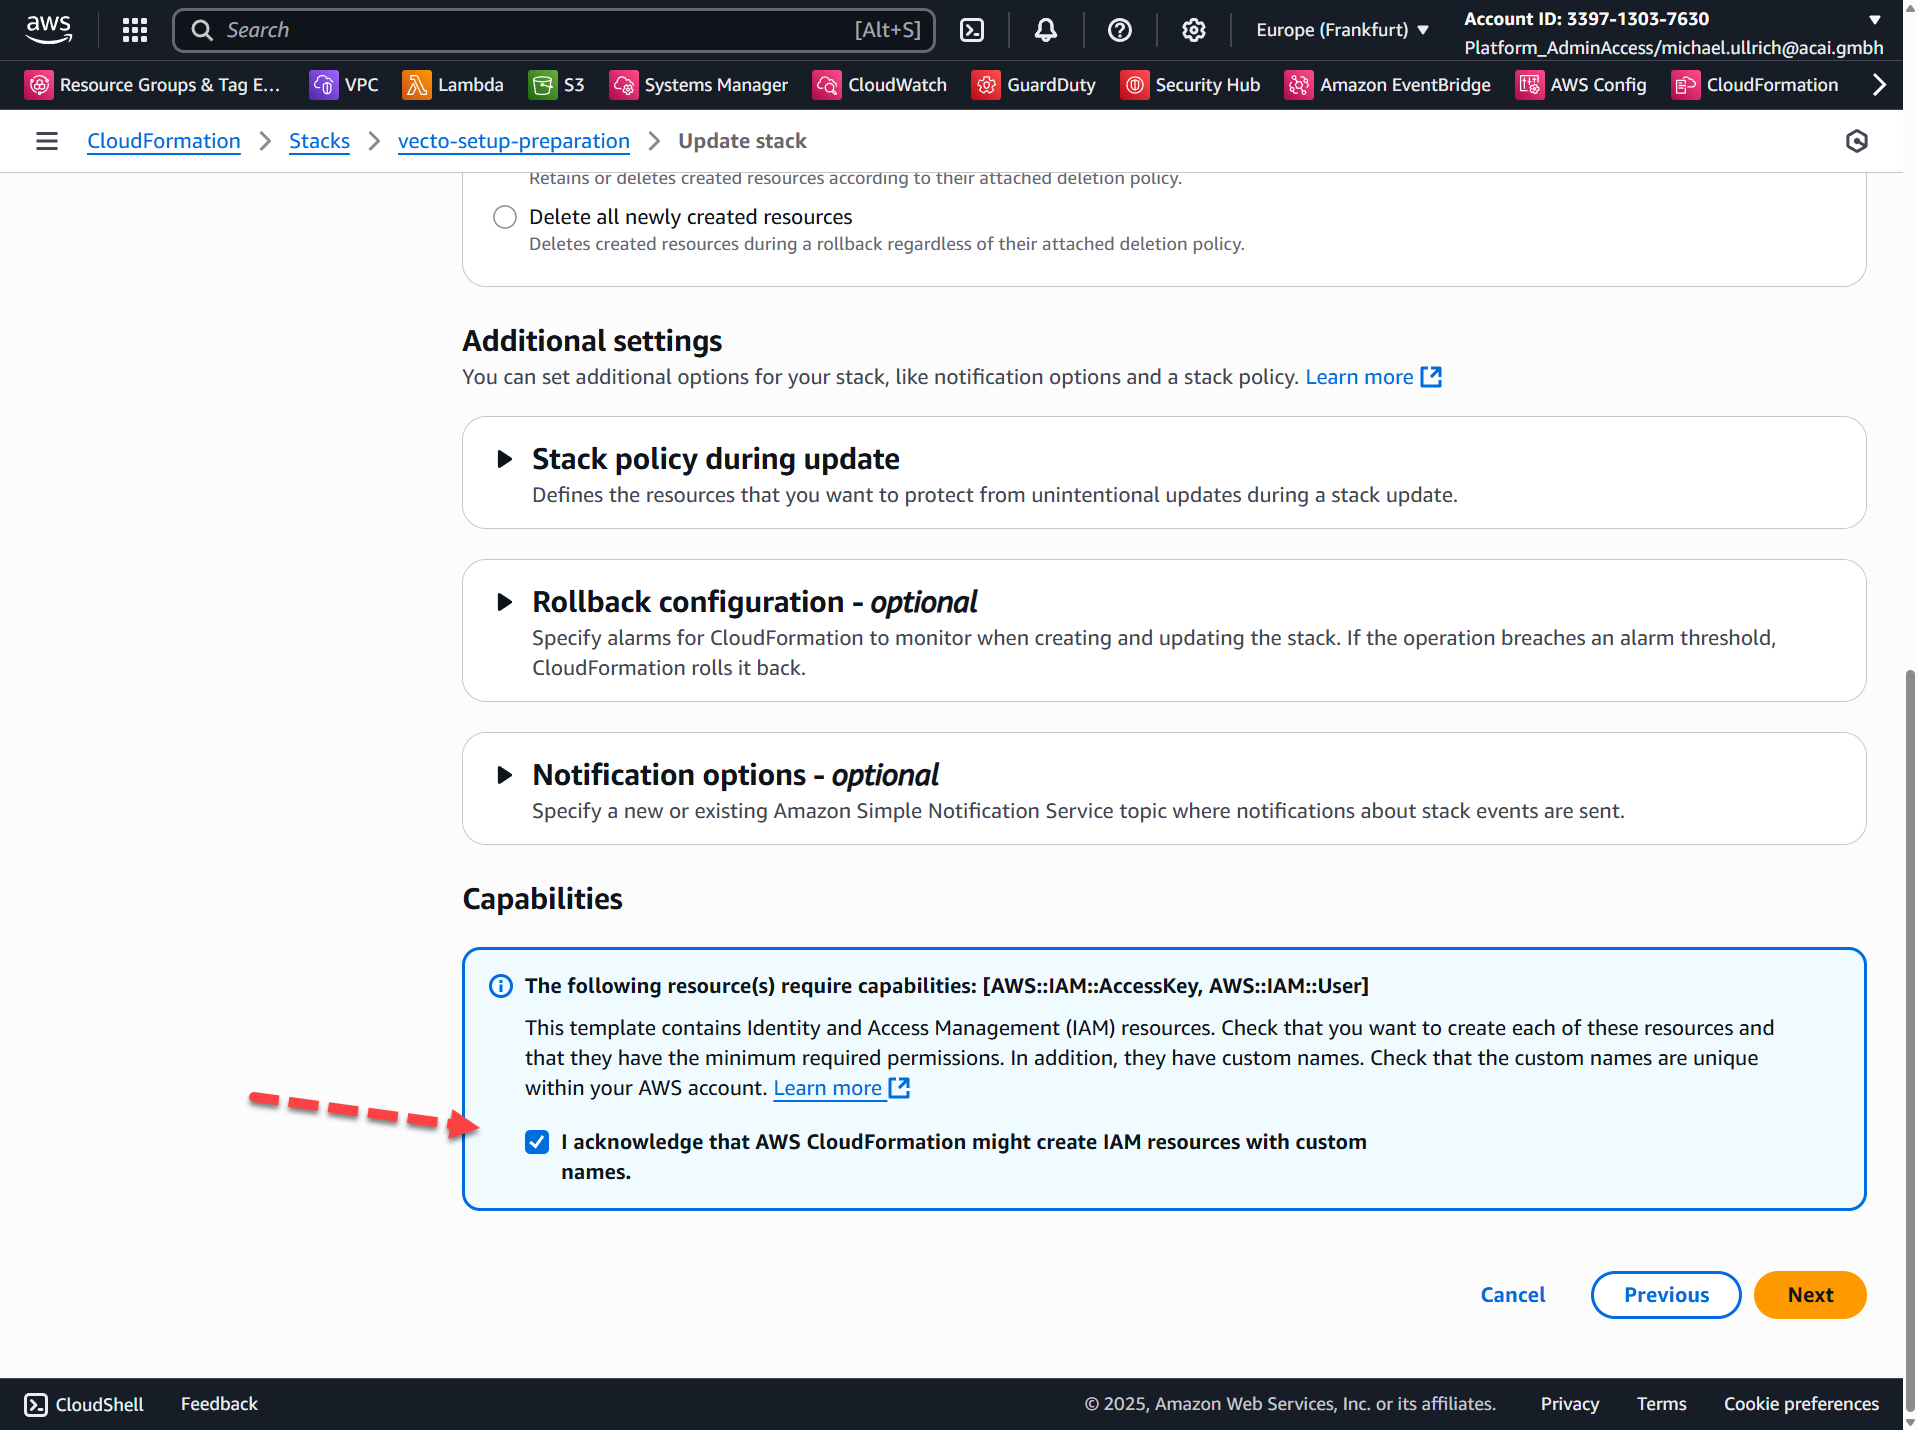
Step 5 – Configure Change Set Options
Check the checkbox and click Next:
Step 6 – Review Change Set
Click: Submit
IAM User has no permissions anymore